Add content — Ultra
Add content with the Content Editor – Ultra
The editor appears in most places where you can add text. You can use the editor to add and format text, embed images, attach files, and insert equations, links, and tables. Among many other options in the editor, you can add bulleted and numbered lists and bold and italicized text. Use the Text style menu to add headings. You can also launch the math editor to embed mathematical formulas in your text.
When you submit your work, you can browse for files in cloud storage or on your computer. You can include documents, video, audio, and images. Specifically, the file types supported include DOC, DOCX, HTM, HTML, MP3, MPG, PDF, PPT, PPTX, XLS, XLSX, RTF, TXT, ZIP, and most image types.
In certain areas of an Ultra course, you have the option to upload files in the editor. For instance, while participating in a discussion, you can attach a document to support your statements. To upload a file, click on the Attachment icon, which is shaped like a paperclip, and browse for a file from your computer. You can also add files from cloud storage by selecting the plus icon.
Moreover, you can easily drag and drop a file from your computer into the editor. To do so, simply select and hold the mouse button over the file you wish to move, move the file with the mouse or touchpad into the editor, and release the mouse button. Once uploaded, you can modify the file’s settings, including the display name, alternative text, and display behavior.
Within an Ultra course, there are certain sections where you have the ability to incorporate images alongside text content using the editor functions. It is possible to add images from online sources, cloud storage, or even your local drive. However, it is important to note that images cannot be added within the editor for calendar items.
Add images from your local drive. Simply drag the image from your computer and drop it into the editor:
- Select and hold the mouse button over the file you wish to move.
- Move the file with the mouse or touchpad into the editor.
- Release the mouse button, and the file will have been moved.
Add images from the web.
To insert an image, click on the plus sign icon and choose Insert Content. Then, provide the image URL that is hosted online using the “http://” protocol. Don’t forget to add a description of the image in the Alternative text box to ensure that users who can’t view the image or use screen readers can still understand it.
It is not possible to resize media on mobile devices.
However, there is a simple solution. You can resize images and other media types in the editor. You can even resize videos and media inserted via URL.
To resize an image, hover over it and click on it to select it. You will see four corner handles in the image. Click and hold one of the handles, then drag it to increase or decrease the image size. Once you are satisfied with the size, release the mouse button and click Save.
In the editor, you have the option to insert YouTube videos directly without leaving your course. You can choose to display the video as a link or embed it alongside other content. The preview icon is available in the top right corner to play the video in another window while in edit mode, allowing you to preview before saving.
The editor allows you to embed media directly by using the “Insert Media” option. This makes it easier for your course members to view the content alongside other course materials, without having to navigate away from the site.
To add media, simply paste the source URL in the editor, provide alternative text for screen readers or users with limited access, and select “Insert”. The editor will automatically embed the item for you.
You can insert math equations and formulas into tests, assignments, discussions, and journals by using the math editor. You can also type LaTeX formulas into any rich text editor where the math editor is an option. The math editor runs on any browser and operating system, including smartphones and tablets. The math editor is written by WIRIS and based on standards set by markup languages like MathML.
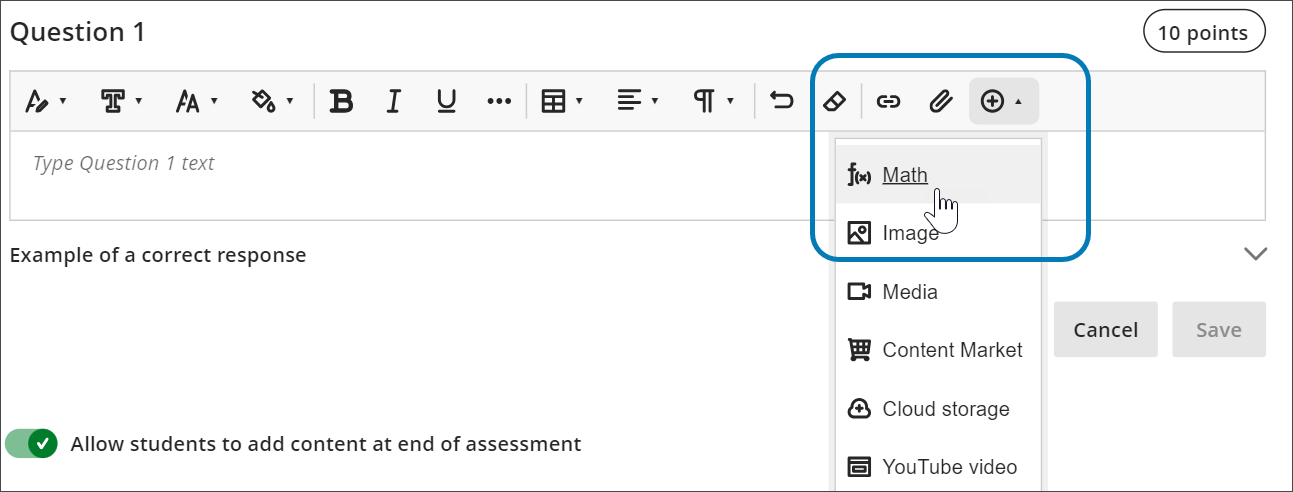
Access the math editor by selecting the + icon in the rich text editor. Select Math in the menu.
You can access many features in the math editor by selecting different tabs at the top.
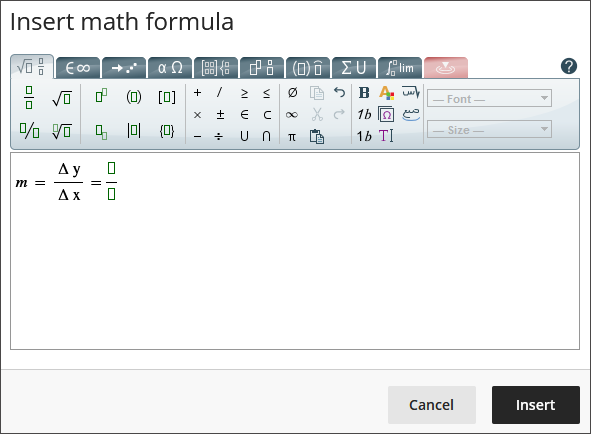
Use your keyboard to enter numbers, letters, and symbols. Select the appropriate icon in the math editor to create complex formulas, such as creating a square root.
TIP: If you are using an option that changes the level of the text for your formula, such as a subscript or a fraction, use the arrow keys on your keyboard to return to the default level. We recommend using the keyboard to navigate within a formula.