Bookshelf via Blackboard Learn
View your eTextbook(s) through your Blackboard Learn course
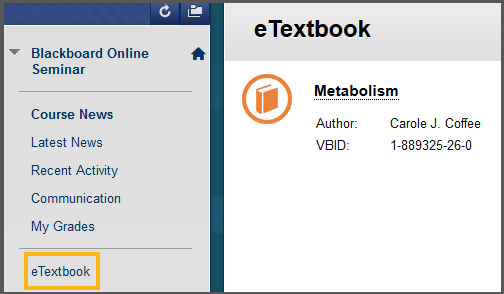
- Visit your Blackboard Learn course.
- Click the eTextbook menu item to see you ebook.
Acknowledgment message:
When you try to open an eTextbook, you will be redirected to page with an acknowledgement message. This page informs you about the fee that will be charged if the eTextbook is launched.
So, in case you have a hard copy of your book and don’t wish to use an eTextbook do not click the Launch button, because you will be charged with the price of the e-Textbook.
The message:
“All students are charged for the ebook via the revised learning resources fee. There are NO refunds.”
To access the e-Textbook, click the Launch button.
Now, you will be redirected to another page asking for your user account. Log in using your current credentials or follow the instructions to create a new Bookshelf user account. Remember to use your @acg.edu email as a username.
ATTENTION: If you are registered in a course that uses an e-textbook, please be informed that after the 50% Withdrawal period the initial access to your course’s e-book has expired. In order to receive the full license for access to your course’s e-textbook, you need to visit the e-textbook menu item and click to open and reactive your e-textbook .
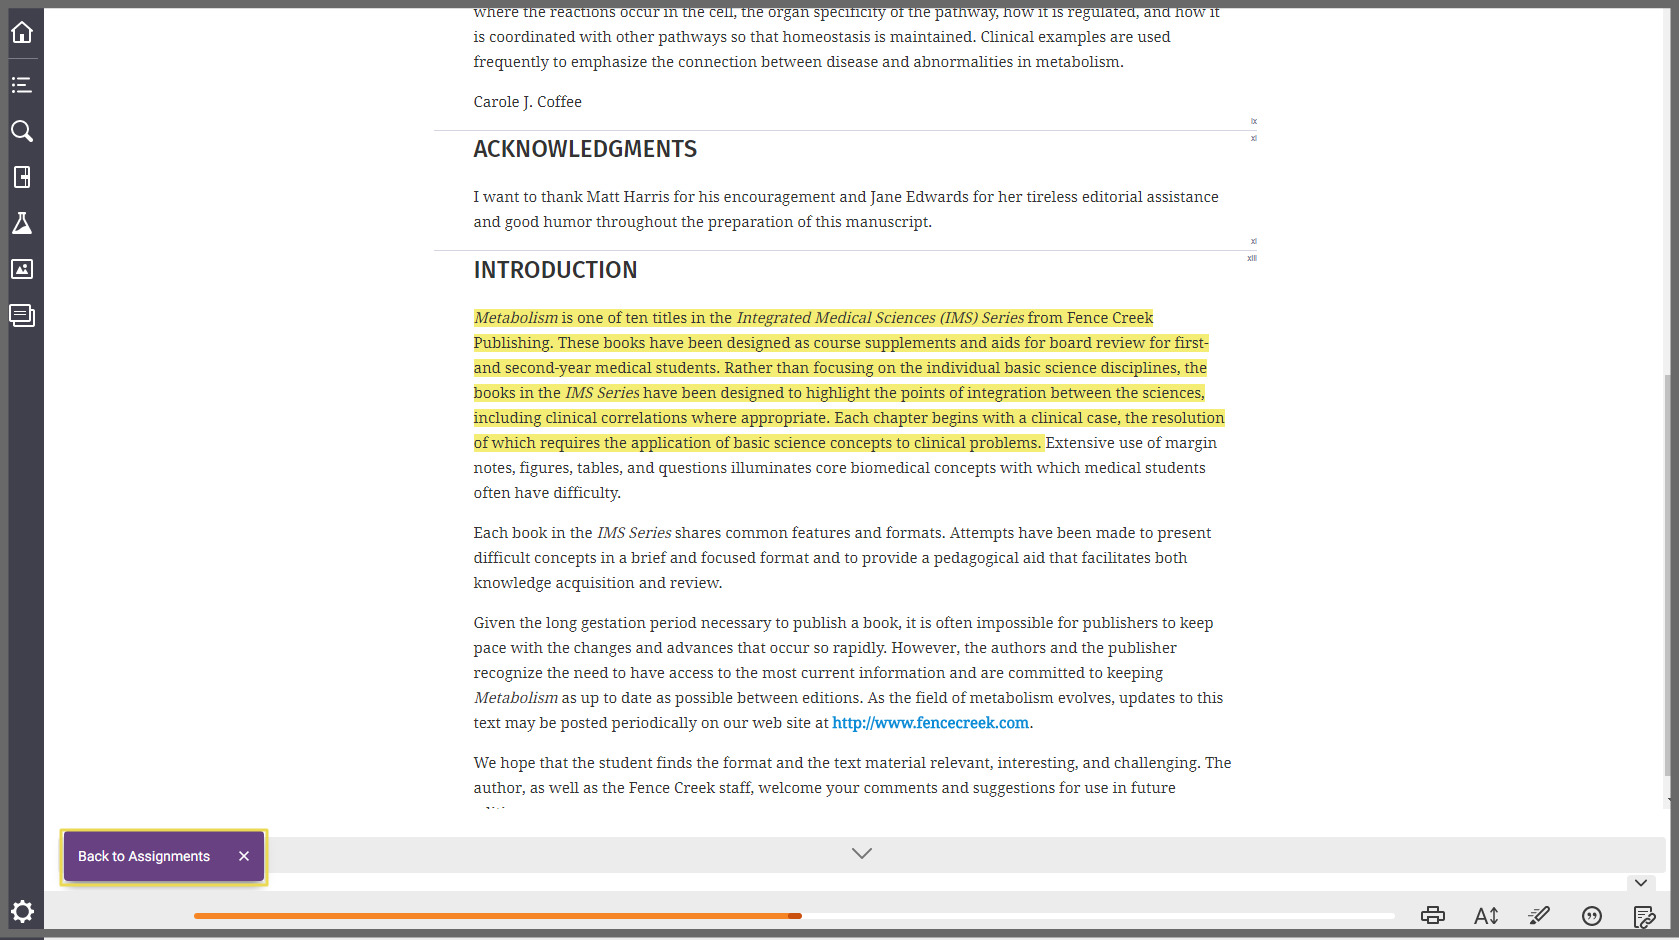
Once you are inside your eTextbook you will see the following environment:
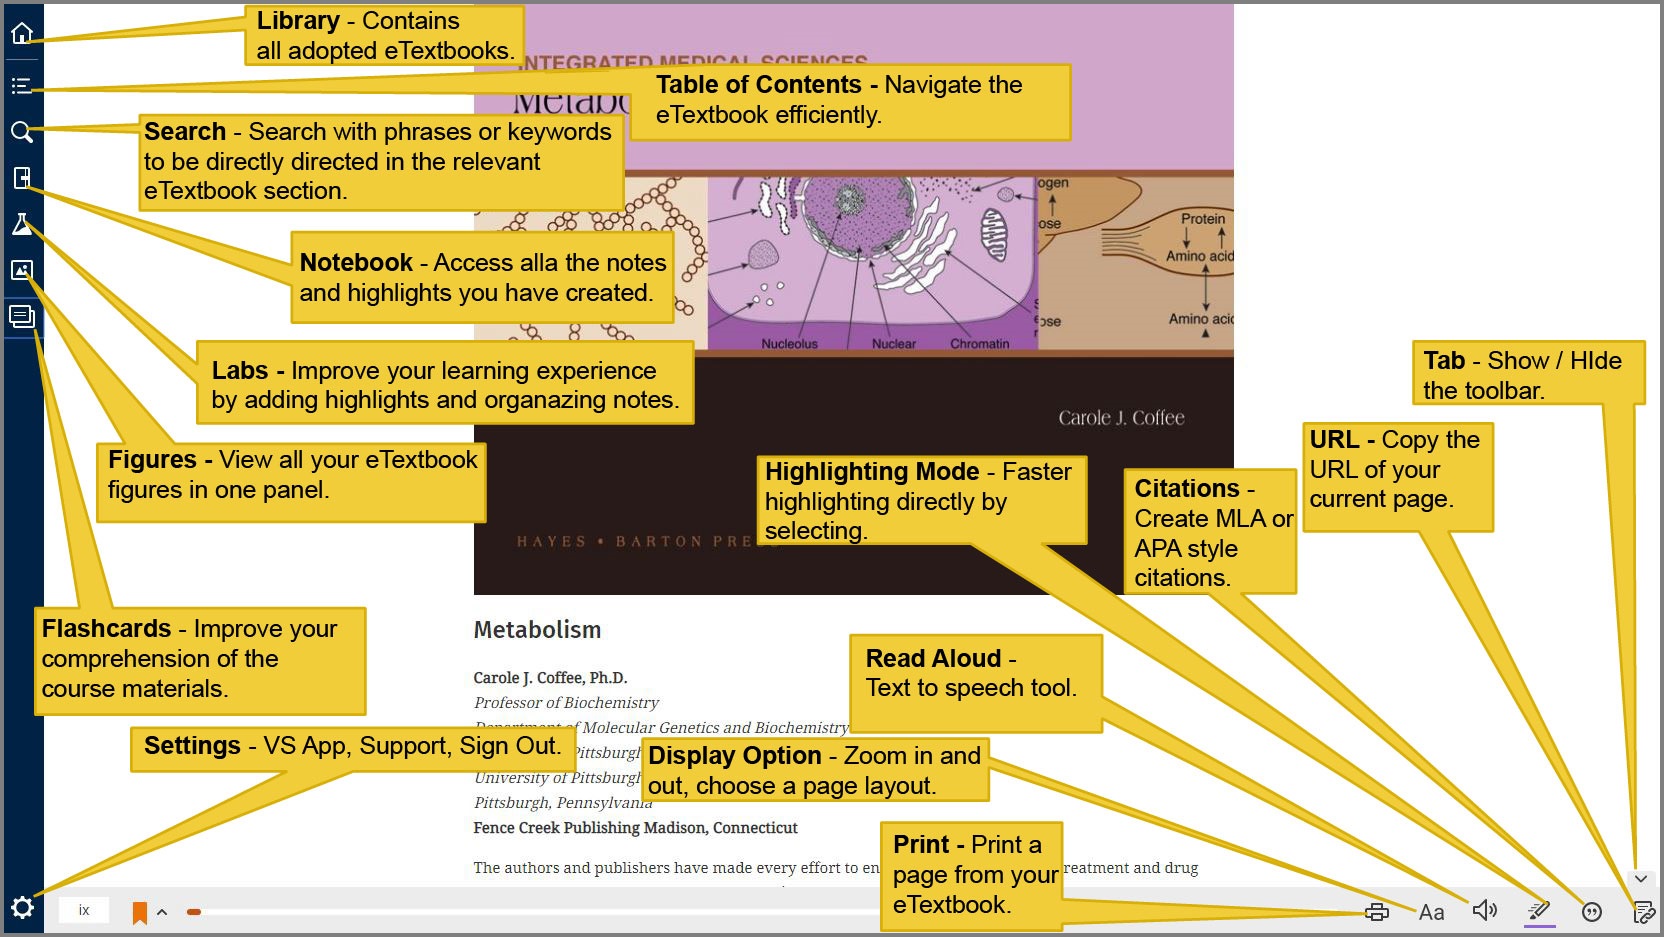
If you click the Library button ![]() in your eTextbook page, you will open the Library page of Bookshelf and from there, you are able to manage your sharing settings and Highlighters and view/edit your VS user account.
in your eTextbook page, you will open the Library page of Bookshelf and from there, you are able to manage your sharing settings and Highlighters and view/edit your VS user account.

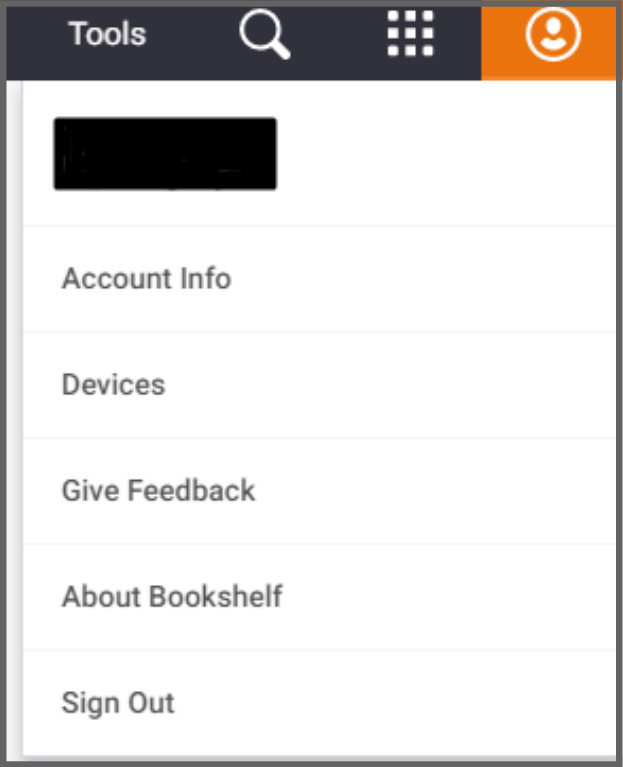
- Click the admin button in order to access your Account Info, Devices or Resources (not included in all textbooks) that are included with your eTextbook through the VitalSource Account Center.
Press Sign Out to log off from your from your VS user account.
How to see Instructor’s highlighters
- In order to see your instructor’s highlighters, you have to subscribe to him/her.
- Click the Library button at the top-left of your screen and then select Tools on your top right.

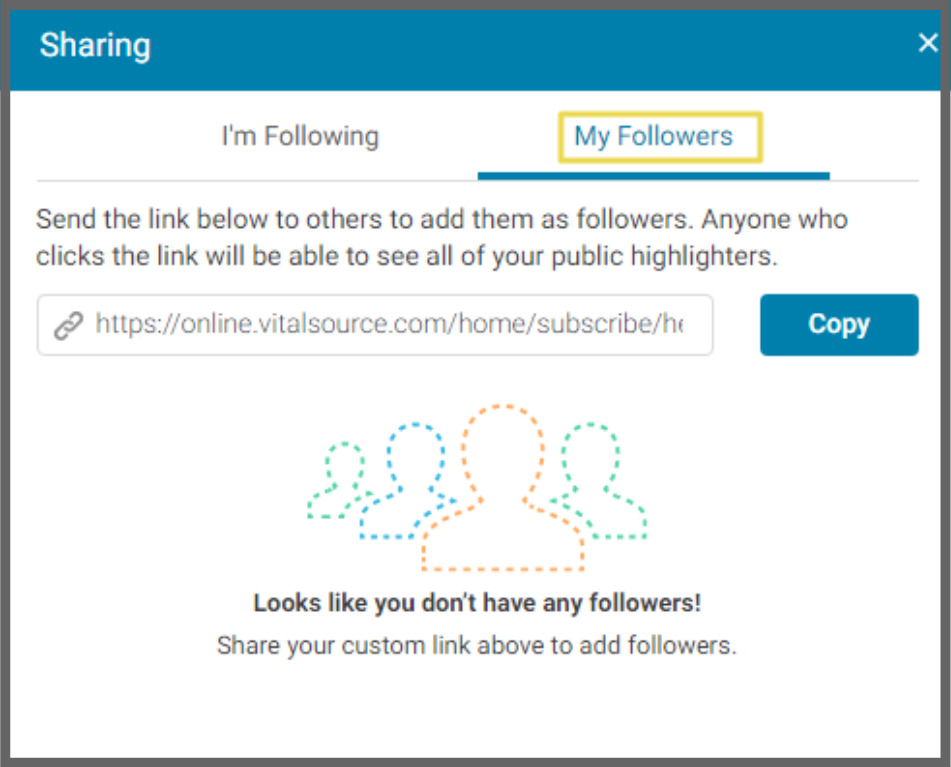
- Click the Sharing button, in order for the pop-up window to open.
- Once inside the window, select the I’m following tab or select the My Followers tab.
- If you select the I’m Following tab, then you will be needed to enter the email of the instructor in order to see their shared highlighters.
- Then click Add.

- If you select the My Followers tab, then a link will be there for you to send to others to add them as followers and anyone who clicks the link will be able to see all of your public highlighters
- Repeat this process to include as many students or instructors as you want.
Make highlighted text available to other students
- Visit your Blackboard Learn course.
- Click on the eTextbook you want to access.
- Once you are inside the eTextbook, click the Library button at the top-left of the screen.

- Select Tools at the top-right.
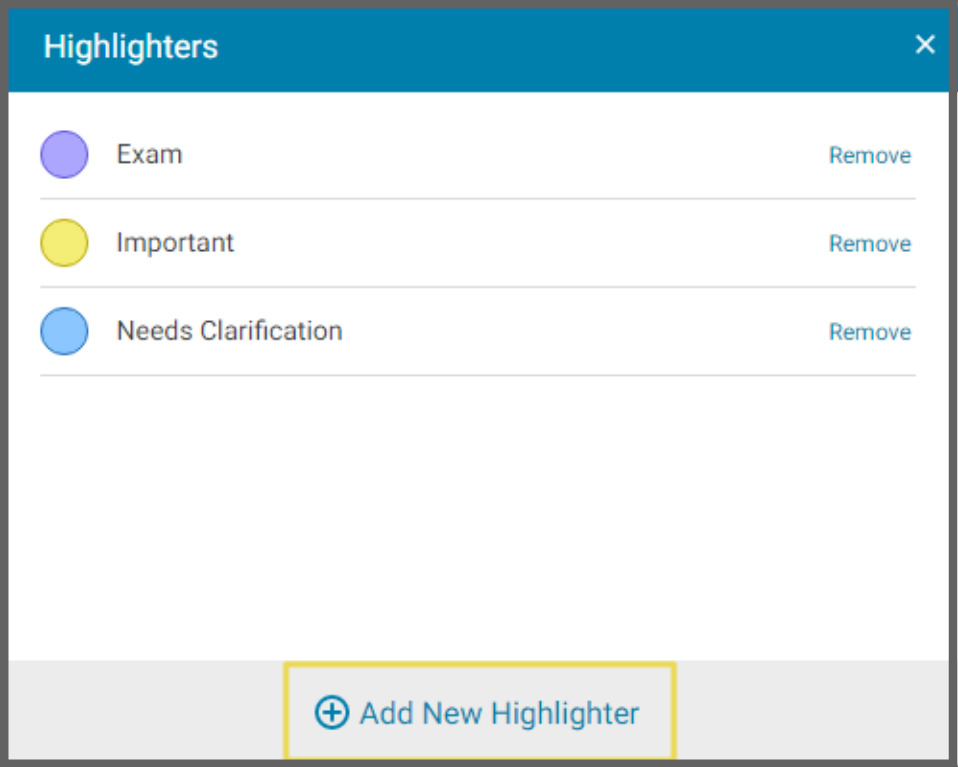
- Click on Highlighters.
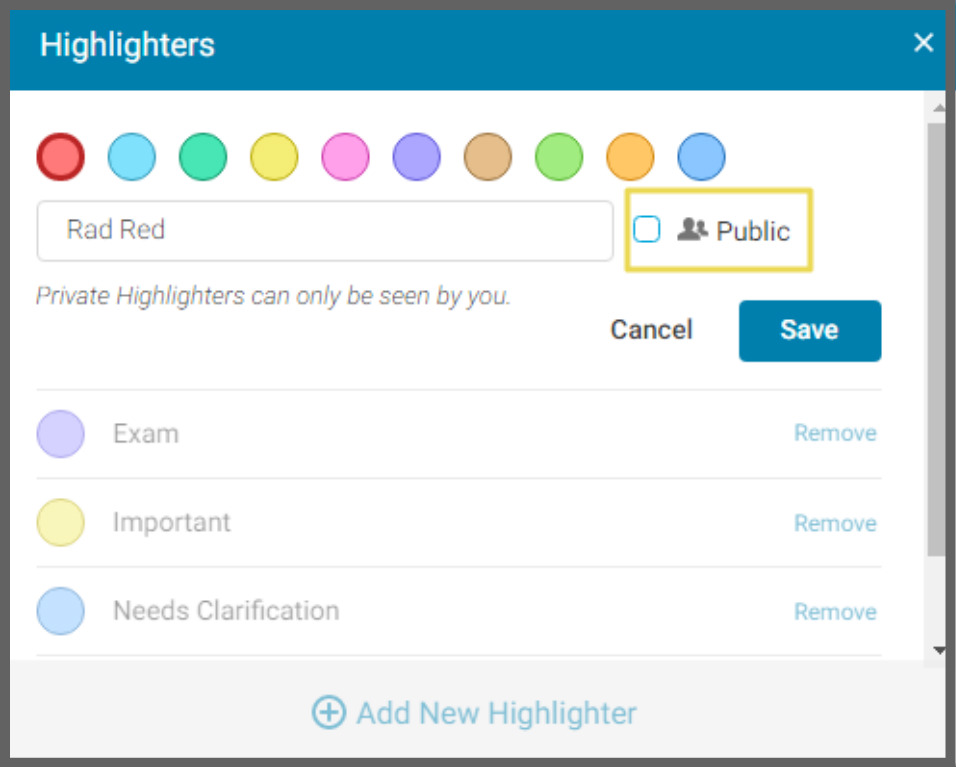
- There are three highlighters by default. You can create another one if you wish by pressing the Add Highlighter button and entering the appropriate information and choose it’s color.
- To make your highlighted text available to students, you have to select each highlighter and then change the privacy option to Public. You have to click Save in each and every highlighter for your changes to take effect.
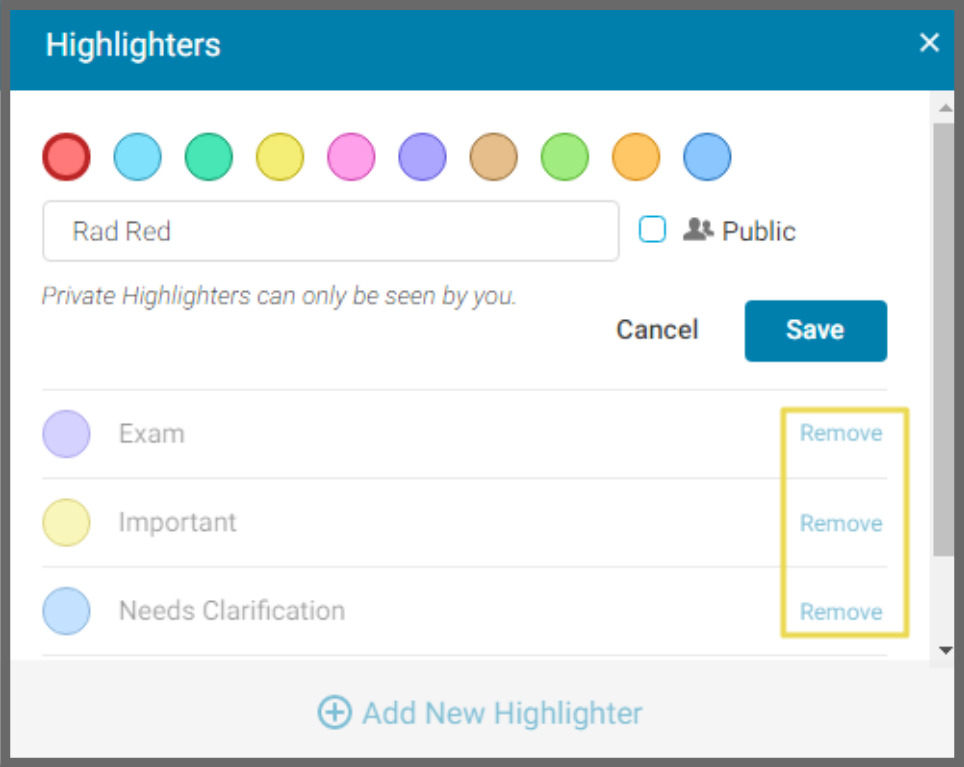
- To Delete a highlighter click on Remove.
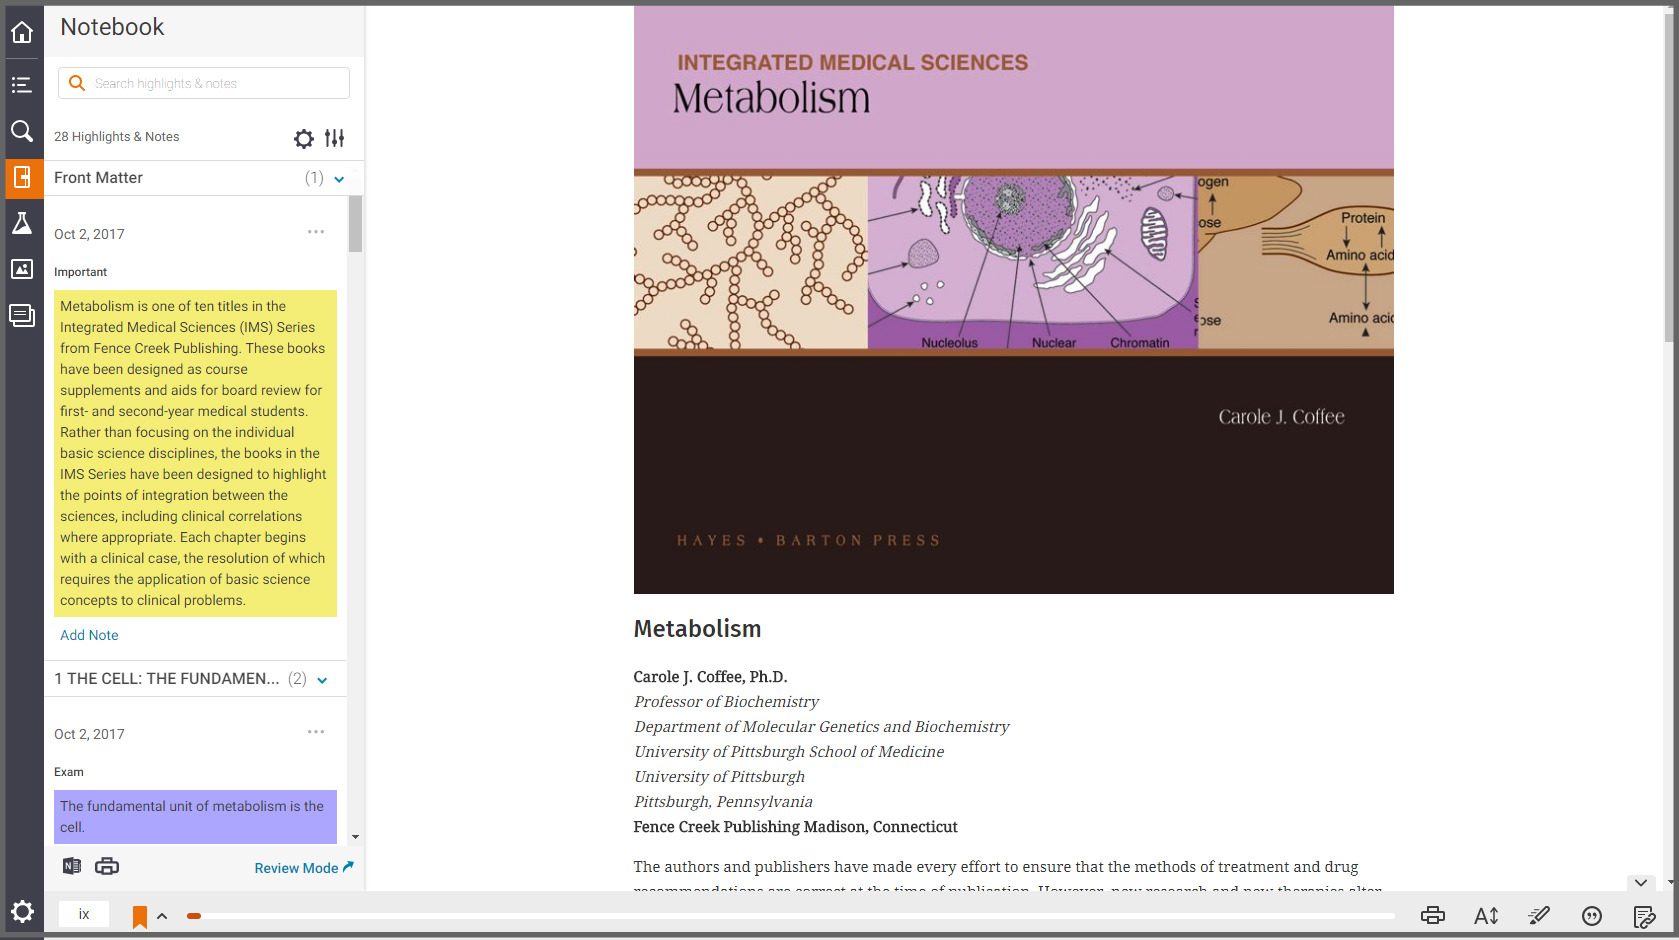
Notebook
You can use the notebook tool to search for highlighters or notes inside the e-textbook.
![]()
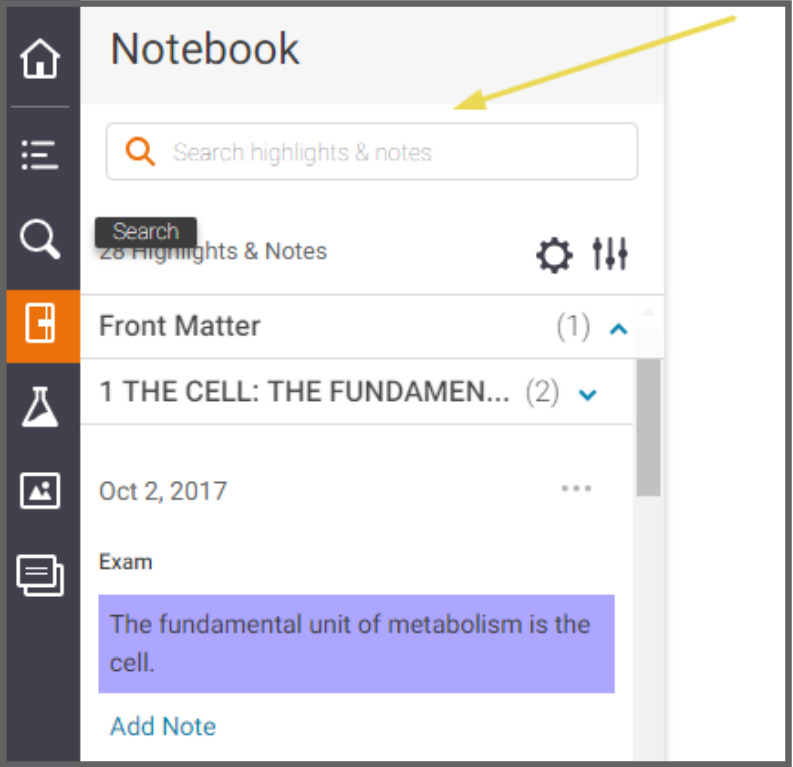
- The Search field offers you the option to search for specific highlights or notes.
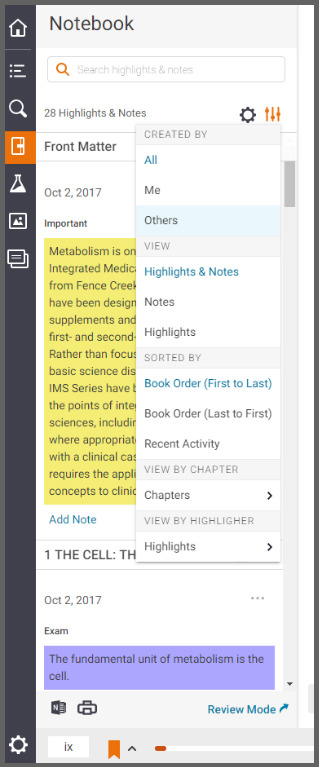
- The notebook provides two drop-down menus for managing your Sharing/Highlighters and the other one is Created By, View, Sorted By,View by Chapter and View by Highlighter .
- On the Created By option, you can select to present highlights depending on the user that created them by selecting one of the three options.
- The View option, allows the user to select which note(s)/highlighter(s) are shown below.
You can select the “Highlights and Notes” option which is selected by default or select the “Highlights” or “Notes” option to present only the highlights or only the notes of the e-textbook. - The Sorted By option, allows the user to reorder the note(s)/highlighter(s). The default option is the “Book Order (First to Last)“, but you can change it to whichever option you like.
- The View by Chapter offers you the option to view your highlights and notes by Chapter.
- The View by Highlighter option, offers you the ability to view the highlights you want.
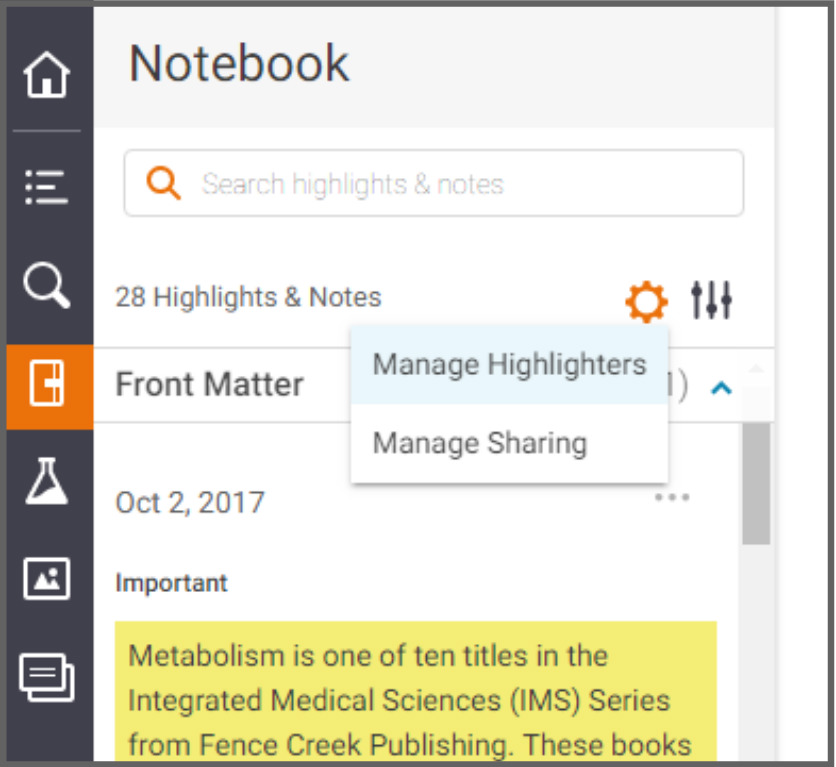
You have the ability to manage your highlighters and your sharing through the Notebook option.
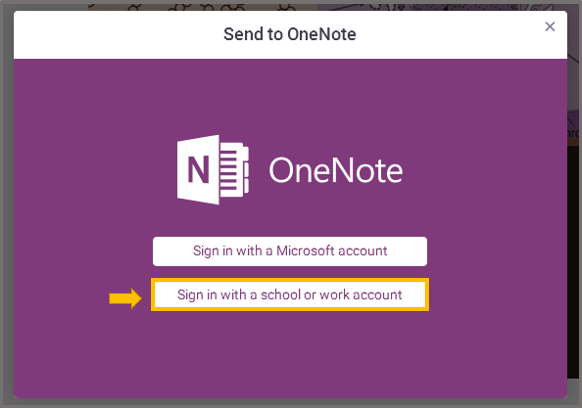
You can also read your notes and highlights by using Microsoft OneNote integration with Bookshelf Online.
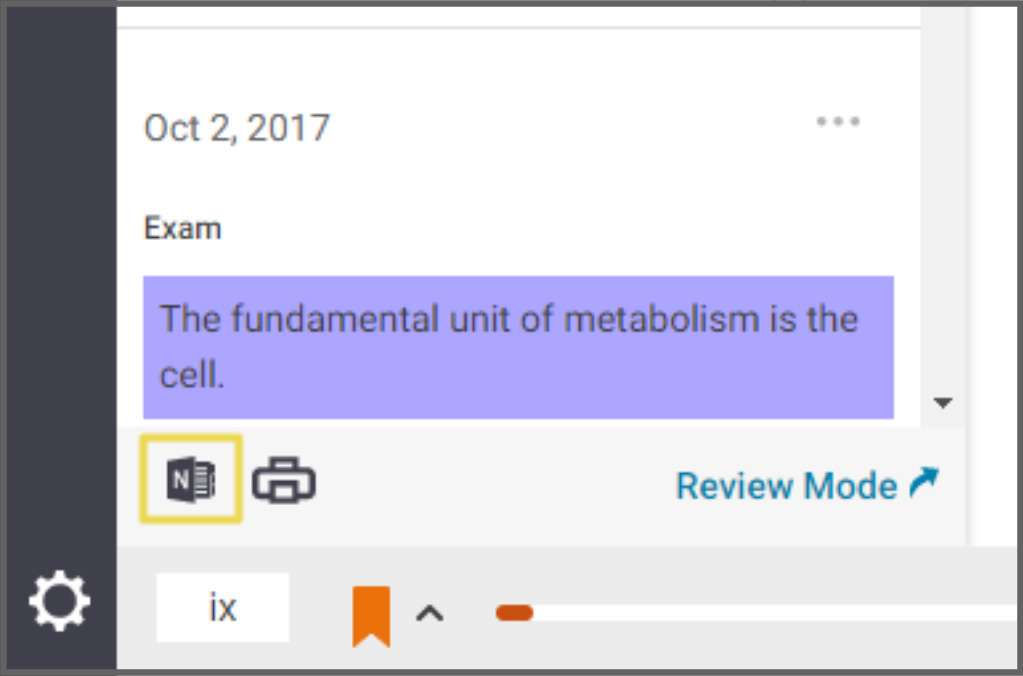
Microsoft OneNote with Bookshelf Online enables students to access notes and highlights within Microsoft OneNote.
You can use this feature to annotate notes created in Bookshelf and class for studying on the go.
First, open an e-textbook that you have notes and highlights added.

Then, click on the Notebook icon to access your highlighted material and notes.
As soon as you access your notebook click on the OneNote icon in the upper right-hand corner.

You can sign in with your college email account to access OneNote.
Then allow OneNote to access your info by clicking “Accept”,
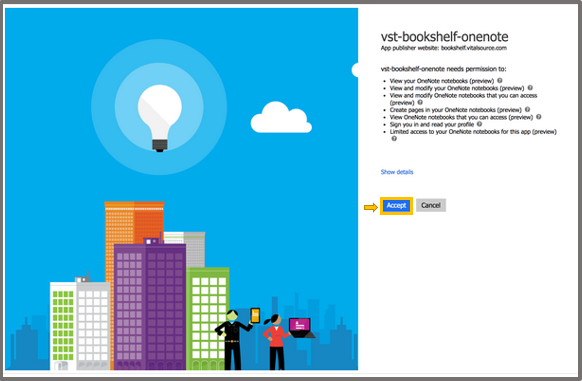
use the check boxes to select the content you wish to send to OneNote and click Preview.

Review Mode
Review Mode is a tool made to permit students a concentrated approach to study about subscribed and individual notes as well as highlights.
- In order to access this tool you will need to select the Notebook button on your bottom left and then on the bottom of the Notebook section you will press the Launch Review Mode button.

- After you press the button, a window will pop up in which you can customize your review.
- On the top left of the window you can see which of the notes or highlights belong to you and which are shared.
- On the top right of the window you have the option to select all of your notes or highlights to review or you can deselect them all and manually enter the ones you would like to review.
- In order to add a highlight you just check the box on the right of the highlight.
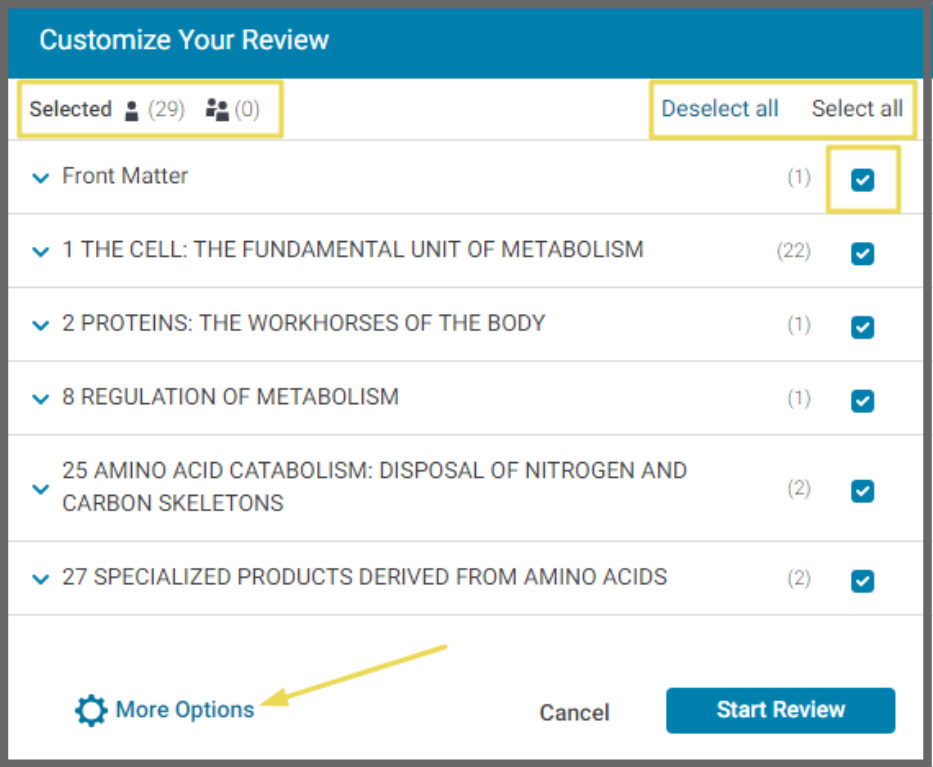
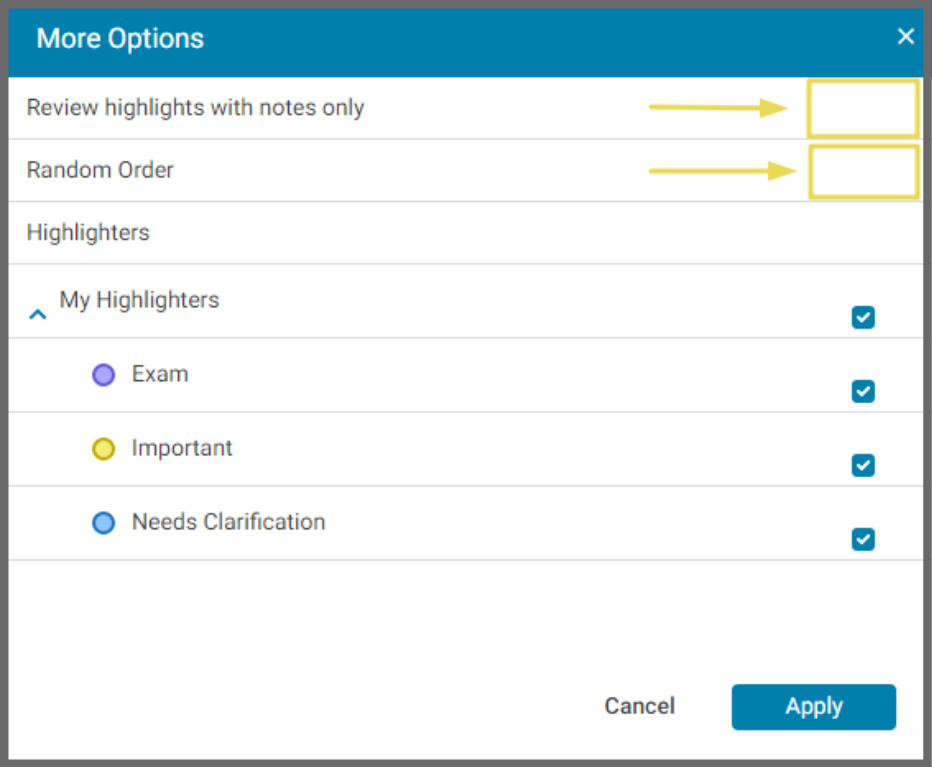
- If you wish to customize your review further you can click on the bottom left of the window the More Options button where you have the ability to choose highlighters you want to include in your review as well as some other features.
- If you want to apply the settings of Review highlights with notes only and Random Order just click on the area as shown below one time and then apply.
- After you have finished with your customization click Start Review.
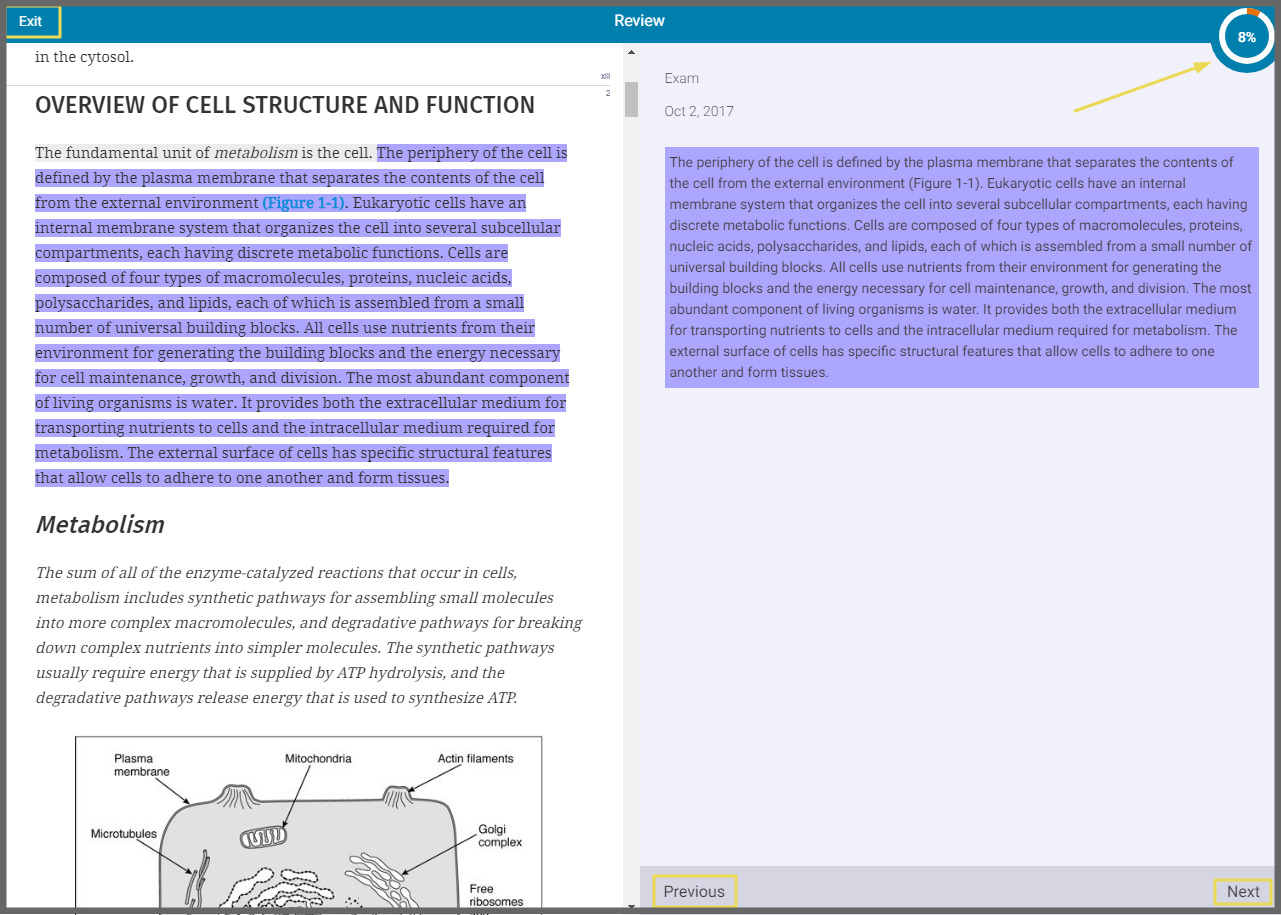
- Inside your customized review you can see on the left the page of the book that the highlight is and on the right your highlight.
- On the top left there is the Exit button. Whenever you would like to exit from your review press that button.
- On your top right is your progress during your review.
- On the bottom right there are the Previous and Next buttons where you can forward or backward the pages.
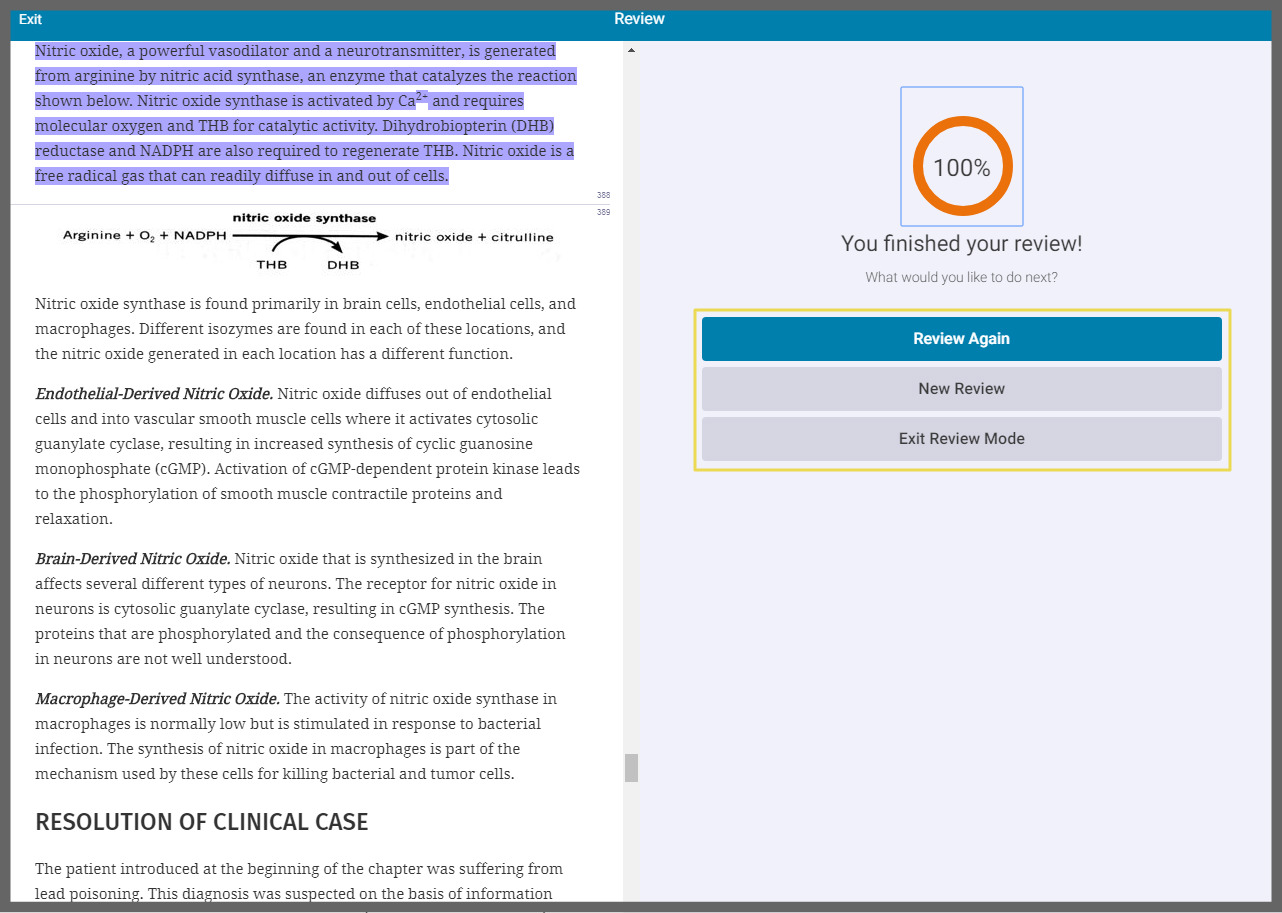
- When you are finished you can review again if you would like to, make a new review or exit the review mode.
Assignment Creator
The Assignment Creator offers you the ability to create an assignment with specific readings from the book you choose.
- In order to create an Assignment click on the Library button

- Click on Tools on the top-right and then select Assignment Creator.
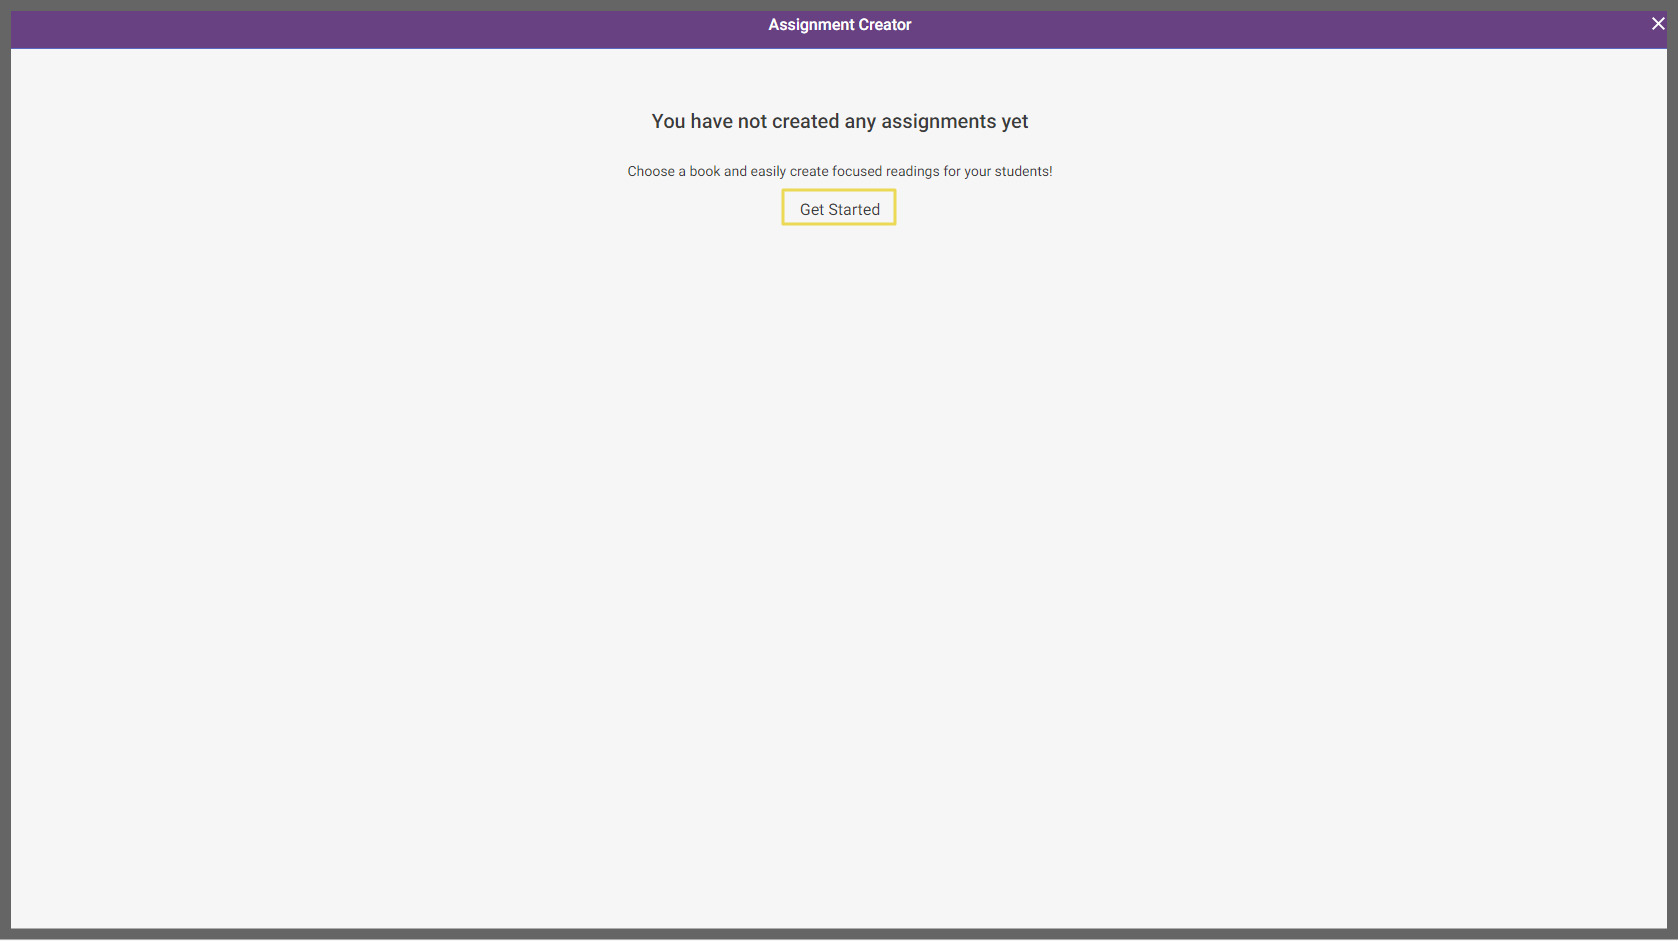
- First thing is to click on Get Started
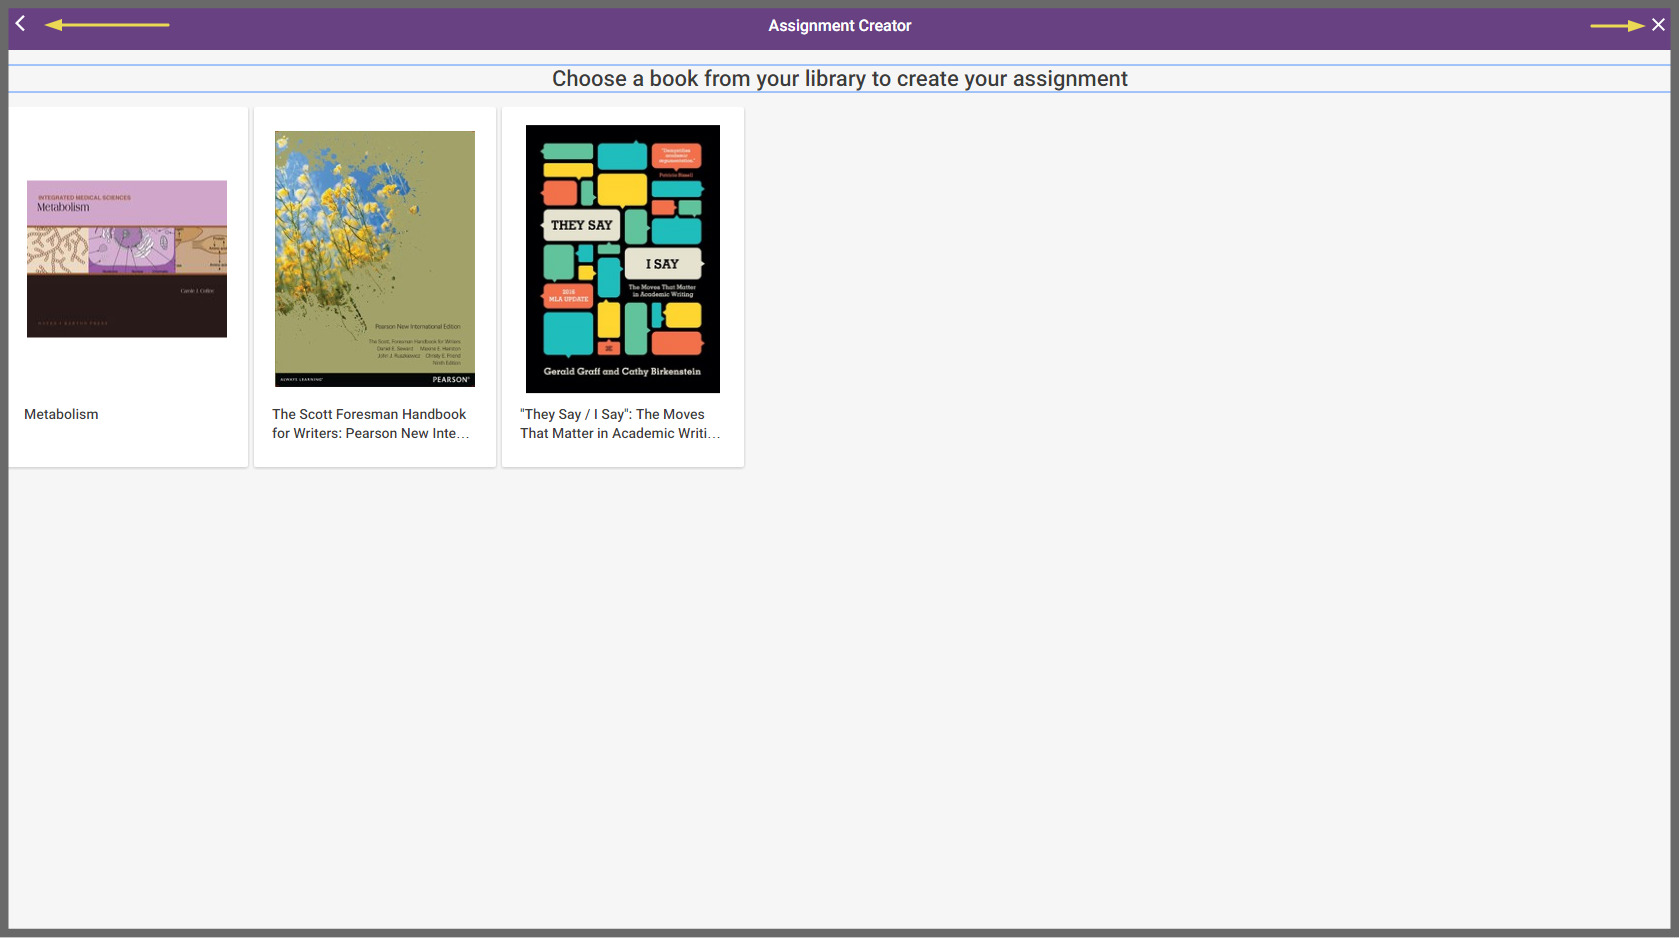
- Choose the book that you would like to create your assignment.
- You can either go back by pressing the arrow on the top left or you can exit by pressing the x on the top right.
- When you choose the book you want to create your assignment, you can then start your assignment.
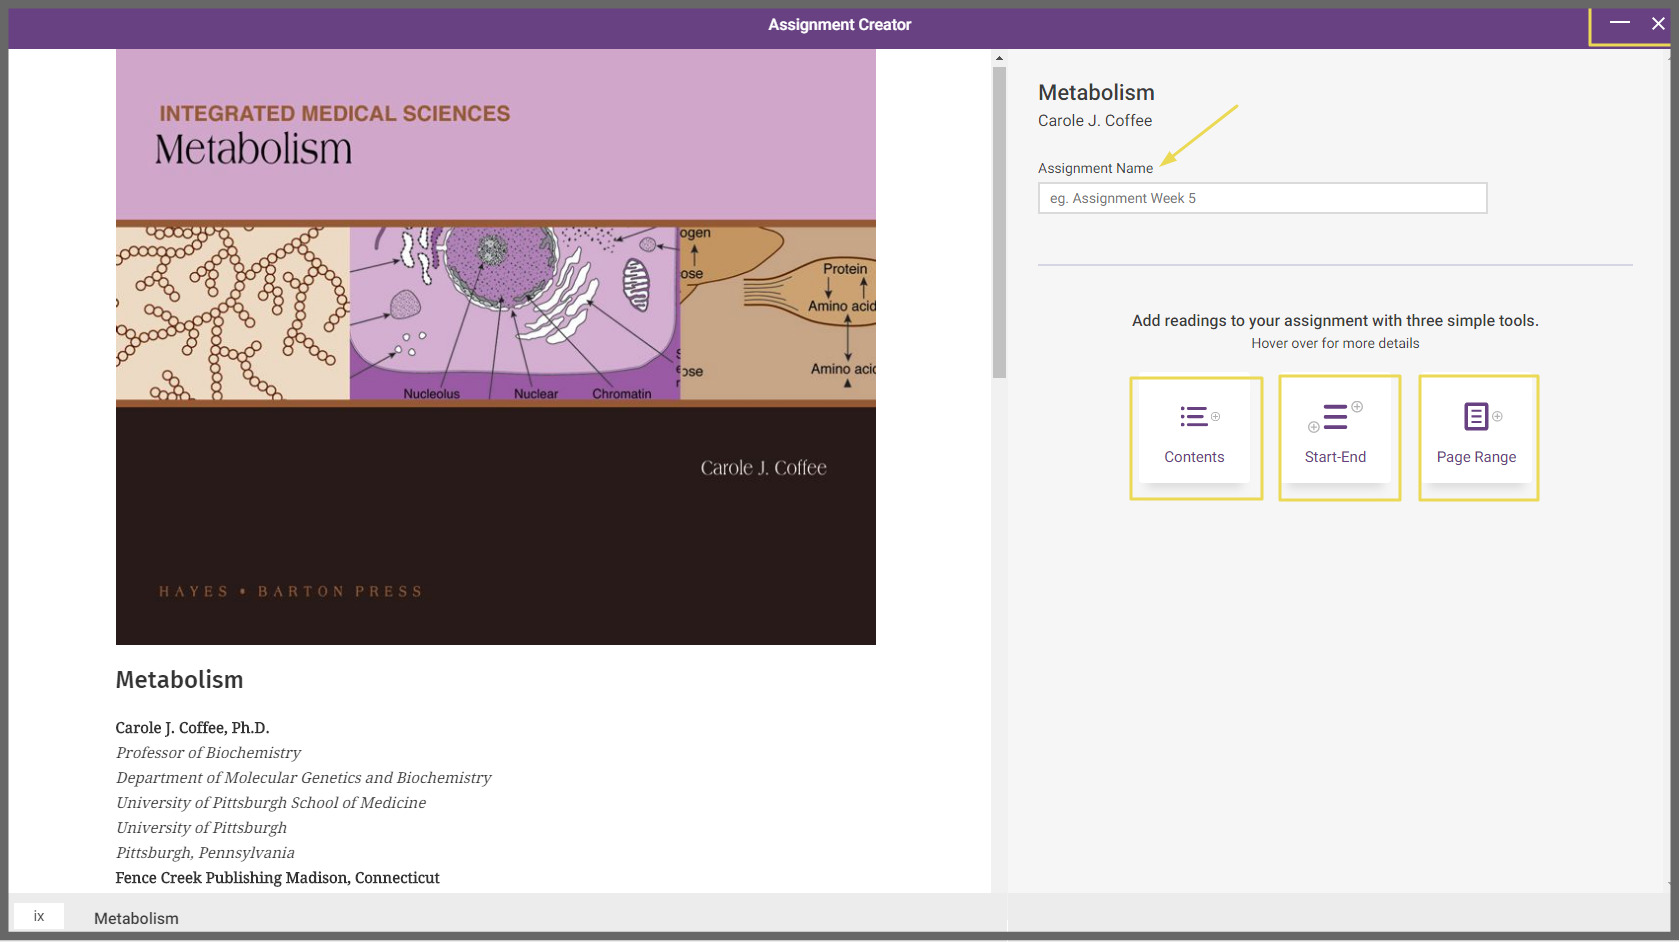
- First of all, choose the name of your assignment
- After that, you have 3 options to enter readings in your assignment:
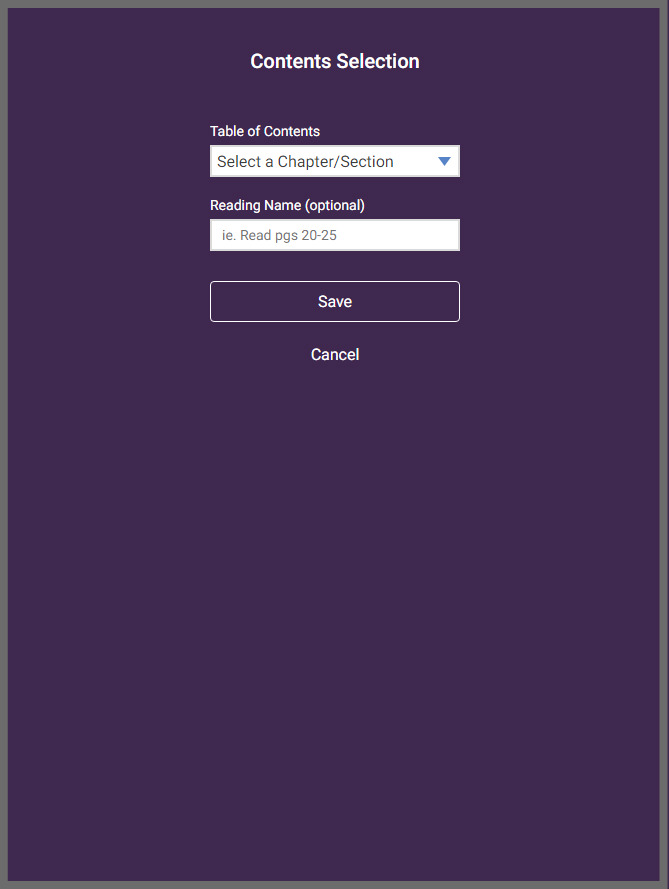
- Contents: You can enter a whole chapter in your assignment.
- Start-End: You do not have access to this feature.
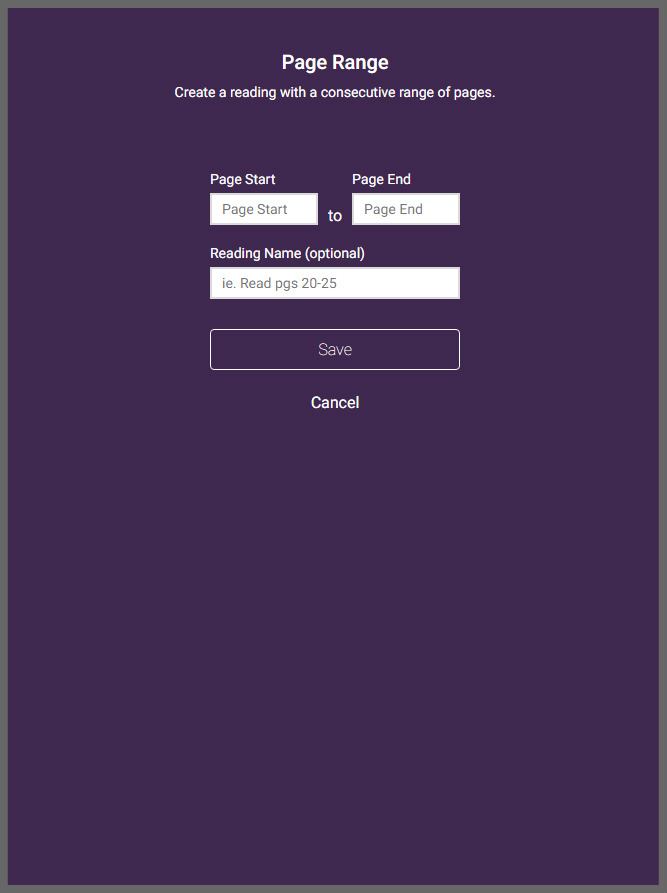
- Page Range: You can choose a specific page number to enter in your Assignment.
- If you would like at anytime to minimize your assignment, you can press the dash on the top right.
- You will then see that your assignment has been minimized on your bottom left.
- If you would like to go back to your assignment just press the Back to Assignment button.
- Once you entered all the readings that you wanted, you can see under the Readings all the content that the Assignment will have.
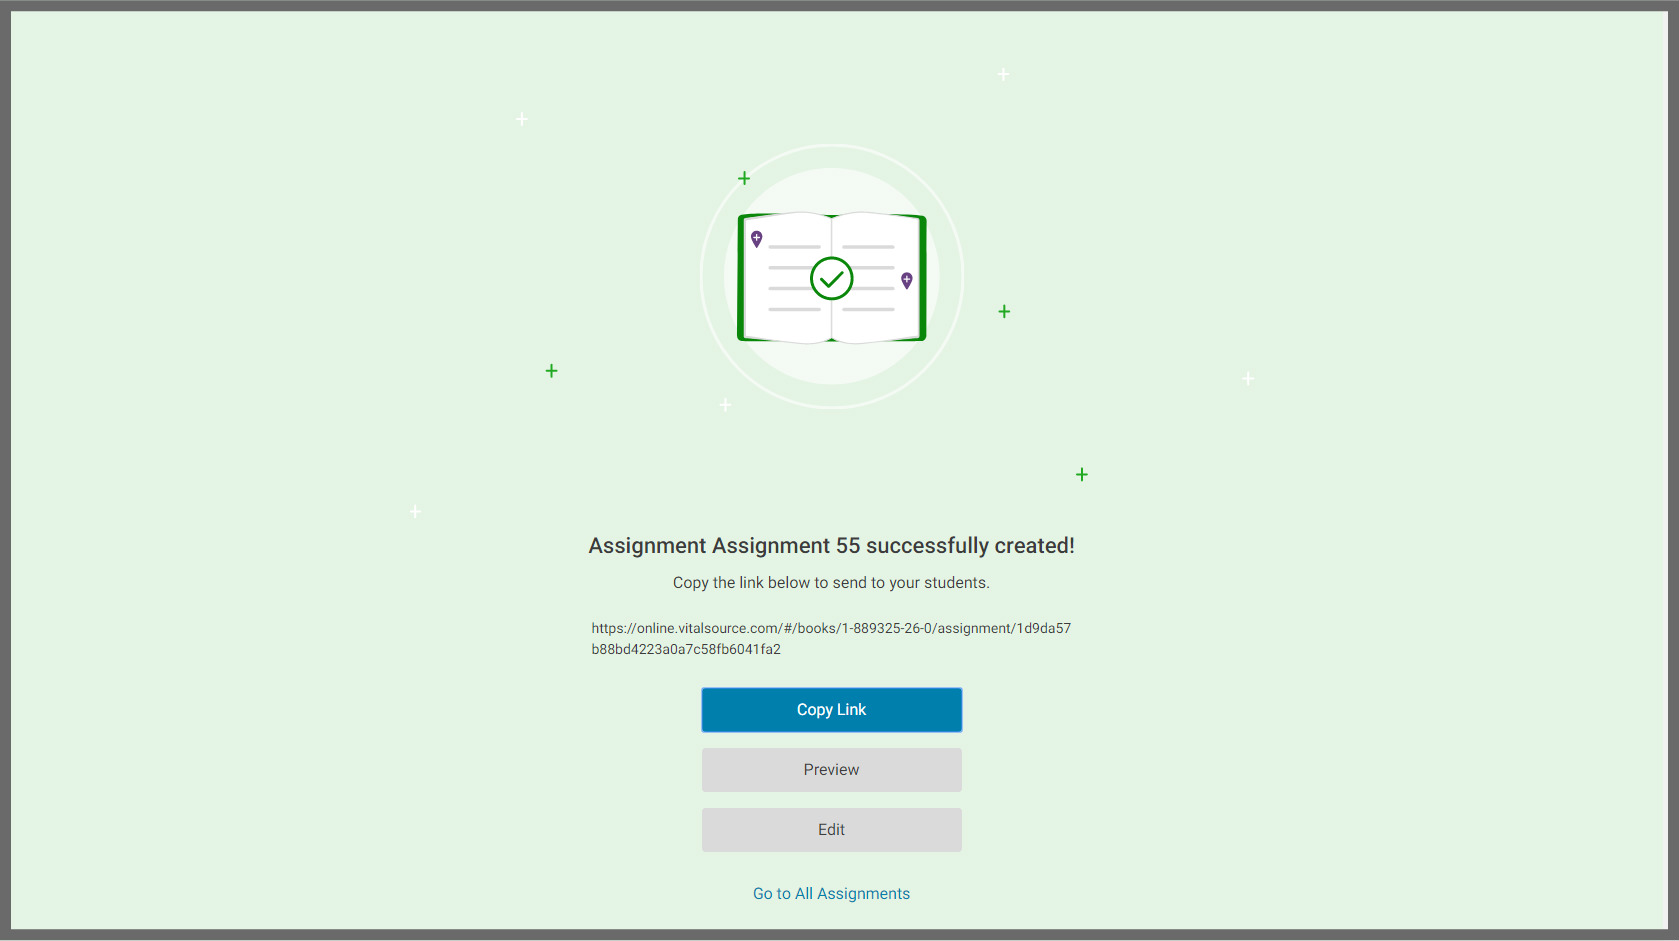
- When you are ready just press Done on the bottom right.

- And you are ready.
- You can then copy the link of the Assignment and send it to others, preview the Assignment or edit it.
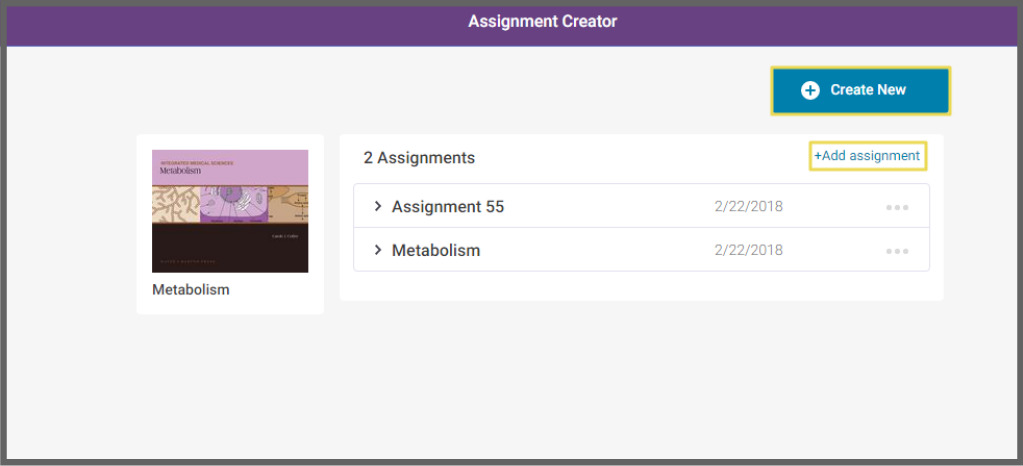
- In case you want to see all your Assignments just press the button on the bottom that says Go to All Assignments.
- Once you are in, you can see all of your created assignments and if you want you can create a new assignment in the specific book by clicking on Add Assignment or you can create a new one on a different book by clicking on Create New.
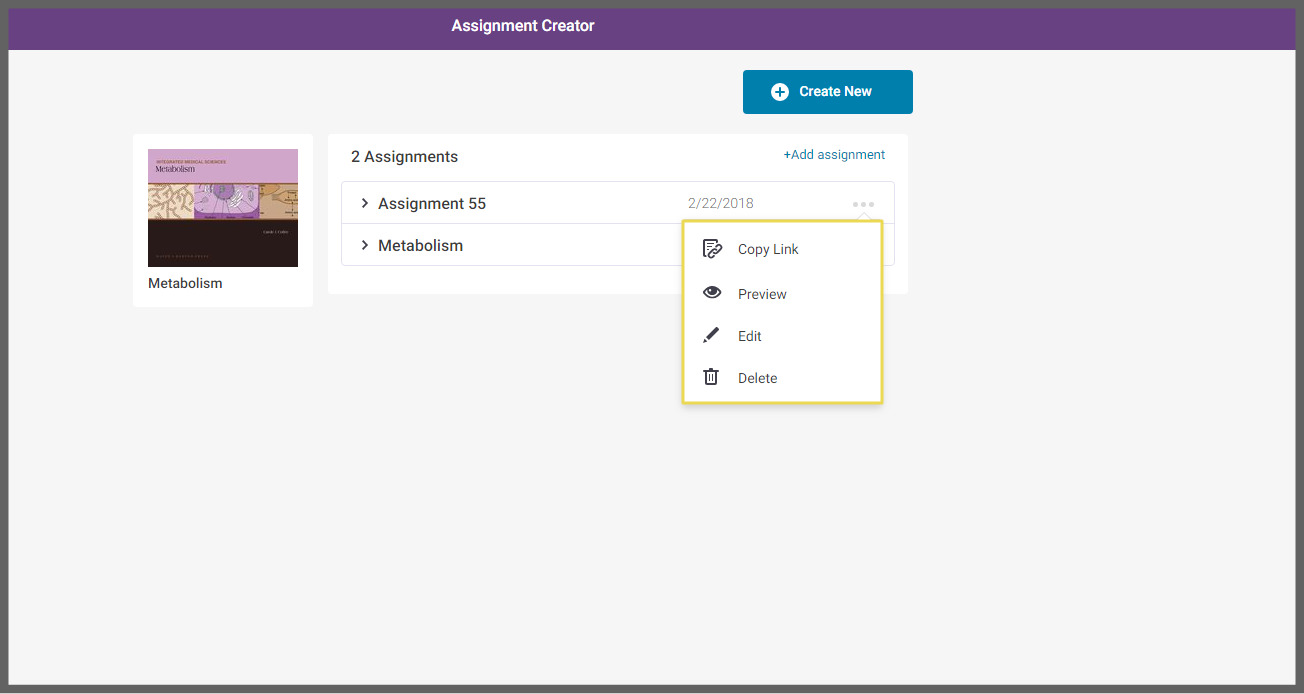
- If you click on the 3 dots next to the date that the assignment was created, a drop-down list will expand with some extra options.
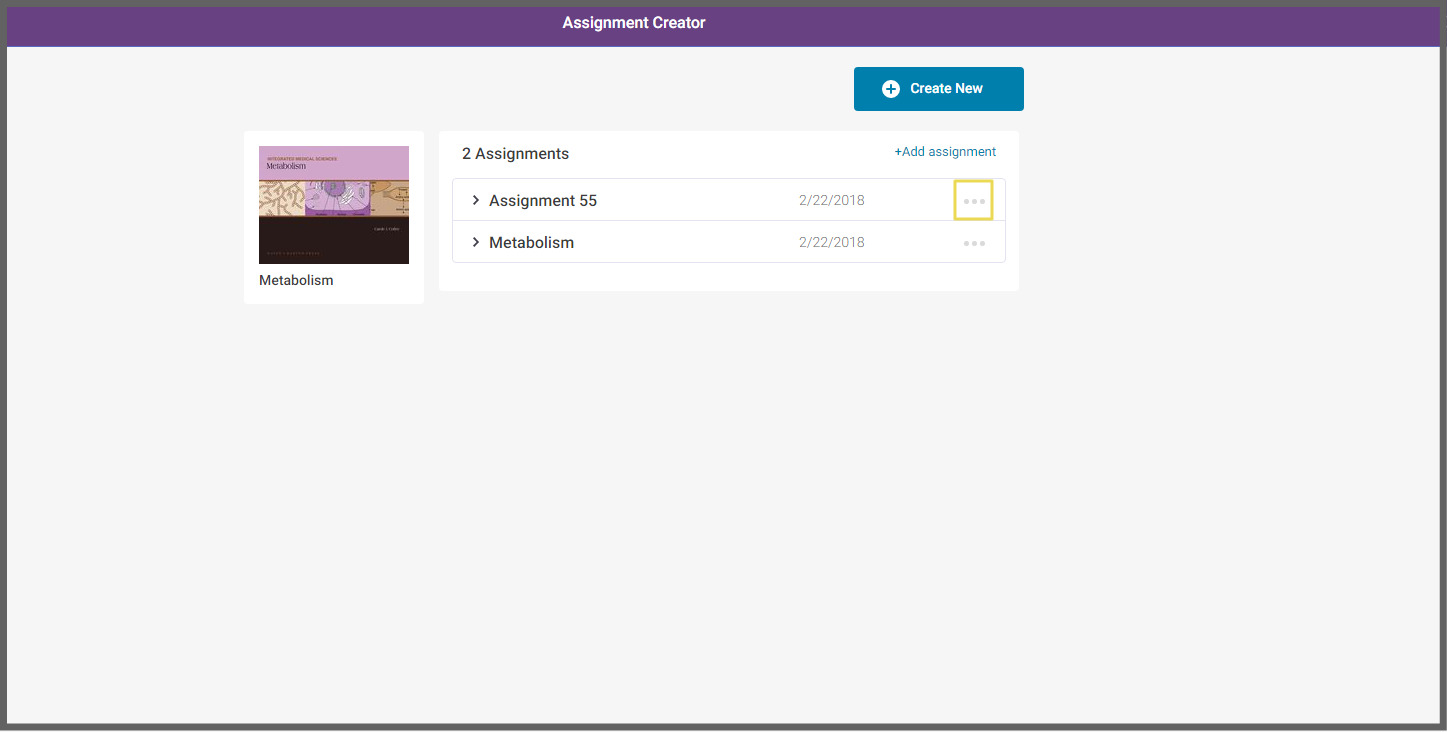
- When you expand this list you have the option to Copy Link which means that you can copy the link of the assignment in order to send it to someone else.
- You can Preview the assignment in order to see how it looks like.
- You can Edit your assignment in case you want to add or remove something.
- The last option is Delete in order to delete the assignment you have created.
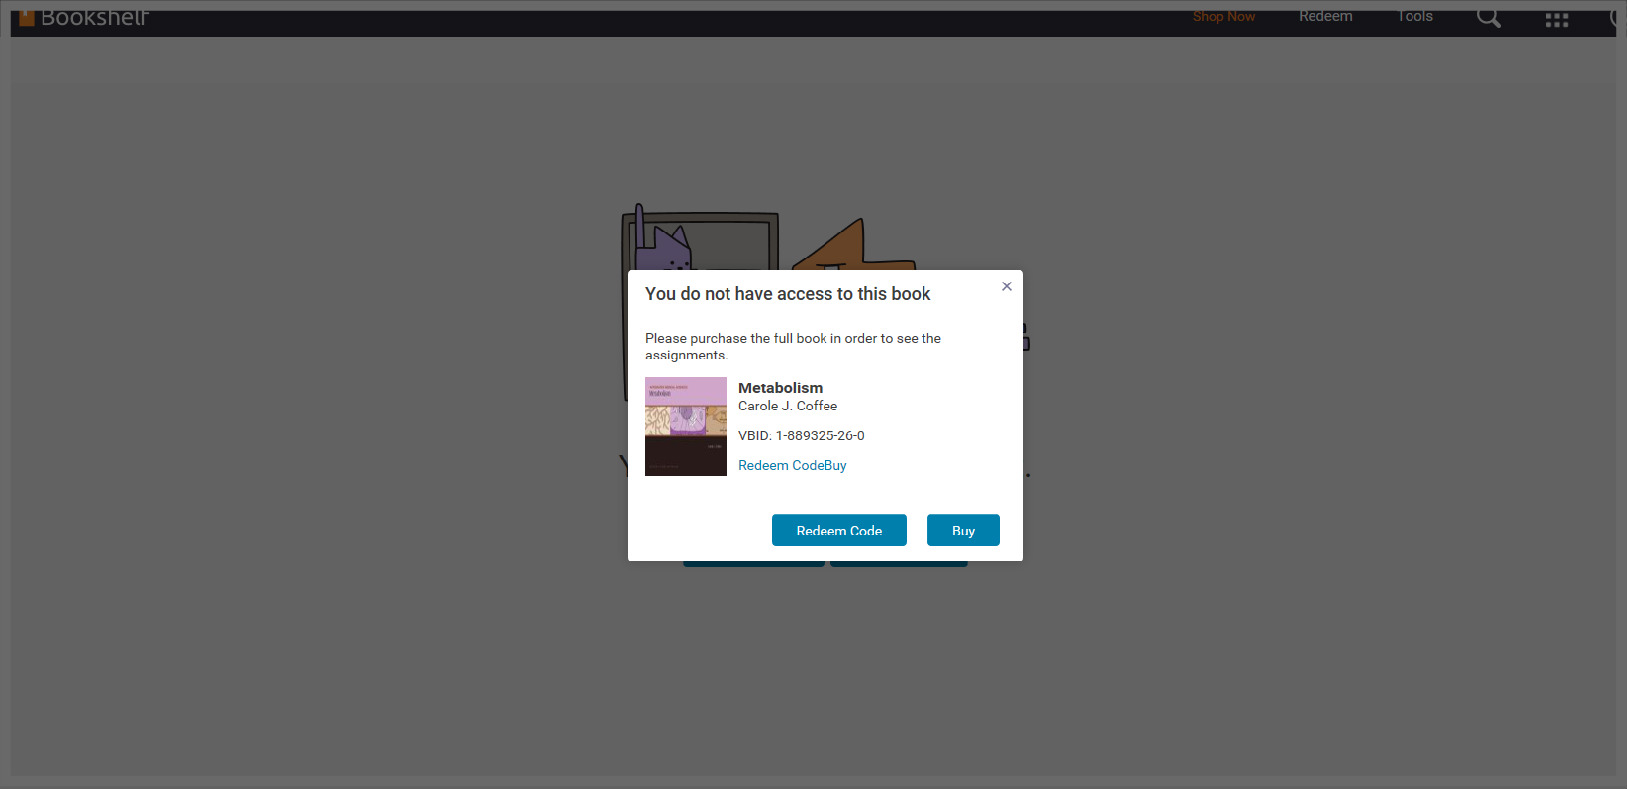
WARNING: Whoever wants to access a specific assignment, he/she will need to have access to the specific book that the Assignment has been created. Otherwise, there will be a pop-up window that will say you do not have access to this book.
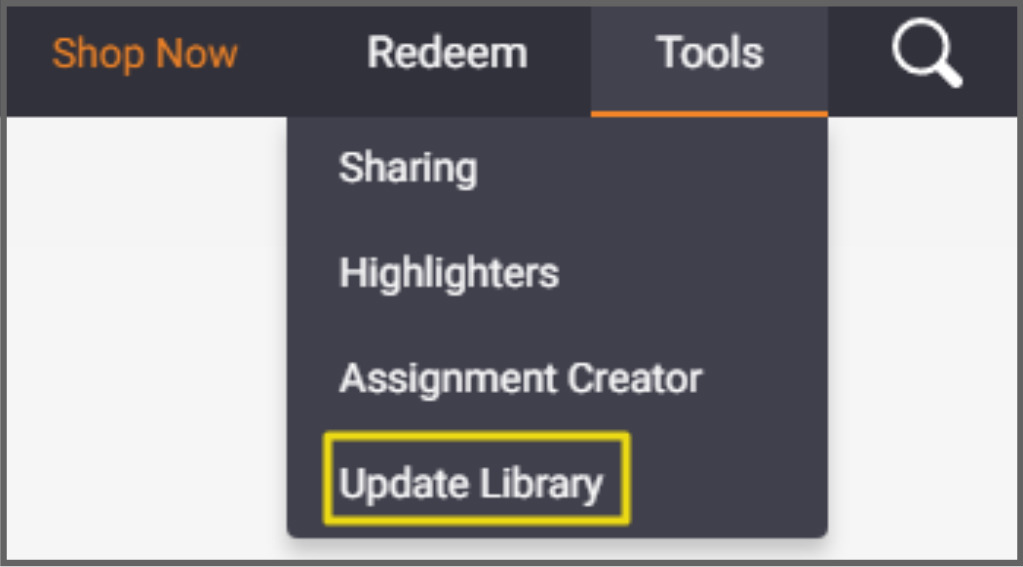
Click this link to view and manage all adopted e-Textbooks. To refresh your eTextbook Library, click on Tools and then, select Update Library. All your adopted e-Textbooks will appear in this page.
Click on an adopted eTextbook to read it. Click on any link from the Table of Contents to your left to reveal the chapter contents. Use the scroll bar to navigate through the pages or type the exact number of the page you wish to visit located at the bottom left of the page.
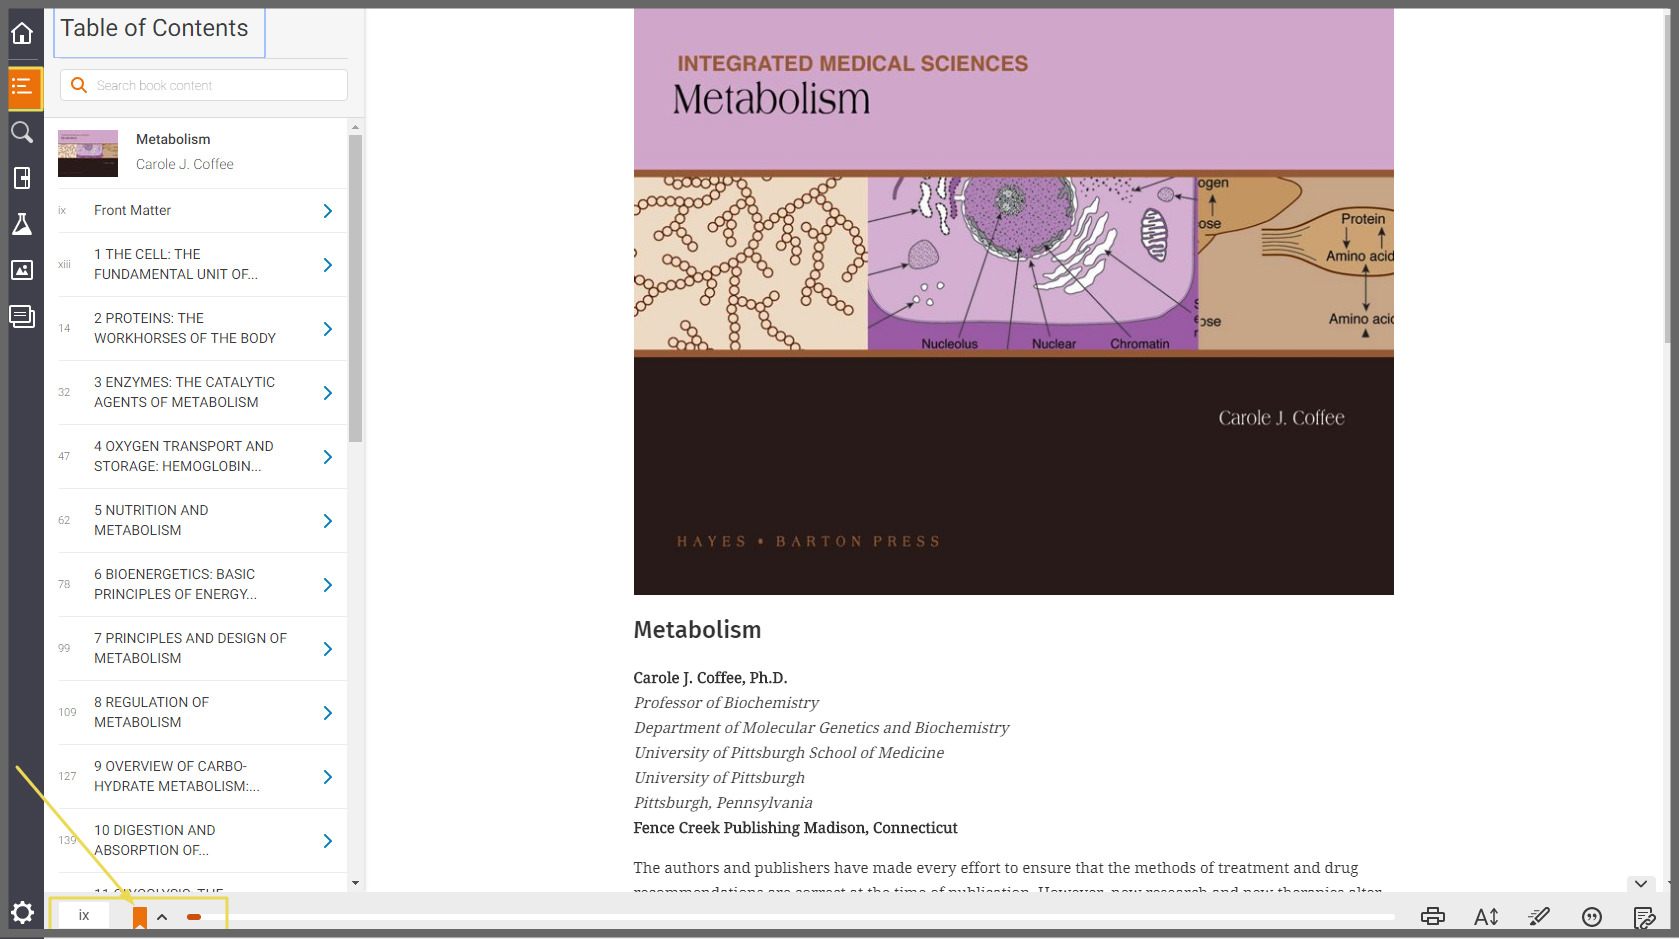
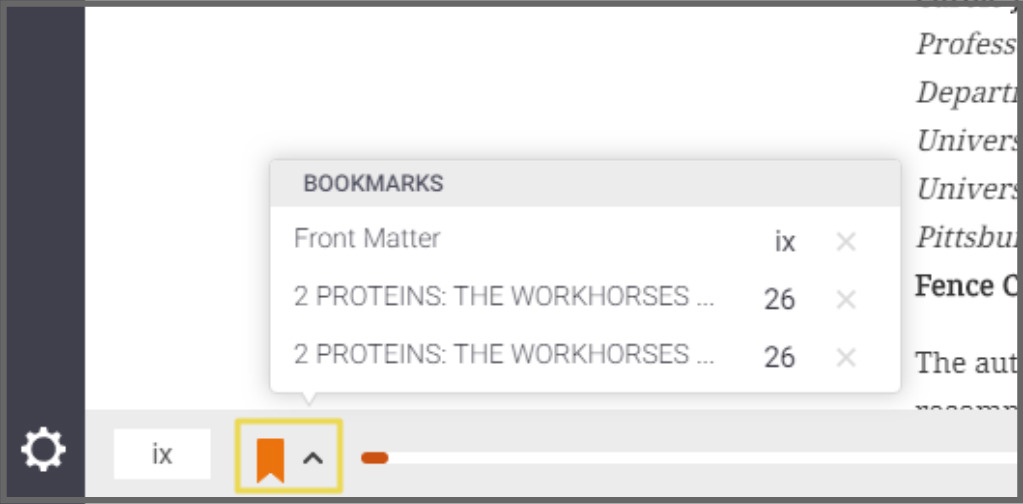
On the bottom left there is also a Bookmark option for you if you want to use.