Add/Edit/Remove File(s)
Add a File in a Content Area
How to upload a File on your Bb course 
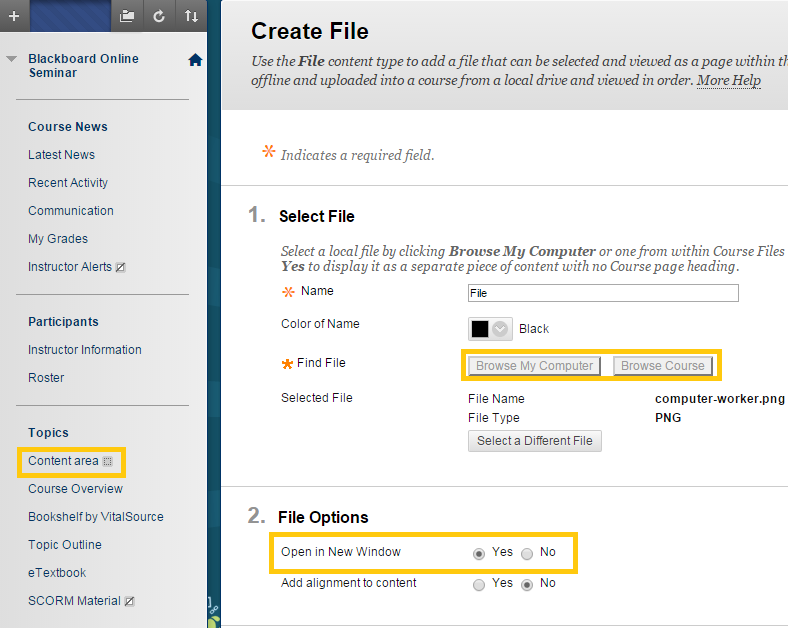
- Open a Content Area
- The Edit Mode should be set to ON
- Roll over the Build Content button
- Click File
- Fill in the Name field
- Click on Browse My Computer to select and upload a file OR click on Browse Course if you have already uploaded the file in your Blackboard course. In this case you will select it from the Files area.
Note: You are able to attach only one file on a File content type
- Set the File Options
- Click Yes to open the file in a new window
- The Add alignment to content option is not functional and therefore closed for usage
- Set the Standard Options according to your preferences
- Click Submit
Edit a File 
To Edit an File:
- Open a Content Area
- The Edit Mode should be set to ON
- Roll over the File
- Click on the menu next to the File’s name
- Click Edit
- Perform the changes needed
- Click Submit
Download multiple files at once
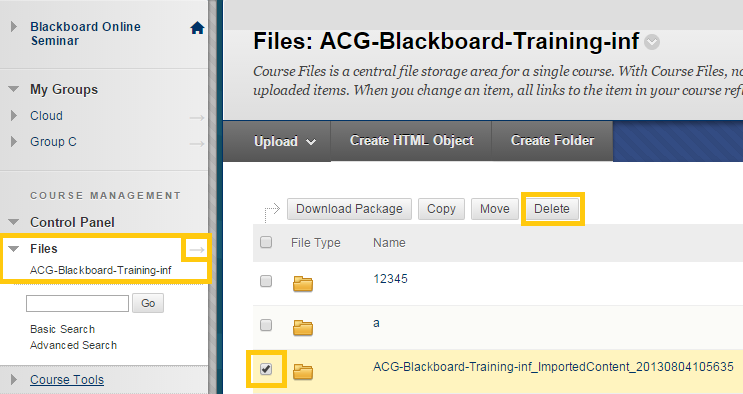
- Navigate to Course Management, then Files.
- Click the arrow to enter the Files page.
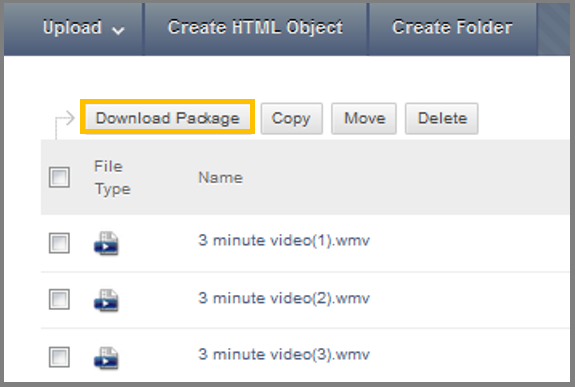
- Once inside check the files you want to download and click the Download Package button to download a .zip files, containing the files you have selected.
Upload multiple Files at once
With this tool you are able to upload all your files for the course at once. Add all the course files you will need in a folder and compress it as a .zip file. Then, upload its contents into your course. Find instructions for this below.
Create a .zip file :
- Create a folder.
- Put inside that folder everything you want to upload to your course.
- Right click on the folder and press “Add to archive..“. Choose to compress as a .zip file and not as .rar
- Press OK to the window that will appear.
- Now you have your .zip file that you can upload to your course using the steps below.
Upload the .zip file and extract its contents to your course:
- Navigate to Course Management, then Files.
- Click the arrow to enter the Files page.
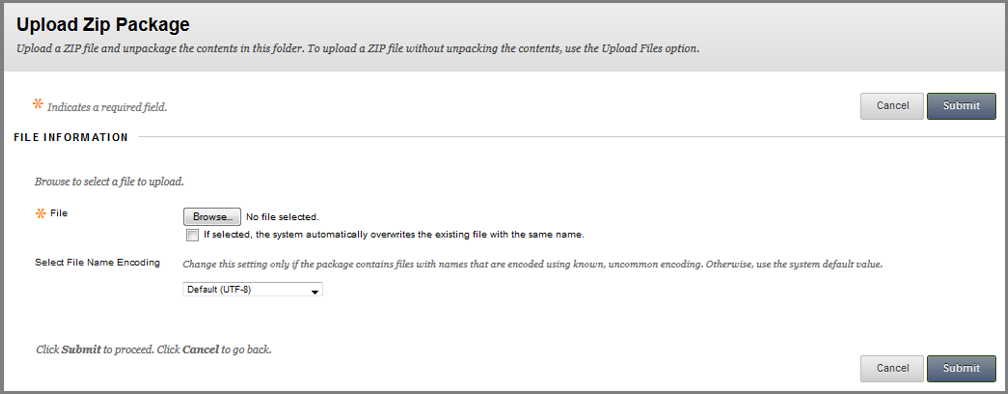
- Once inside, move your cursor over the Upload button and the click Upload Zip Package.
- In the File Information section, click Browse to search your computer for the package you want to upload.
- Click the check-box only if you want to overwrite a file with the same name.
- In the name encoding field, leave the option to Default (UTF-8).
- Click Submit.
- You can now see the expanded folder on the Files page.
- You can also create a link of the folder in any content area you want inside the course by clicking the browse course button. For more instructions on this click here.
Delete one or more Files
To delete a link to a file from a content area:
- Open a Content Area
- The Edit Mode should be set to ON
- Roll over the File
- Click on the menu next to the Item’s name
- Click Delete
- You receive a message: Delete File?
- Click OK
Delete the actual a file(s) from the Files Repository of your course:

- Visit the Control Panel
- Expand the Files section
- Roll over the > icon next to the Files
- Check the file(s) you wish to delete
- Click Delete
- You receive a message on file deletion
- Click OK to delete the file(s)

