Course Management
Course Management
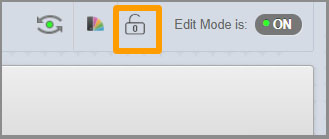
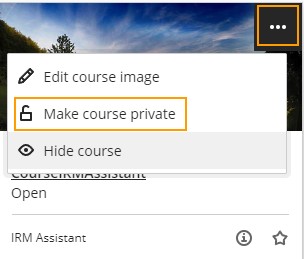
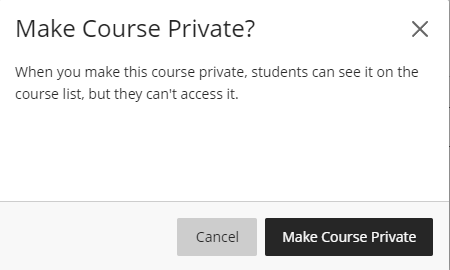
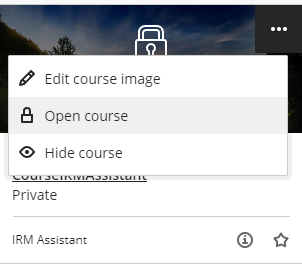
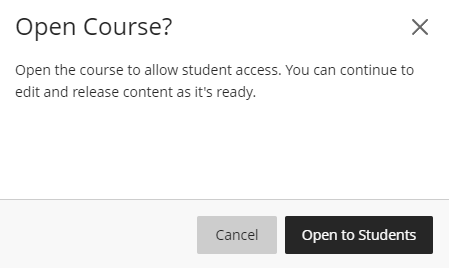
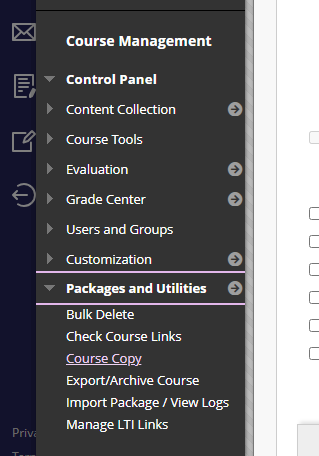
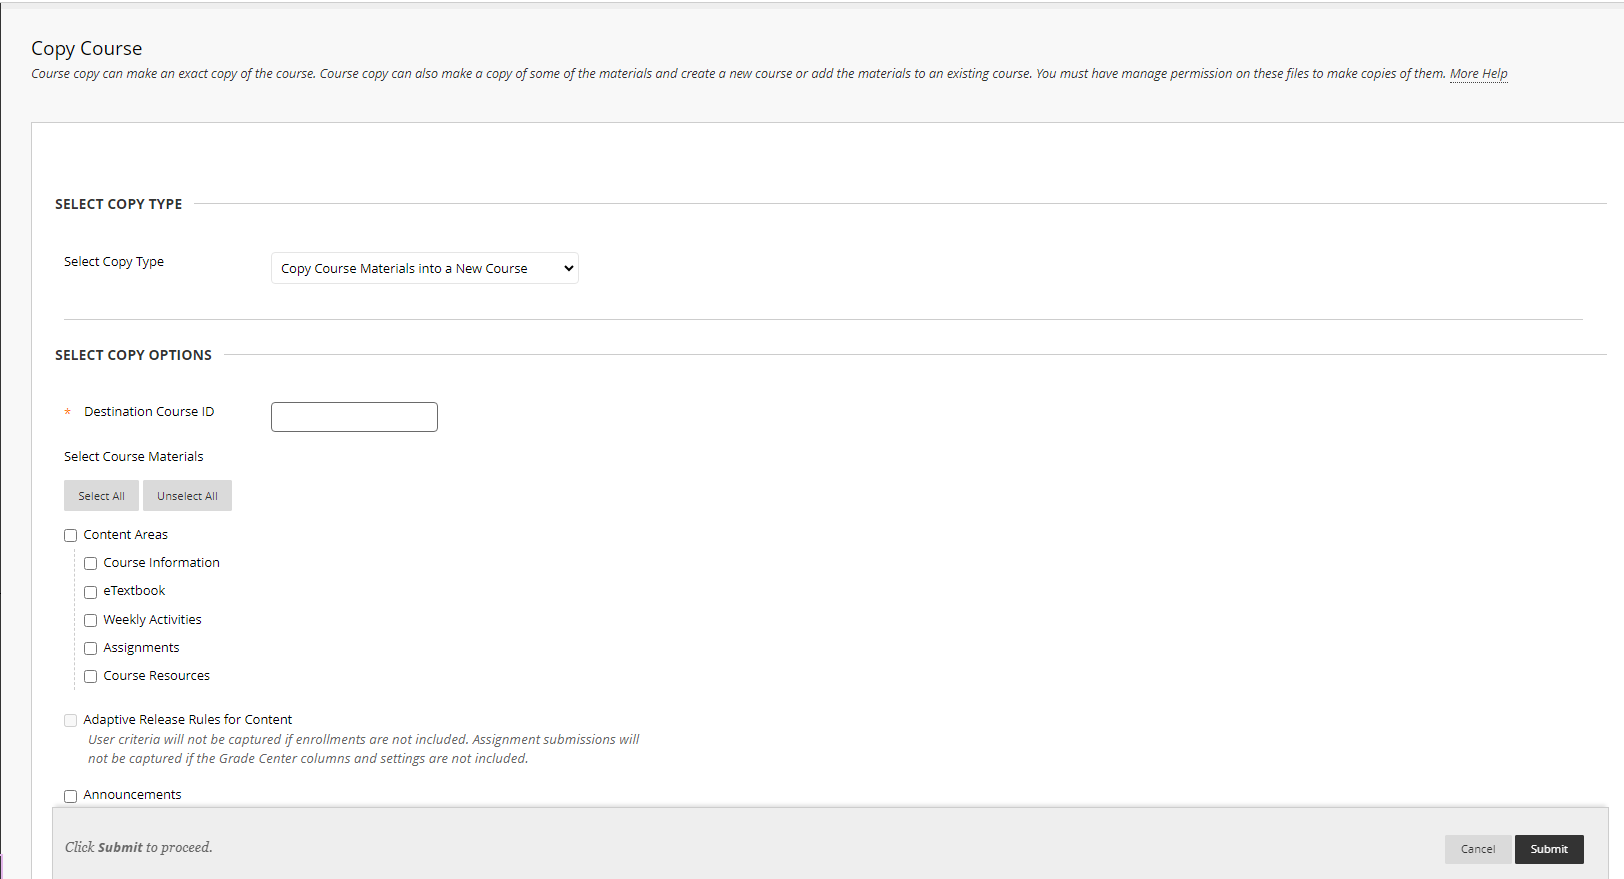
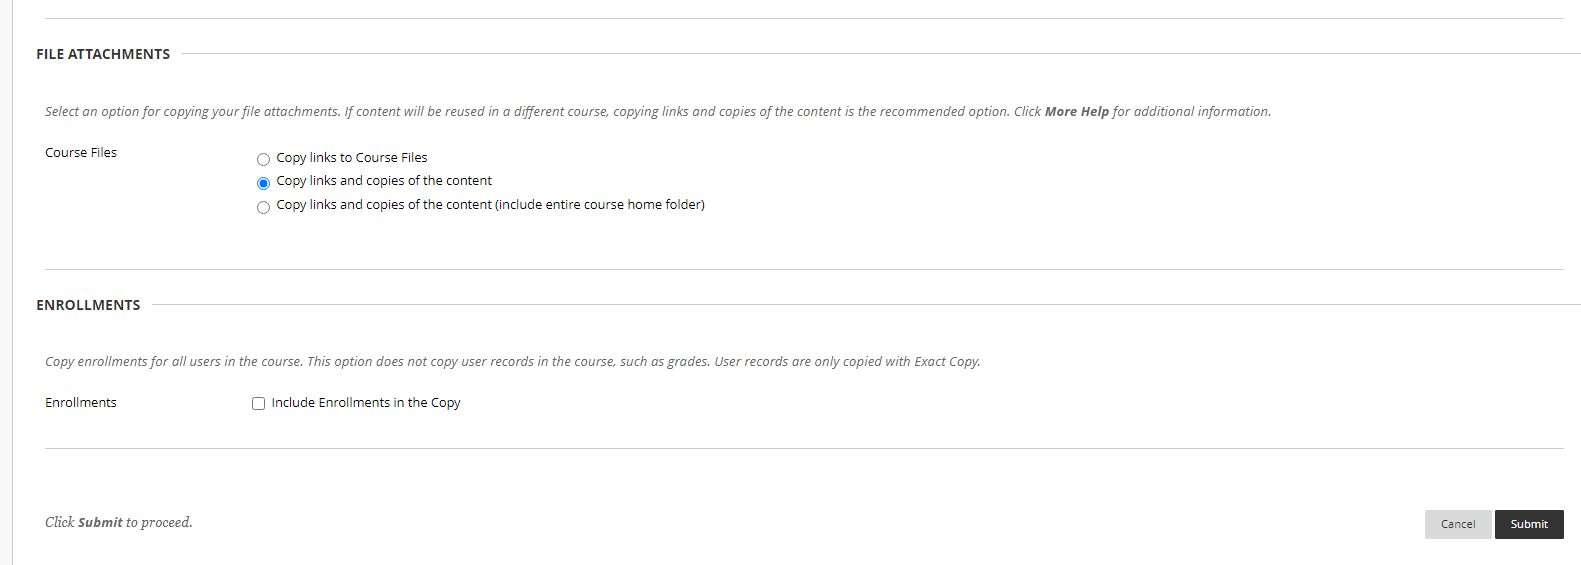
Blackboard Learn courses are automatically created approximately 10 days before the first day of classes of each semester/session/term. After late registration, the courses are updated and students are enrolled. In case you don’t see your course, you are able to: Create a Service Request on the IRM HelpDesk OR When the Bb courses are created are by default set to be “Unavailable” for students. That is, the students are not able to view the Bb course until you make it visible for them. To make a Bb course available for the students to see follow the steps below: While on the Customization page, you can modify your course’s availability. From the main course view, you can now easily see an open or closed padlock icon representing the availability of the course to students and quickly change the availability with one click, saving both time and effort. This new feature can be seen below, next to tools such as Student Preview and the Edit Mode toggle. In the new Blackboard environment the courses are created are by default set to be “Available” for students. That is, the students are able to view the Bb course . To make a Bb course unavailable for the students to see follow the steps below: To make a Bb course available for the students to see follow the steps below: At the Select Copy Options click “Browse” so as to select the Destination Course ID (the course you wish the content to be copied to). After you select the course, you have to select which content will be copied. Click the “Select All” button to copy all the content or choose the desired content areas, tools, or settings. In the File Attachments section: In the Enrollments section click Include Enrollments in the CopyONLYif you want to enroll the students to the new course that you created. This option is usually suggested to be left unchecked. Finally, click “Submit” to finish the procedure. Wait for a few minutes and visit the destination course so as to see the material copied. Repurposing content in a Blackboard course increases efficiency by reducing the time and effort needed for course preparation. There are three possible ways: Note: User-created export and archive packages will automatically expire and be deleted 30 days after they are generated. You can export your course content for use in the future. This content is included in an export/archive package: To export the entire course, open the “Course Content” page and open the menu on the right side above the content list. Select “Export Course Package”. Note: The system prompts you to decide whether to include student activity data in your export, which serves as an archive. Student activity data comprises assignment submissions, grades, attendance records, and discussion posts. Select “Yes” if you wish to include student enrollment information and activity data. Choose “No” if you only want to copy the content without any student enrollment or activity data. When the export or archive package is ready, a ZIP file will be available. Click on the file name to download the package to your computer. Both export and archive packages are downloaded as compressed ZIP files, and they should be imported or restored in the same format. Please do not unzip the package or delete any files from it, as this will prevent the contents from being imported correctly. You have the option to import a course package from a prior course or one offered by another instructor. During the import process, all content is transferred collectively, meaning the entire course package is imported simultaneously. This procedure is applicable to organizations as well. When you export and subsequently import a course, a column for attendance is automatically generated in the gradebook. However, this column does not contain any attendance information and cannot be removed. To import content, navigate to the Course Content page and access the menu above the content list. Select Import Content > Import Course Content and choose the course package (ZIP or IMSCC file) from your device. All content is added to the end of the content list, excluding student enrollments, grades, and discussion data. Additionally, you can import files from cloud storage or include items from the Content Collection. To include content in your course, begin by going to the Course Content page of the target course. Click on the three-dot menu near the search option and choose “Copy Items” from the dropdown list. You will be presented with a list of your courses. If the course you’re seeking is not visible on the first page, use the navigation arrows or the search bar to locate it. To find Organizations, click on the “Organizations” tab. To initiate a complete course copy, mark the box next to the course you wish to copy. This action will transfer all the content from the selected course to your current one without deleting any existing materials. When you carry out a full course copy, all settings—including due dates, visibility statuses, and release conditions—will remain intact. However, course links within learning modules that have enforced sequencing cannot be copied as this would permit navigation outside of the required sequence. When a course link is copied, all associated content will also be included. After making your selections, click “Start Copy” to continue. Note: You must exit the current course before initiating a full course copy.
Original View

Ultra View
1. Export and archive your course
2. Import Course Packages
3. Copy Content from Courses
Moreover, when managing a course, there is a list of tools available for the instructor in order to modify and customize the courses and their content. The tools are divided according to their use in eight different categories. You will find them in the Control Panel of the course. To view the details of these categories, click the orange links below:
| Tools | Description |
|---|---|
| Content Collection | Contains a search function that let you search files and folders and modify content within the course. |
| Course Tool | A group under the Control Panel that has all available tools that can be added to the course via Content pages. |
| Evaluation-Original | Evaluation provides tools for tracking user performance and activity. In the Evaluation section of Control Panel you can monitor the performance of the students and groups through Course Reports, Performance Dashboard, Retention Center and SCORM Reports. For information please take a look at the drop-down lists. |
| Grade Center | The Grade Center can record data, monitor student progress and communicate information to students, instructors and administrators. It is also a valuable tool for assisting decision making on taking action to promote student and institutional progress. |
| Users and Groups: | Users: The instructor can enroll user to the course and change their roles.
Groups: You can create groups of students to collaborate on academic work and you can do so, by creating them one at a time or in sets. Each groups has access to each own homepage and to various tools and links that help students collaborate. |
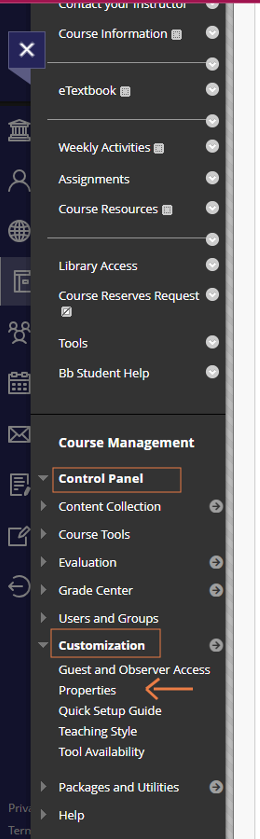
| Customization | In this section you can modify your course and its properties as you see fit. You can also change the name of the course, set its availability and select its appearance by adding a theme and a banner. |
| Packages and Utilities– Original | A group under the Control Panel that has tools that help in the handling of Blackboard data. Tool from this section help to delete, copy, back up and check for link availability. |
| Help | Contain link to external help in the use of Blackboard. |