Turnitin
Turnitin
Original Course View
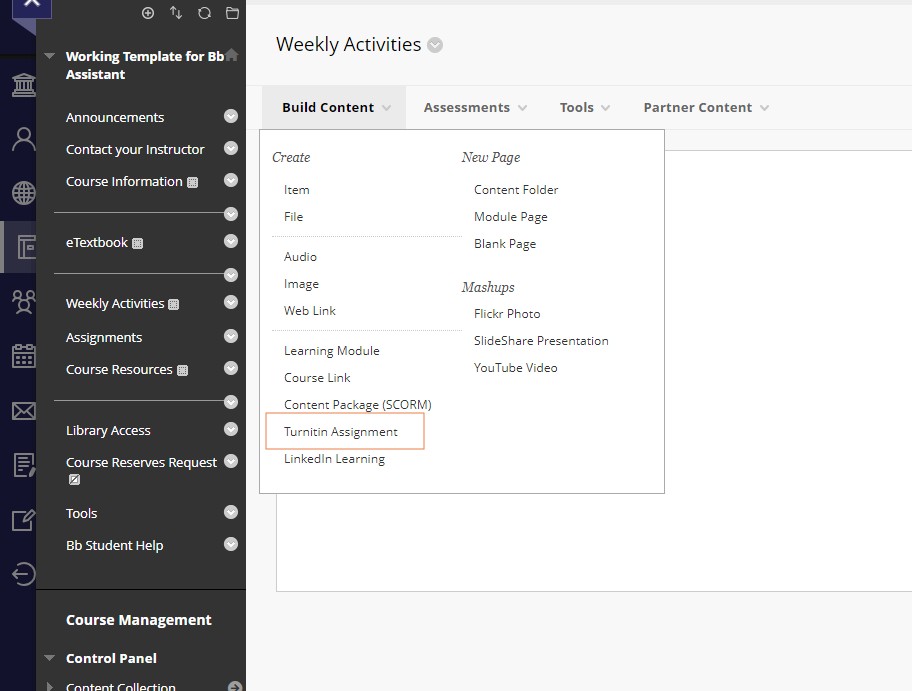
The Turnitin assignment creation link for the Original View is no longer under the Assessments button of a content area. Specifically, you will find Turnitin assignments under the Build Content button (areas that allow the creation of items, assignments, interactive tools, etc.).
Ultra Course View
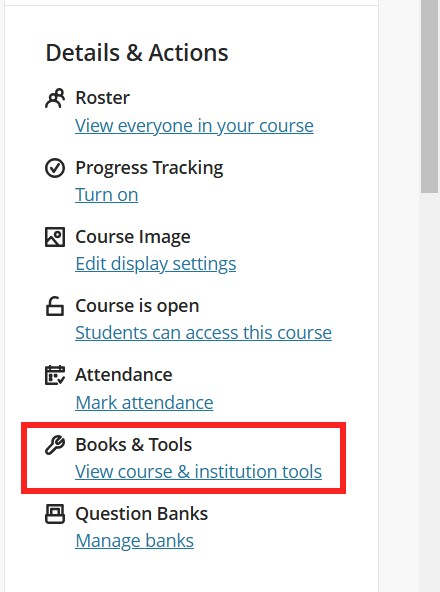
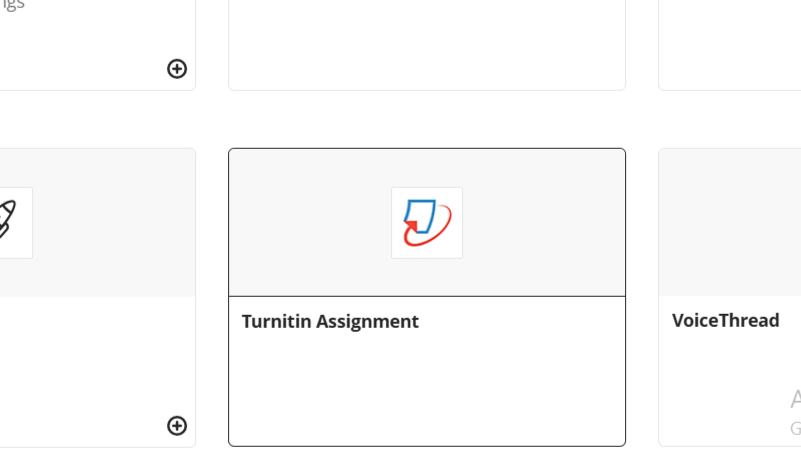
Regarding the Ultra View, you will find the Turnitin creation link under the Books and Tools in the Details and Actions. After you click the Browse all course tools you will find the Turnitin icon at the bottom of the page.
Create a Turnitin Assignment:
- The Turnitin creation link is under the Books and Tools in the Details and Actions button. Click the Browse all course tools, and you will find the Turnitin icon at the bottom of the page.
- In the Turnitin Assignment page, fill in the Name (at least 3 characters long) of the assignment, optionally add a description and attach file(s).
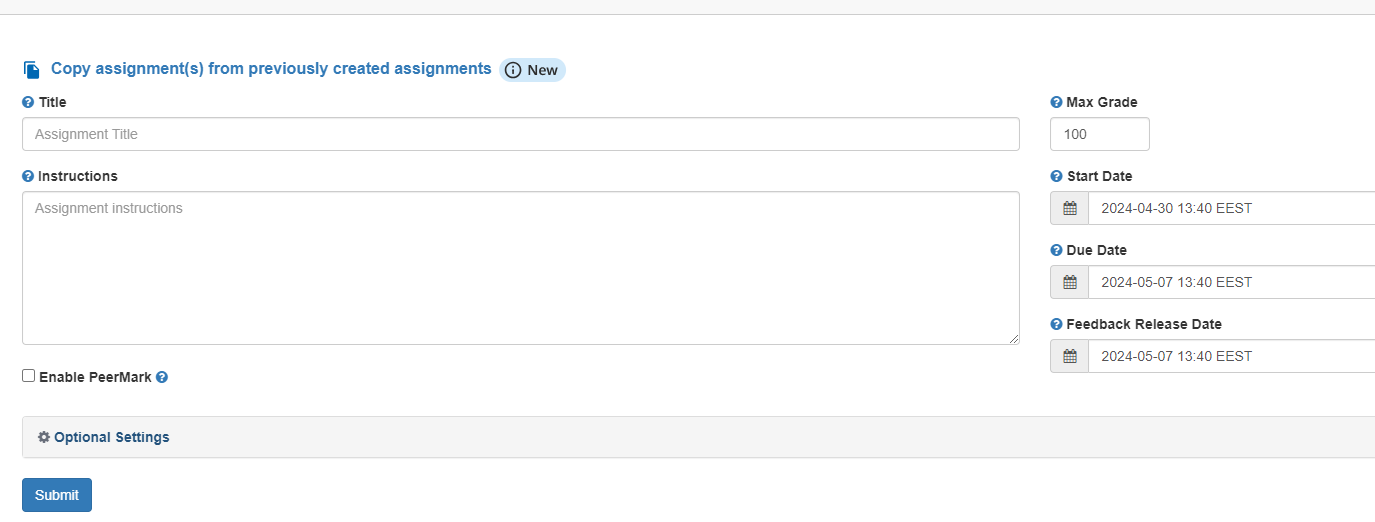
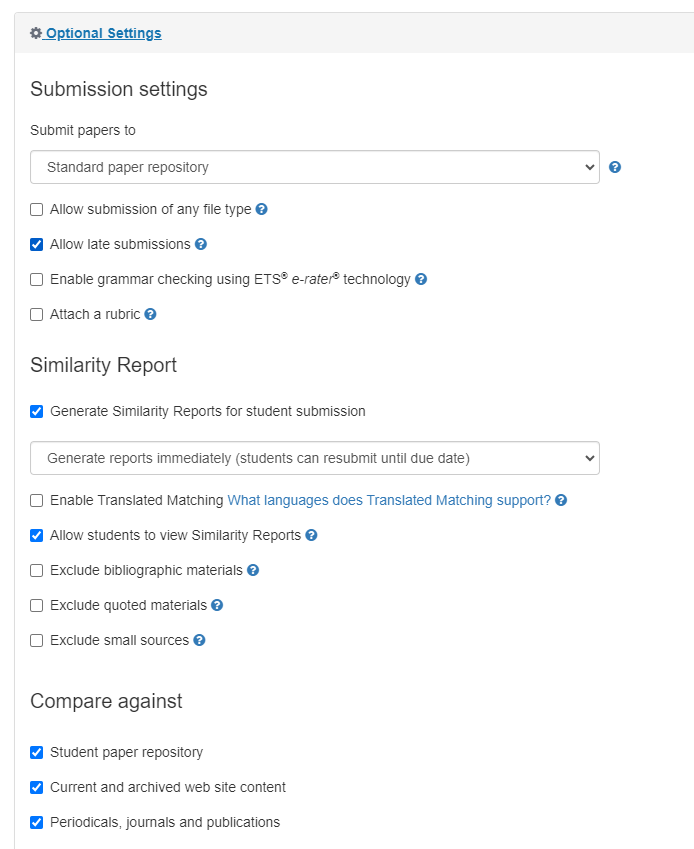
- Continue by defining the Optional Settings of the assignment. In the Submissions Settings you can select if you want to allow late submissions or any of the other options given. Regarding the similarity report you can decide if you want to allow the students to view the report and if you want to exclude certain sources and materials. By default there are some cells checked but if yo want to change the options you are able.
- Click Submit. The Turnitin assignment is added at the end of the page.
In the new version of Turnitin there are some added features for facilitation of assignment creation. Those are the following:
- Copy assignment(s) from previously created assignments
- Exclude Assignment template
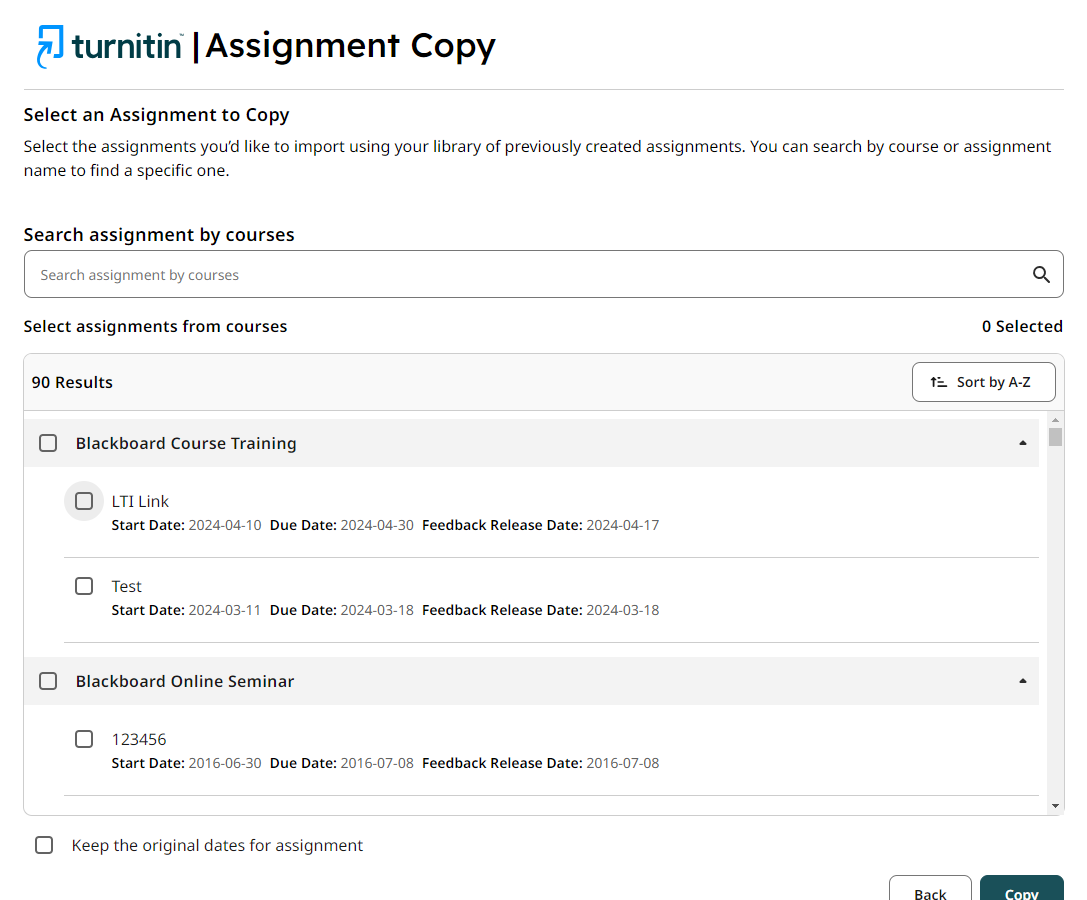
1.Copy assignments from your library of previously created assignments. You can select assignments from your other courses if you want to copy them instead of creating one from the start. Just click at the top left button that says “Copy assignment(s) from previously created assignments” and you will be transferred to the following page. If you can’t find the assignment you are looking for just search the course on the search bar. At the end click COPY.
2.Upload or create a template of text to be automatically excluded from the Similarity Report. Note: Once a submission has been made to the assignment, templates can no longer be added or edited.
You have now created a Turnitin Assignment that will appear at the bottom of the Content Area (i.e. Assignments) you had originally selected. It looks like the picture to the right: 
Once the Turnitin assignment is created and is available for the students, they are able to access it via the content area you have specified i.e. Assignments. The students will click on the assignment’s name and will upload their assignment. Keep in mind that students need to submit and re-submit their assignments themselves. The originality report will be generated immediately. After 3 resubmissions though, the originality report will take 24 hours.
Students need to submit their assignments themselves. The instructor has the option to re-submit a student assignment, by accessing the Turnitin Assignment Inbox and clicking under the Options the 3 dots which will open a drop-down list, then select the Upload option.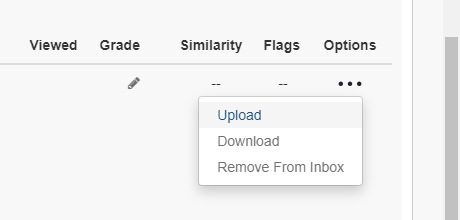
Once file submission is over, Turnitin will generate originality reports for each one of the submitted papers.
Instructors are able to view the submitted files of the students, online. That is, view the submissions in the web browser without the need of other applications or plug-ins.
To submit successfully, Turnitin requires files to be:
- less than 100MB;
- has a minimum of 20 words (unless the assignment settings state otherwise)
- is less than 800 pages (.xls/.xlsx and .csv files must be less than 450 pages)
- Microsoft Word® (.doc/.docx) – If using unsupported processor, it may be needed to change the file into .txt or . rtf
- OpenOffice Text (.odt)
- WordPerfect® (.wpd)
- PostScript (.ps)
- HTML
- Hangul Word Processor (.hwp)
- Rich text format (.rtf)
- Plain text (.txt)
- Google Docs, Google Slides, Google Sheets via Google Drive™
- Adobe® PDF (.pdf)
- Microsoft PowerPoint® (.pptx, .ppt, .ppsx, and .pps)
- Microsoft Excel® (.xls/.xlsx) – If you have a .xls/.xlsx file that is 450 pages or more you have to save the file in a PDF form.
Note: If you have any problem regarding the supported submissions documents by Turnitin please click here.
If you need to submit a file that does not need to be checked for similarity, but does need grading the only types of files acceptable are the following:
- Password protected files
- Microsoft® Works (.wps) files
- Microsoft Word 2007 macros-enabled .docm files
- OpenOffice Text (.odt) files created and downloaded from Google Docs online
- Document (.doc) files created using OpenOffice, as they are not 100% Microsoft Word equivalent
- Apple Pages
- Spreadsheets created outside of Microsoft Excel (i.e. .ods)
- Text with visual effects
You are able to grade Turnitin assignments directly from the Turnitin environment using the following steps: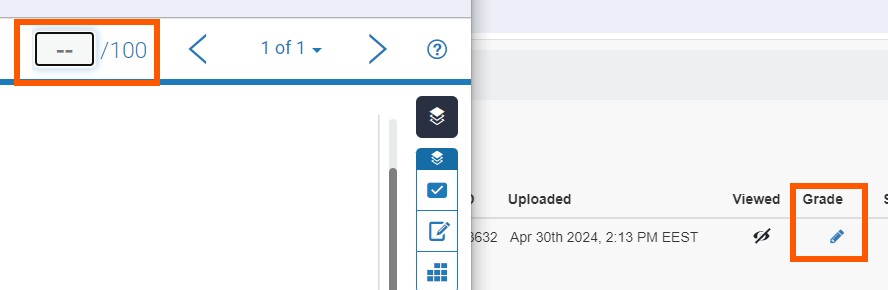
- Access the Turnitin assignment you want to grade within a Bb course.
- Via the Turnitin environment, you can view the submissions of the students. Click the Grade icon to be redirected to the Feedback Studio and grade the assignment.
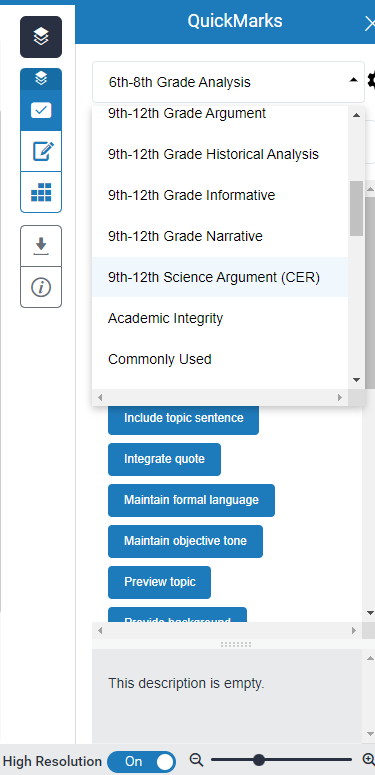
- From the Feedback Studio you can comment on the student’s assignment, give QuickMarks and grade it.
- The grade you insert in the box as it is shown in the picture on the left, is immediately updated in Blackboard’s Grade Center.

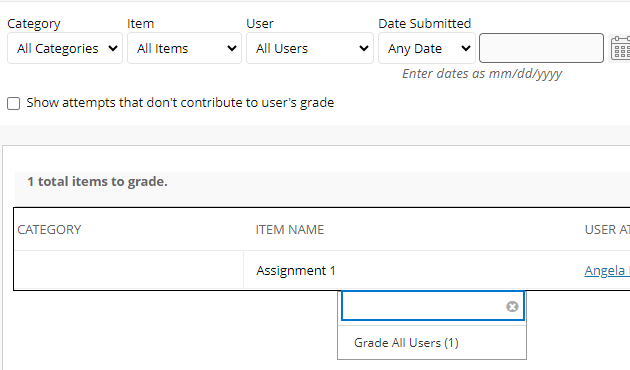
To grade a Turnitin assignment via the Grade Center of your Bb course, visit Control Panel> Grade Center> Full Grade Center. Locate the Turnitin Assignment column and click the contextual menu next to the student’s name you wish to view and grade. Then, click the Grade User Activity option. You will be redirected in the Turnitin environment.
WARNING: Due to some issues, you will see the following two “problems”.
- Once you have submitted the assignment you want for your course and you have selected the Due Date, you cannot go back and change it. You can change if you like by going to the drop-down menu given from the arrow and selecting Edit. After that, you just change the date to your liking.
- After you are redirected to the original page you will notice a sub-note in your assignment saying “Enabled: Adaptive Release”. Please, keep in mind you will need to deactivate if you want your students to see the task all the time.
In order to deactivate you will need to go to the drop-down menu that is provided by the arrow and select the button Adaptive Release. After that, you will just need to unselect the “Display after” and hit submit so your changes will be saved.