Lecture Capture – Panopto
The Panopto Lecture Capture service allows you to record, edit, share and stream video, audio, Powerpoint presentations and screen capturing content for various audiences such as staff, faculty and students. It stores and manages the recordings using a cloud based content management storage system. Panopto lecture capture is integrated in Blackboard Learn and thus it allows you to record and use the recordings from within the Blackboard environment.
Uses of Panopto Lecture Capture
- Lecture recordings to enhance students or fellow colleagues learning experience.
- Flipped Classroom recordings with pre-recorded sessions with notes and subjects to allow preparation for the next lecture and assist discussions and feedback.
- Conference/Discussion recordings to share with a wider audience or promotional tool.
- Training Video recordings to be shared with colleagues and students.
Requirements
You can use the Panopto Lecture Capture service in certain smart classrooms where the required software is already installed. Open a Helpdesk Request to ask for the available Panopto smart classrooms across ACG and declare that you wish to use the equipment (microphone and a web camera). Moreover, you can ask Panopto to be installed in your office pc. Again, open a Helpdesk Request for that.
To use Panopto in your own device you need to install the software and use a microphone and a web camera (optional).
Steps to follow
- >Login to your Blackboard Learn user account.
- >Visit your Blackboard course and make sure the Edit Mode is set to ON.
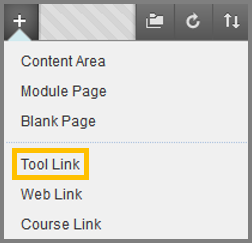
- >Add the Panopto tool video area on your course menu by clicking the + sign above the course menu and then Tool Link.
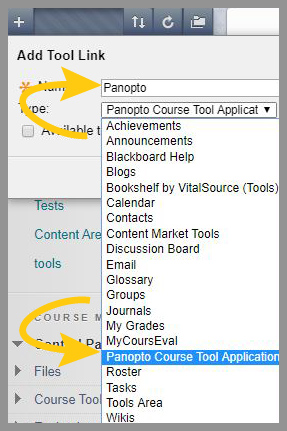
- >In the Add Tool Link box, enter a Name such as ‘Panopto’ or ‘Lecture Recordings’ or ‘Panopto Videos’.
- >In the Type drop down list, choose Panopto Course Tool Application.
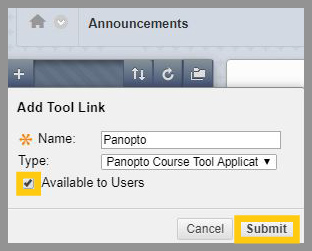
- >Make sure to check the Available to Users checkbox so as students enrolled in the course to be able to access the area.
- >Click Submit.
- >There is now a new ‘Panopto’ menu item listed in the course menu. Click it to access it.
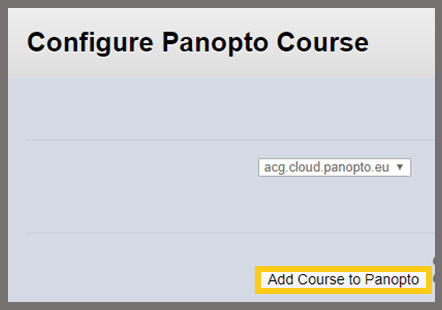
- >In case your course is not provisioned/registered in Panopto you will need to follow a shopt configuration process. You will come across the following screen:
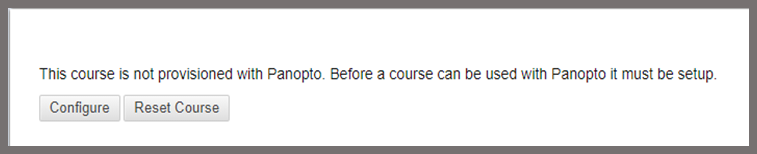
- >Click Configure and then Add Course to Panopto to provision your Blackboard course. In this way, a Panopto folder is created and it has the same name with with your Blackboard course.
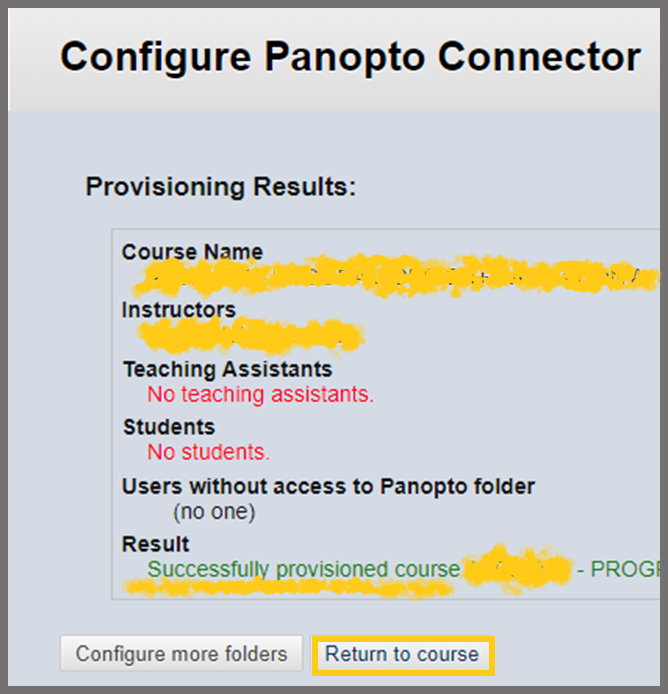
- >Check the Result and make sure it says “Successfully provisioned course”. Then, click Return to Course to go back to the Blackboard course environment.
You have now configured Panopto for your Blackboard Learn course. Your Panopto folder is now embedded in the Blackboard Learn environment with an iframe and it has the same name with your Blackboard course.
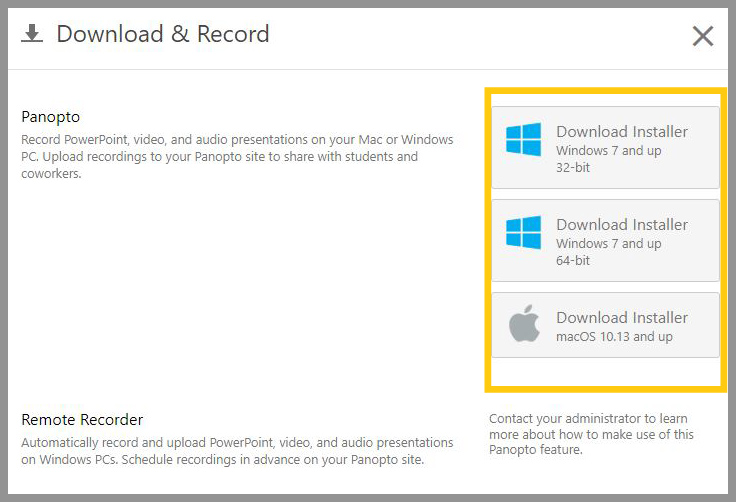
The download installation process is the same for PC and Mac users.
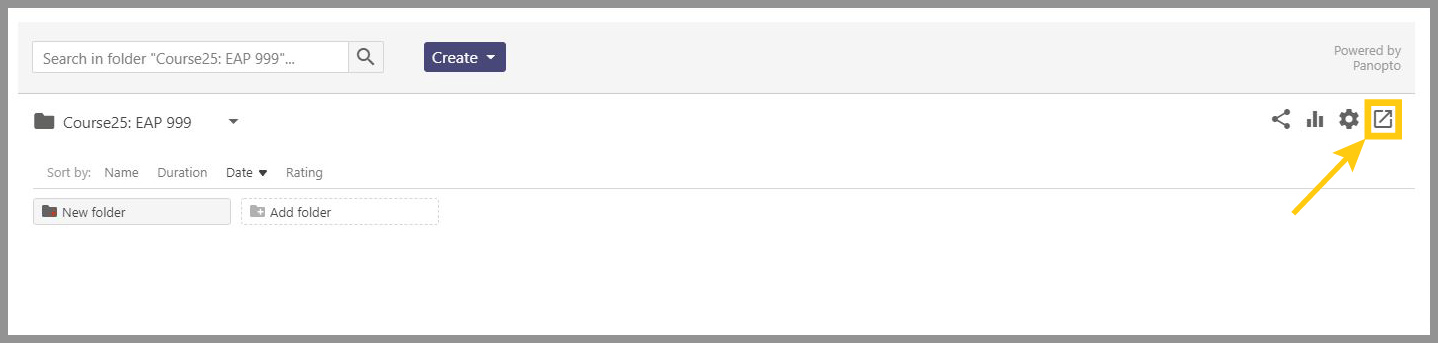
- >Once in your Blackboard course, click the Panopto menu item. You are now in the Blackboard Learn Panopto area.
- >On the top right part of your page, click the arrow button pointing to the right. This will open a new tab in the Panopto environment.
It will also activate your Panopto user account.
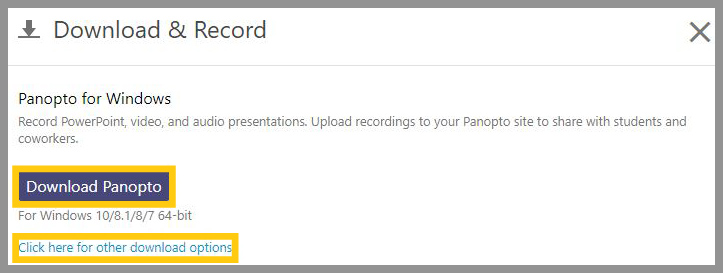
- >Now, you are in the Panopto environment. Click Download Panopto to download and install the application on your machine.

- >After you finish with the installation, a shortcut of the Panopto application will be at your computer’s desktop.
Double click to open it and then Sign in.
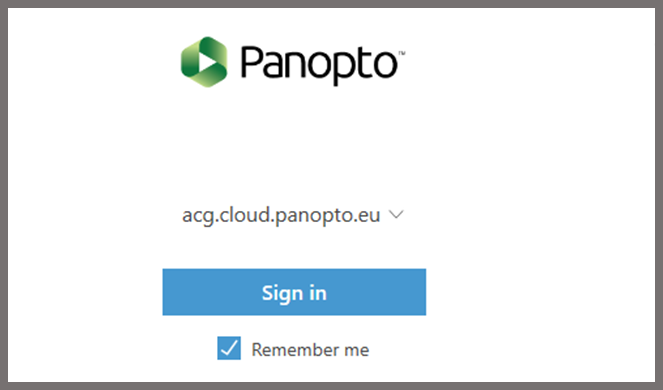
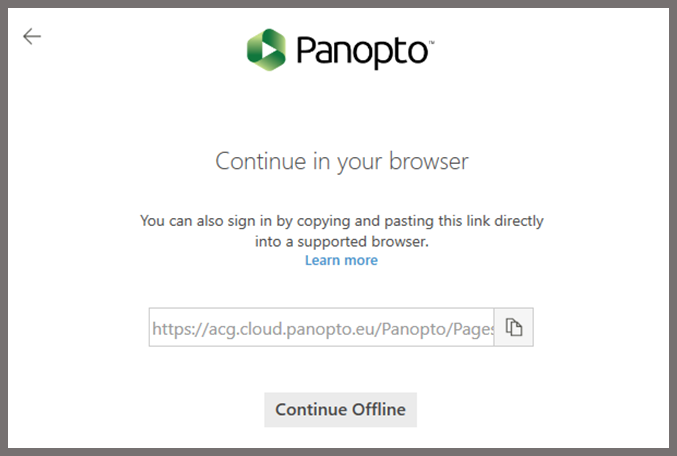
- >A new window pops up, which suggests continuing in your web browser. Close this window unless you wish to work offline (Continue Offline).
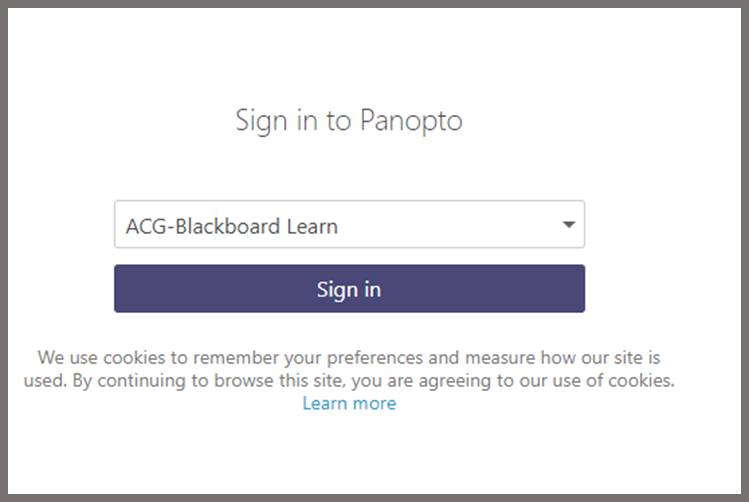
- >At the same time, a new tab in your web browser opens up. Expand the drop-down list and choose ACG-Blackboard Learn, then click again Sign in.
This will lead you in the Blackboard Learn login page. Add your Blackboard Learn username and password to login.
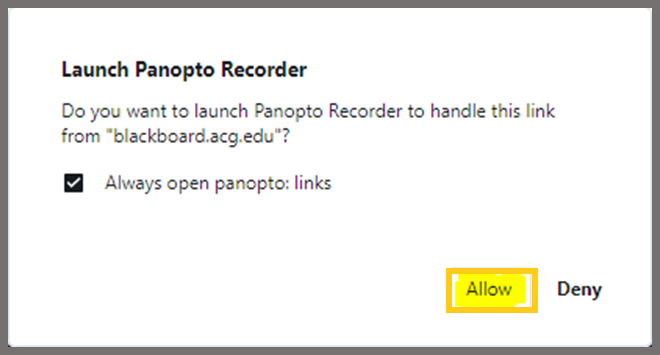
- >In the pop up window that comes up, check the “Always open panopto links” check box and click then Allow.
- >The Panopto application opens and you are ready to record your first video.
Create Folders & Subfolders
When your Panopto user account is created for the first time the My Folder is the only folder that you have and cannot be shared with other users. You are able to create, share and use as many subfolders as you wish to organize your videos and turn them visible to other users.
- >Visit your Blackboard course and make sure the Edit Mode is set to ON.
- >Click the Panopto menu item to enter the Panopto video area.
- >You can either create folders in this area
OR - >visit the Panopto environment to create them there.
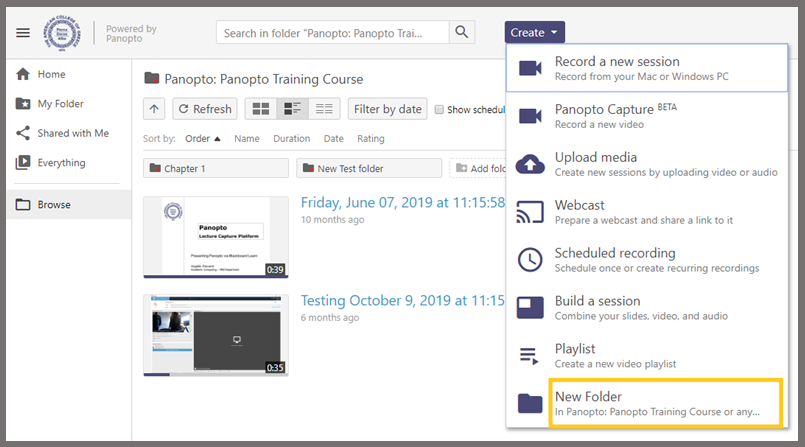
- >Either way, click the Create button and select New Folder.
- >Type the Name of the folder and add a Description (optional).
- >If you wish it to be a subfolder of another folder then expand the Parent folder drop down list and select the parent folder.
- >In the Options area leave the Inherit Permissions from the parent folder as it is and choose if you like thi folder to be added in the “My Folders” list.
- >Click Create Folder to finish.
Move a subfolder by using Folder Settings
- >Visit the Panopto area from within your Blackboard course.
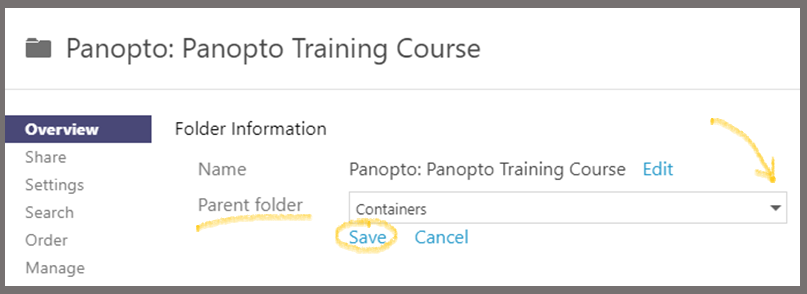
- >Click the gear button on the top right part of the page to open the Overview section.
- >Click the Parent Folder drop down list and select a new folder.
- >Save.
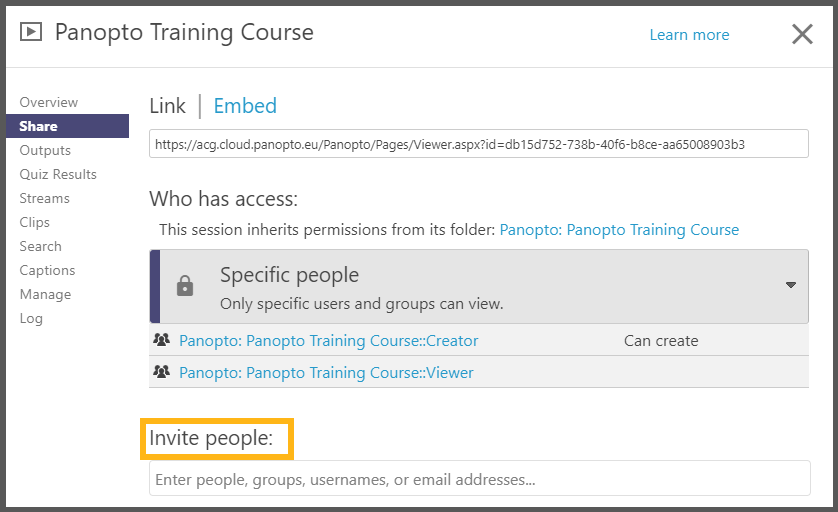
Share your Panopto Folders
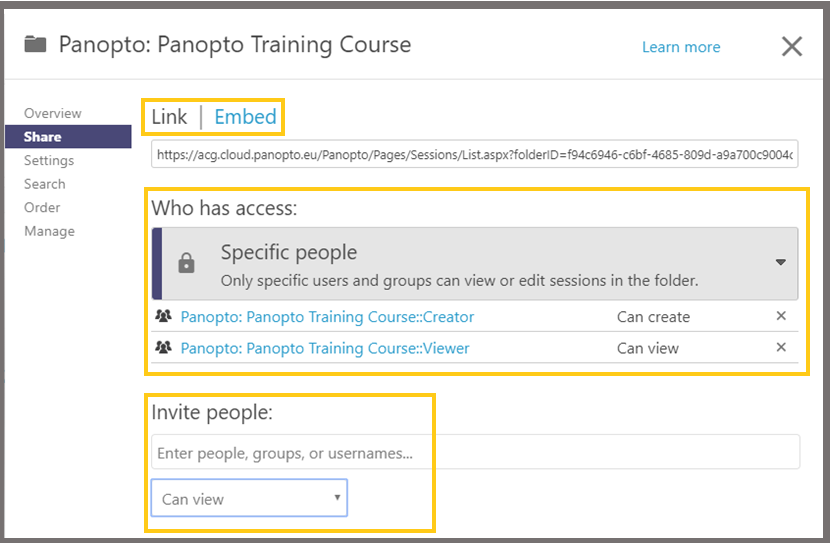
In order to share a folder with other users you first need to enter it. So, click on the folder you like to share and choose the “Share” button.

This, will bring you to the Share tab of the folder settings. Choose, who will have access to your folder by expanding the drop down list and choosing your audience. Invite people to view your folder and choose their permissions (View, Create or Publish). From this section you are also able to copy the video Link or the Embed code and add the video in a website.
Record a video, a PowerPoint presentation and/or a screen capture
- >Visit the Panopto area from within your Blackboard course.
- >Click the Create button.
- >Select Record a new session.
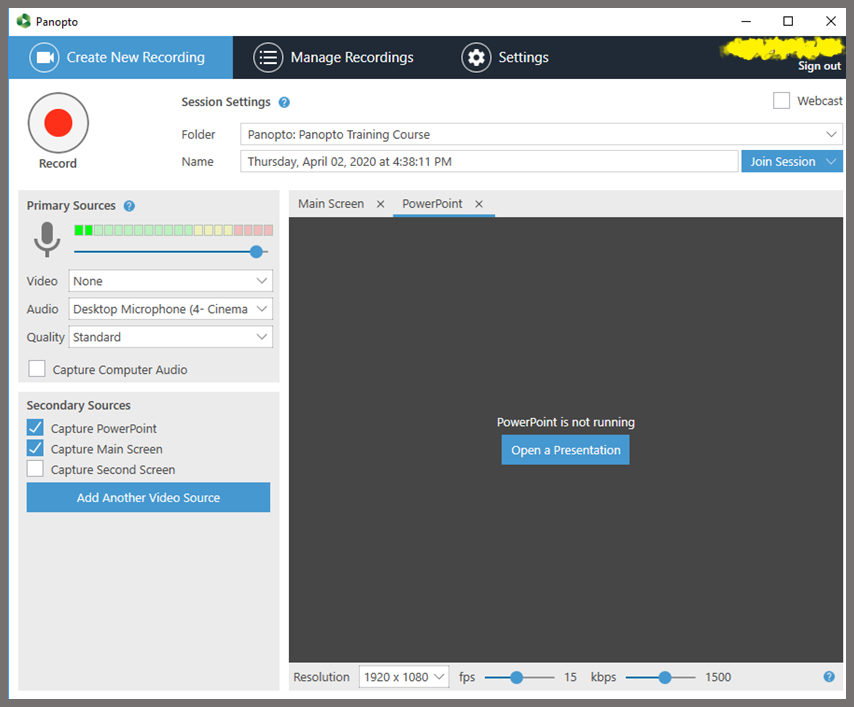
- >Click Launch Panopto and the Panopto application will open on the ‘Create New Recording‘ tab.
On the above screen, you can see the Folder name field. By default, this will be the name of your Blackboard course. Panopto creates a folder with the same name in its environment. There, all the recordings you create for the specific course will be stored. You are able to click the arrow to the right and select another folder/course to store your recordings.
- >Below the Name field enter a sensible name for this recording session – something that will help to clearly identify it later.
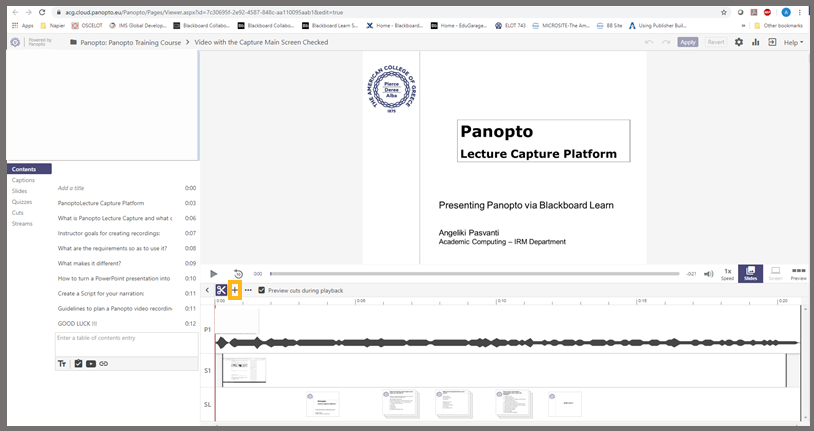
- >On the left, you will see that ‘Capture Main Screen’ is selected by default, meaning that all actions carried out on the computer screen will be recorded.
- >Under Primary Sources, select the Video source or choose None if you do not wish to use a camera.
- >The Audio will be set to On by default, recording audio through the microphone. Then, you can set a Quality level. Leave the Standard option. You can select to ‘Capture Computer Audio‘ if you wish to record audio generated by applications you use during your recording.
- >Check the Capture PowerPoint in case you wish to add a PowerPoint presentation to the recording and click Capture Main Screen to record your screen.
- >Once ready, hit the red Record button towards the top left.
- >Click the Stop button to stop recording.
- >You are able to Delete or record again if you are not satisfied the recording.
- >Click Upload to save the recording to the Panopto Cloud storage location. A copy is also stored to your local Windows computer.
Once the recording is uploaded, the Manage Recordings window displays all of your recordings. The most recent one is on the top.
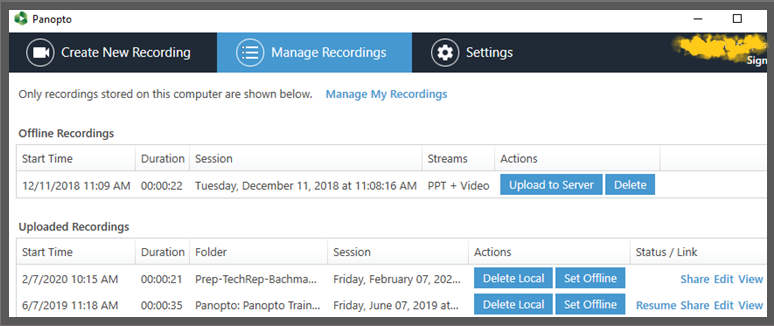
Keep in mind that some minutes may be needed for the recording to upload to the Panopto Cloud location. When the upload completes and to the Status/Link area options as Resume, Share, Edit or View will appear. Moreover, an email will be sent to your @acg.edu email account as a confirmation that the video uploaded successfully.
Students will be able to view the new video recording by default with their Blackboard course just by click Panopto Videos from the course menu.
The Share option is only required if you want to share the video out to other users beyond those students who are enrolled on your Course.
Edit a video
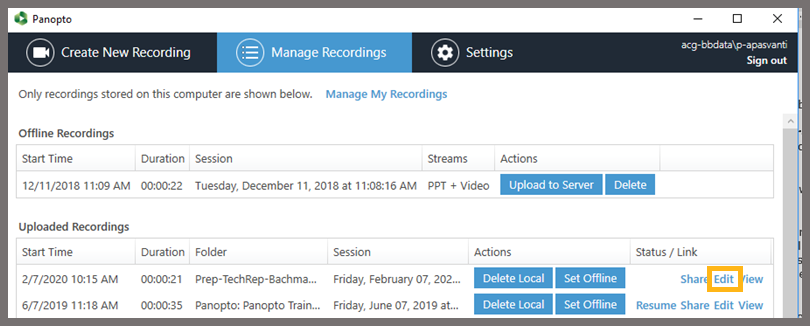
The Panopto application must already be installed in your computer in order to edit your recording.
To edit a Panopto recording choose the Edit link from within the Panopto application software and the Manage Recordings tab. There is also an Edit link in the email confirmation sent to you after you have finished a recording.
There is also an Edit link in the Blackboard Course recordings when you hover your mouse over the recording. The recording will then open in a new window in Panopto where you can perform your editing.
Another way to edit your video is from within the Blackboard course and the Panopto Videos menu item. Hover over the video and choose the Edit option as shown below.
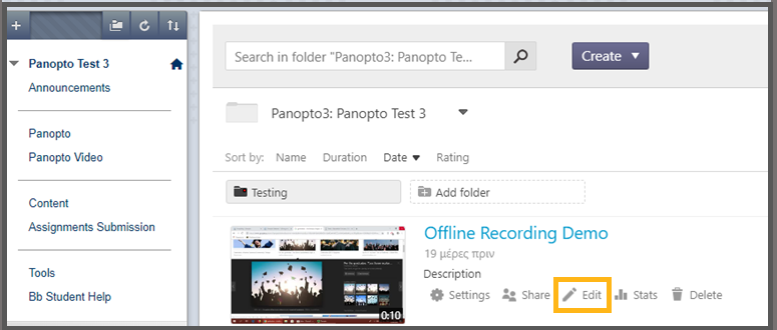
The recording will then open in a new tab in Panopto where you can perform your editing.
To add a second video on your current video or a PowerPoint presentation click the + sign and select the item you want to add.
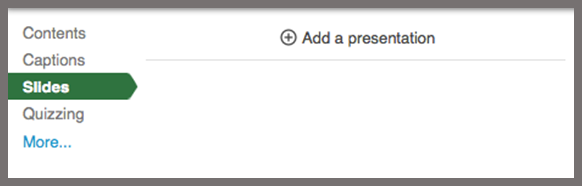
To add slides to a video click the Slides tab. Here you are able to add in a PowerPoint presentation by selecting Add a presentation. Browse to your presentation file on your PC and click OK.
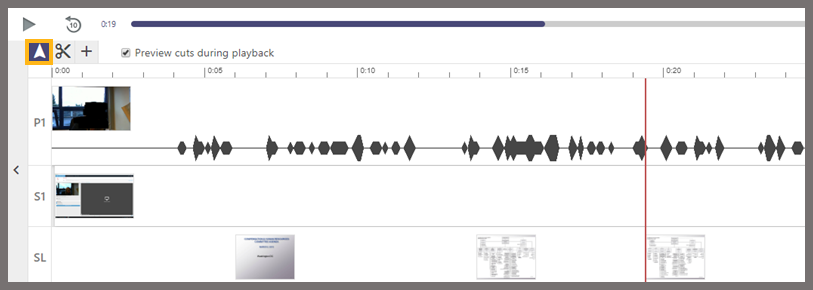
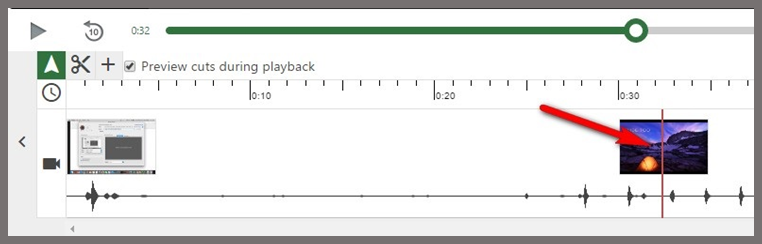
Once your slides have been uploaded use the Pointer tool to navigate to the place in your video where you want to add your first slide and click on it. Click the Plus + icon next to the slide to add it. You will see a new stream appear within your timeline and a time. Repeat these steps to add in additional slides. You will notice that the time when the slide appears is written next to the slide. To delete a slide click on the three dots next to the slide and press delete. The slide is not deleted but the time disappears.
Crop a video
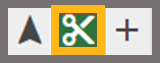
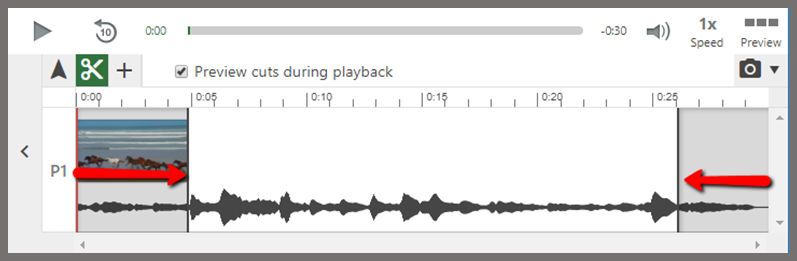
To crop a video select the Cut tool.
To edit out the start of the video, click and drag the edit handle from the left to the right. To edit out the end of the video, click and drag the edit handle from the right to the left.
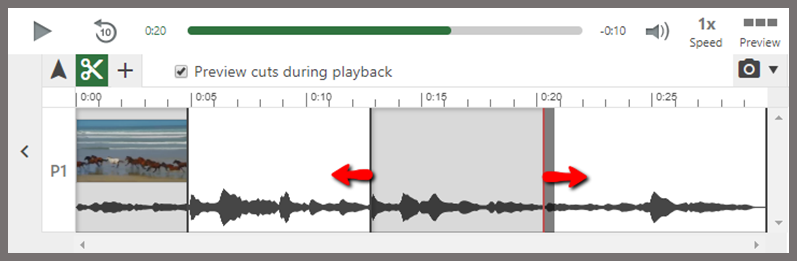
To cut a section from the middle of the video, position the cursor over the point you would like to start the edit, click and drag to the right and then let go at the point you want the cut to finish. This will remove the area highlighted from the video, and add a new handle at each edit point to allow you to finely trim your cut.
Create a Quiz
In Panopto you have the ability to add quiz questions to any Panopto video. Quizzes can only be taken by users that are signed into your Panopto site.
To create a quiz open your video in the Panopto editor.
Using the Pointer tool, navigate in the Timeline to where you want to add a quiz.
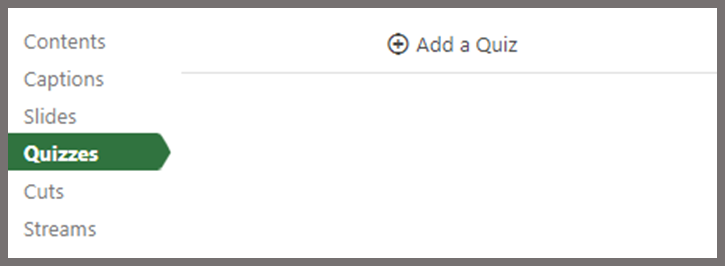
In the left Navigation menu, click on Quizzes and select Add a Quiz.
A quiz window will appear in your secondary stream window where you can fill in the details for your quiz.
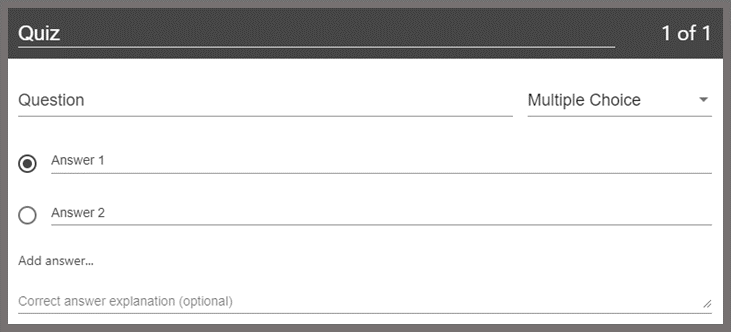
Within the form, you can select the drop-down menu in the top right corner to show different types of quiz questions.
The quiz options include True/False, Multiple Choice, and Multiple Select. The default is multiple choice.
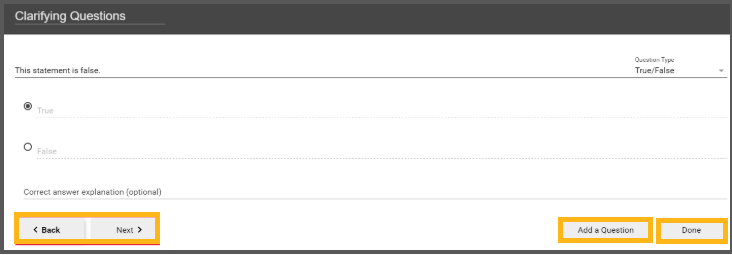
Once you are done with a question and want to add another one, click the Add a Question button at the bottom of the form.
If you need to navigate to a different question in your quiz, you can use the Back and Next buttons at the bottom of the form.
Once you have added all of your questions, click the Done button at the bottom of the form.
After the above step, pops up the Options page for this Quiz. You are able to choose among the following:
- >Allow viewers to retake the Quiz.
- >Show grade after taking this quiz (If this is enabled you can also allow review of correct answers and explanations).
- >Allow review of correct answers and explanations.
- >Block advancing in the video until answering this quiz.
- >Delete questions by clicking the Xs.
- >Reorganize the questions by using the arrows.
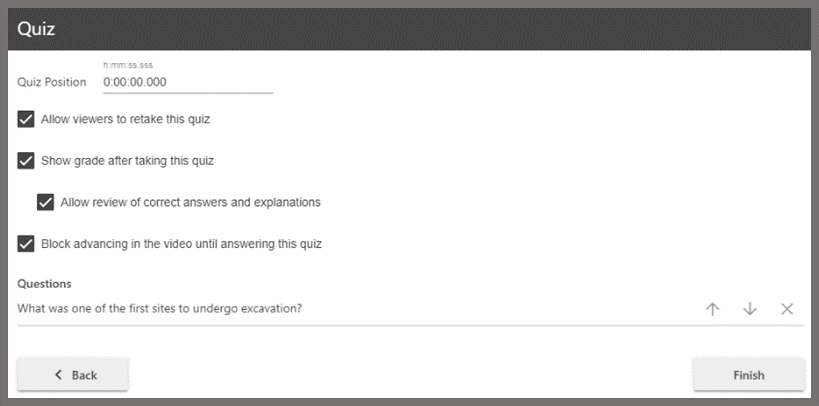
Once you are finished, click the Finish button. The name of your quiz will now appear in the Quizzing pane. Repeat the process above for every quiz you wish to create. After finishing with everything, click Publish. During the video playback and the time for a Quiz comes, the video pauses until the question(s) is/are answered.
View the Quiz results
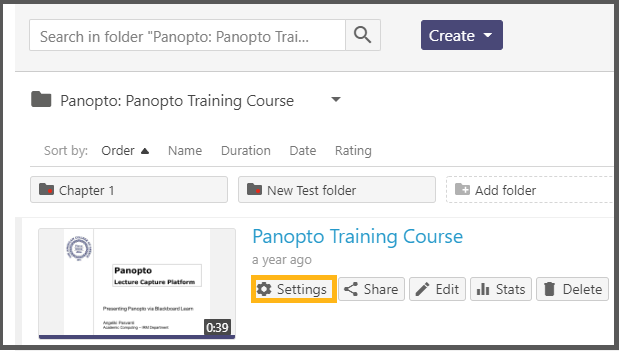
To view and access the results of a quiz, click the settings icon on the session where the quiz was created.
On the left, click the Quiz Results tab to display the results.
From this tab, you can see Quiz Results Summary, which shows the total number of correct answers, and questions as well as the percentage correct for each quiz. You are also able to get a more detailed view of results by section. Click the Section drop-down to select which quiz section to drill into.
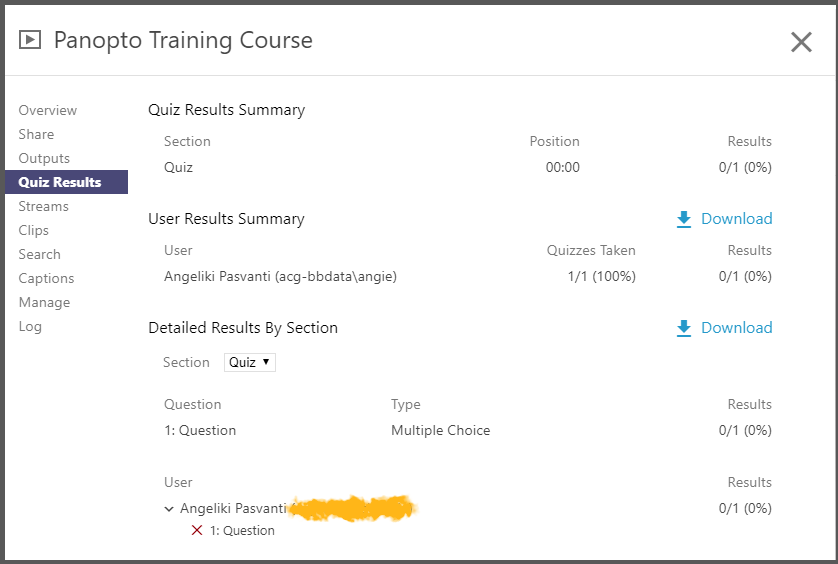
You can also expand each user to see which questions they got correct and which questions they got incorrect. You will also see an option to Download. This will make it possible to convert the quiz results to .csv files including the username, quiz, question, response, and correctness.
Merge/Copy
Merging two Panopto sessions to one allows creators to take all content from one session and add it to a target session. To Merge a session into another session click the Settings of the video. Then, select Manage and in the Merge into another session area choose the folder where the target session exists. The target session is the session that you wish to merge with the current session. Then, click Merge. Now, the target session will contain the original content along with the content of the current session and thus it becomes unavailable for viewing once it is merged.
A message comes up that lets you know about the reprocessing procedure. Click OK to finish the merge.
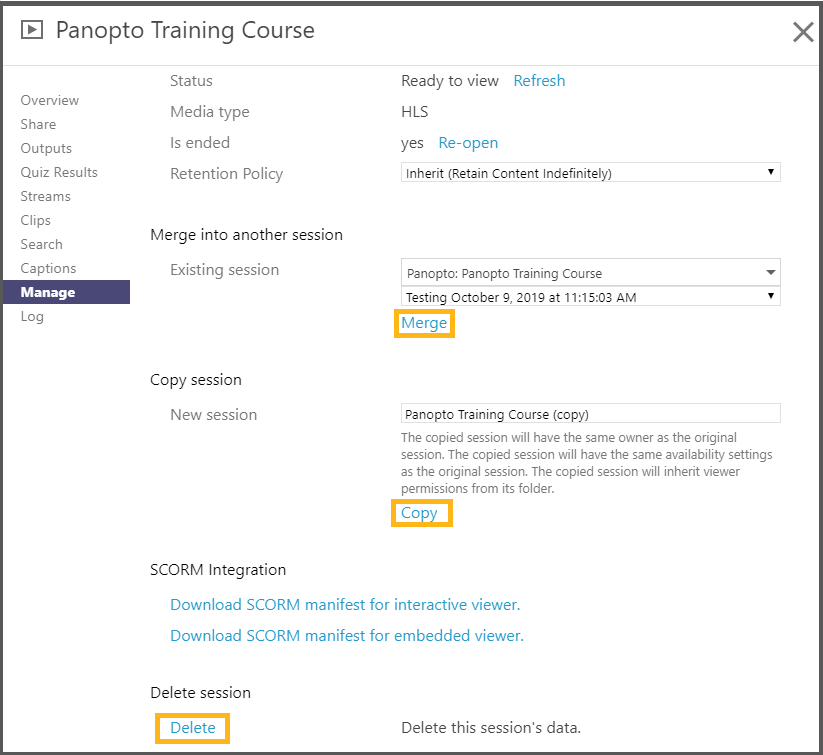
In case you wish to copy a session and move it to another folder/Bb course you visit the session you wish to copy and click on its Settings. Click Manage and select Copy link from the Copy session area to create a second video in the same folder.
In case you wish to delete a session, click the Delete link from the Delete session area.
Share a video
The Creator is able to share a Panopto video to other viewers. One way, is to share video recordings/lectures via a Blackboard course to all enrolled students by recording or adding the videos in the Panopto Videos area of the specific course/folder. The students view these videos by default.
To share a video with other users outside the enrolled in the Bb course visit the Panopto Videos menu item of the Bb course, roll over the video you would like to share so as the buttons to reveal and click the Share button.
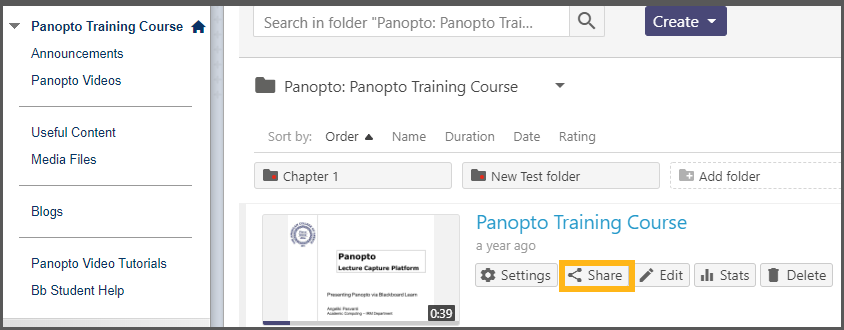
From the Share tab and the Invite people area, type the email of the person you wish to invite to view the video. This person will receive an email with the invitation to see the Panopto recording.
Once you have created your Panopto recordings you are able to add them in your Blackboard course in a content area as a weblink, a thumbnail or a mashup. You can also add the videos in blogs, wikis and journals with the mashup tool.
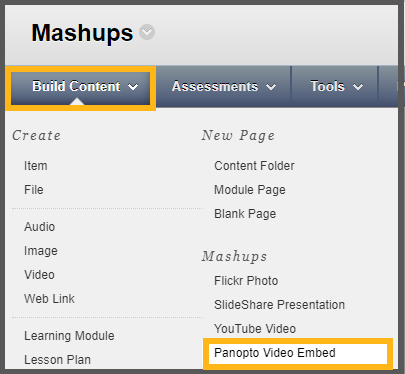
Add a video via Mashup in a content area
To add a video via a mashup, visit a Bb course content area and roll over the Build Content button. Click Panopto Video Embed.
In the Search for a Panopto video page that appears select the video you wish to add from the respective Panopto folder and click Insert Video.

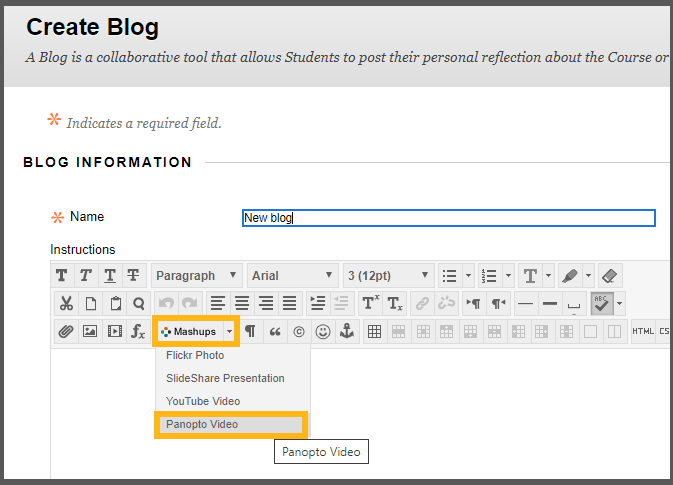
Add a video via Mashup in the content editor
You are able to add a Panopto video via the content editor that exists in Assignments, Blogs, Wikis and other communication tools. The procedure is the same for all Blackboard Learn tools. For example, when creating a new blog for your class you visit Blogs and click Create Blog. In the Create Blog page and under the Instructions area you can add the instructions for your students and add the Panopto Mashup. Select the video from the respective Panopto folder and click Insert Videos to finish.
How to Panopto video guides
View the Panopto video tutorials to learn using Panopto.