User Enrollments & Groups – Original
Enroll a user to your course
- In your blackboard container click the Control Panel , then Users and Groups and then Users.
- Click the Find Users to Enroll and then hit on the Browse button.
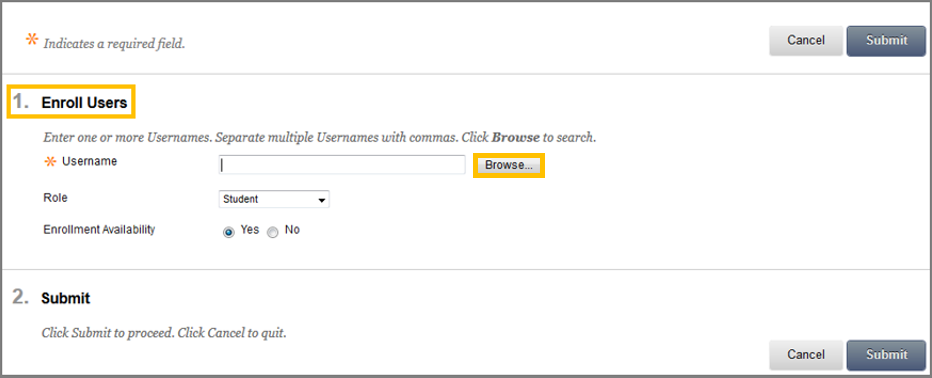
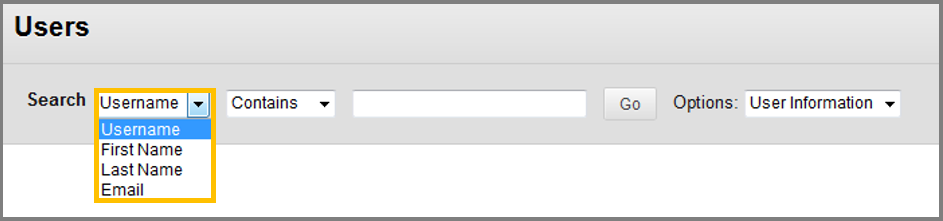
While in the Browse window you can search for the user you wish to enroll by using 4 different filters. Click Go to find the user.
In the Role field make sure that Student is selected (for giving a student role to the user) and then check the Yes option in the Enrollment Availability. - Click the Submit button to submit the selected student in to the course.
Remove a user from your course
- In your blackboard container click the Control Panel , then Users and Groups and then Users.
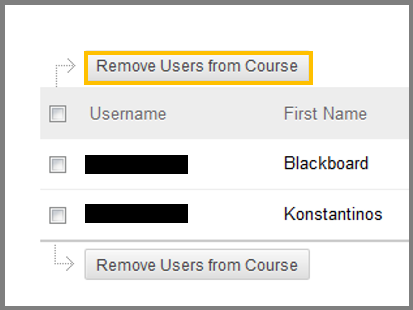
- While in the users page, select the user/s you want to delete.
- Click Remove Users from Course.
- A window will pop-up asking if you are sure you want to delete.
- Click OK to delete the users.
Roles control the access to the content and tools within a course. Each user may have a various roles in different courses.
Below are the roles a user may have in a course
- Course Builder: Has access and can add content in the course, but does not have access to student grades.
- Grader: Assist the instructor in the grading process.
- Instructor: Has access to all areas of the course.
- Student: Have no access to the Control Panel/Course Management.
- Teaching assistant: Able to administer all areas of a course. Their limitations are set by the instructor.
- Guest: Disabled role in ACG’s Bb system. Have no access to the Control Panel and can only view content in the course.
Change the role of a user in a Blackboard Learn course
- In your blackboard container click the Control Panel , then Users and Groups and then Users.
- While in the users page, click the contextual menu next to the username of the participant.
- In the Change User’s Role in Course page, select the new role.
- Hit Submit.

In the new version of Blackboard called Ultra, you can find user enrollments along with their roles in the Details & Actions section of the right-side menu. Click on the Roster option to access a page displaying all the students currently enrolled in your course.

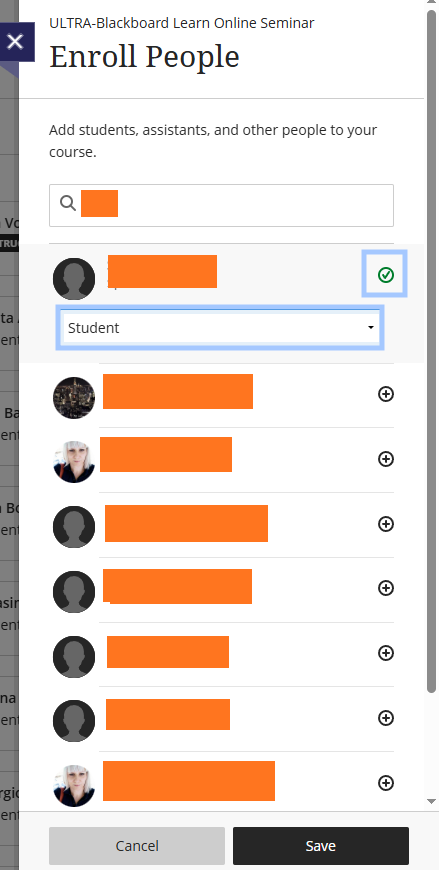
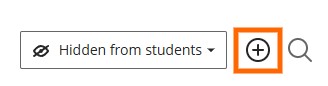
In the Roster, you can view, add, and remove students enrolled in your course. If you want to add click the plus button at the top right corner. Type in the search bar their name, click on the correct name card, and select the appropriate role you want to give them. At the end click “Save“.
If you want to search for a student in your lesson click the search button at the top-right corner. This time it is not going to appear as a side window, but as a search bar at the top of the Roster page.

If you would like to delete a student or change their role in the course, select the person you want. A side window will appear with all the relevant information. Next to the name of the student, there is a bin button. If you select it the student will be deleted from the course. To change the role of the person in the specific course there is a drop-down menu below the Course settings section.
You can create groups of students to collaborate on academic work and you can do so, by creating them one at a time or in sets. Each groups has access to each own homepage and to various tools and links that help students collaborate.
Access a Group:
- Navigate to the Control Panel > Users and Groups > Groups.
OR
- Click the Group link in the course menu if available.
OR
- Click the Tools link in the course menu and the click Groups.
Add a Group link to the course menu:
- Make sure the Edit Mode is ON.
- Click the Add Menu Item.
- Select Tool Link.
- Provide a name for the link.
- Select from the Type the option Groups.
- Check the Available to Users option.
- Click Submit.
Add a Group link in the Course Area:
- Make sure the Edit Mode is ON.
- While inside a content area, hover the cursor over the Tools Drop-down menu and select Groups.
- In the Create Link: Group page, select the type of group link you want to create (ex. group set, group or group page).
- Click Next.
- While in the second Create Link: Group page, provide a link name and an optional description.
- In the Options field select the options that you want to apply to your link.
- Click Submit.
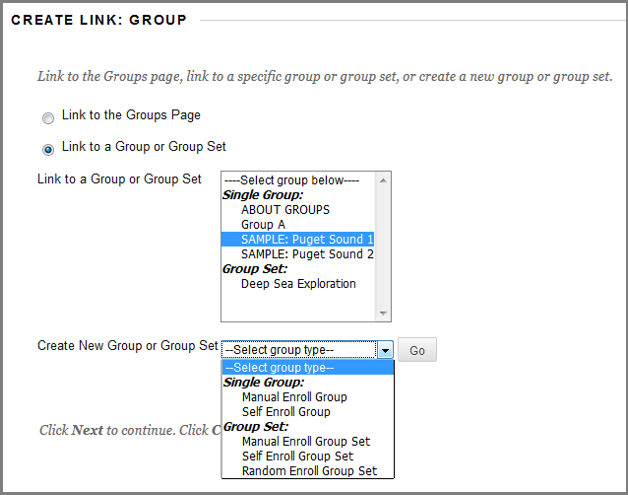
There are two group creation Options:
- Create a Single Group
- Create a Group Set
Group Enrollments Methods
- Self-Enroll: Students will be able to enroll themselves in a group, by adding their names to a sign-up sheet. Sign-up sheets can be made available on the Groups page and can limit the number of people allowed to join the group.
- Manual Enroll: Create a standard group of students to collaborate on work and add manually the students in the group.
- Random Enroll: Available for Group sets only and automatically distributes membership to the groups based on a designated number of students per group or the number of groups.
Create a Single Group: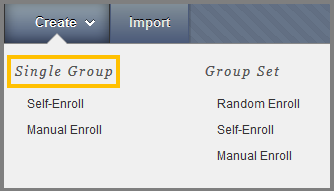
- Navigate from the Course menu to Course Management > Users and Groups > Groups.
- While inside the Group page, select from the Create tab the Single Group and then either Self-Enroll or Manual Enroll.
For Self-Enroll
- On the Create Group page, type a Name and an optional Description.
- Select Yes if you want to make the Group available.
- In the Tool Availability section, select what tools you want to be available in your group and which one of those you choose to grade.
- In the Module Personalization Setting section, check if you want your students to be able to change the group page module.
- In the Sign-up option section, type the name of the sign-up sheet, the instructions and the maximum number of students that can enroll into this group.
- In the Group Options, you can select a smart view of your group which can result in easier grading.
- Click Submit.
For Manual Enroll
- On the Create Group page, type a Name and an optional Description.
- Select Yes if you want to make the Group available.
- In the Tool Availability section, select what tools you want to be available in your group and which one of those you choose to grade.
- In the Module Personalization Setting section, check if you want your students to be able to change the group page module.
- In the Group Options, you can select a smart view of your group which can result in easier grading.
- In the Membership field, select the student you want to enroll in this group.
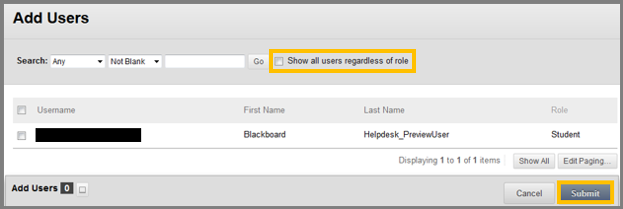
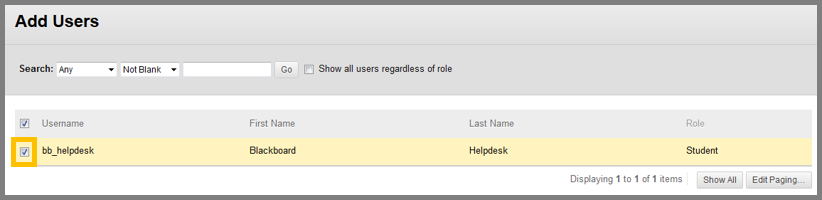
- Click the Add Users button to enter the Add users page and then select the user you want to add.
- In the Search section at the top of the screen, you can search manually for any user you want.
- By default the search only shows students. To be able to search all user regardless of their role, select the Show all users regardless of role check-box.
- Click Submit.
- Click Submit.
Create a Group Set: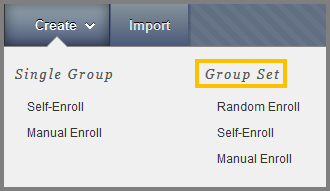
- Navigate from the Course menu to Course Management > Users and Groups > Groups.
- While inside the Group page, select from the Create tab the Group Set and then select Random Enroll, Self-Enroll or Manual Enroll.
For Random Enroll
- On the Create Group page, type a Name and an optional Description.
- Select Yes if you want to make the Group available.
- In the Tool Availability section, select what tools you want to be available in your group and which one of those you choose to grade.
- In the Module Personalization Setting section, check if you want your students to be able to change the group page module.
- In the Group Options, you can select a smart view of your group which can result in easier grading.
- In the Membership section you type the Number of Students per Group to create or the Number of Groups. Select an option to Determine How to Enroll any Remaining Members in the groups.
For Self-Enroll
- On the Create Group page, type a Name and an optional Description.
- Select Yes if you want to make the Group available.
- In the Tool Availability section, select what tools you want to be available in your group and which one of those you choose to grade.
- In the Module Personalization Setting section, check if you want your students to be able to change the group page module.
- In the Sign-up option section, type the name of the sign-up sheet, the instructions and the maximum number of students that can enroll into this group.
- In the Group Set Options field select a number of groups.
- You can select a smart view for your group which can result in easier grading.
- Click Submit.
For Manual Enroll
- On the Create Group page, type a Name and an optional Description.
- Select Yes if you want to make the Group available.
- In the Tool Availability section, select what tools you want to be available in your group and which one of those you choose to grade.
- In the Module Personalization Setting section, check if you want your students to be able to change the group page module.
- In the Membership field, select the student you want to enroll in this group.
- In the Group Set Options field select a number of groups.
- You can select a smart view for your group which can result in easier grading.
- Click Submit.
Import a Group
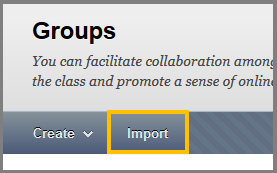
- Navigate from the Course menu to Course Management > Users and Groups > Groups.
- Click the Import button.
- In the Import Groups page you have three sections.
- In the first one, which is Import Group Members you can upload a .csv file directly from your computer that contains group memberships.
- In the second one, which is Import Groups you can upload whole groups from a .csv file directly from your computer.
- In the third one, which is Tool Availability you can select which tools you want available for the group you are going to upload.
- Click Submit.
 Edit and Add users to a group
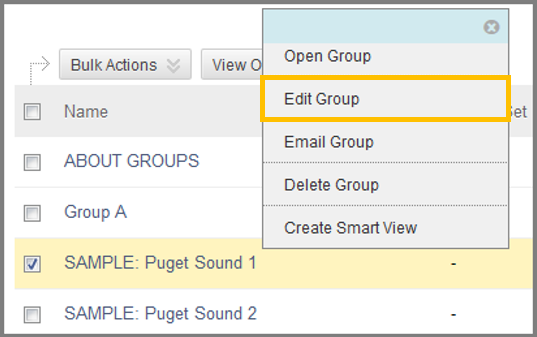
- Navigate to the Control Panel > Users and Groups > Groups.
- Click the contextual menu of the group you want.
- On the menu that will appear, click Edit Group.
- While inside the Edit Group page you can perform any changes you want in the Group.
- Keep in mind that students will not be able to see the Group unless you make it available.
To make it available select Yes in the Group is visible to students option. - In the Tool Availability field you can select which Tools you want your Group to contain.
- Check Allow Personalization if you want to allow your students to modify the group modules.
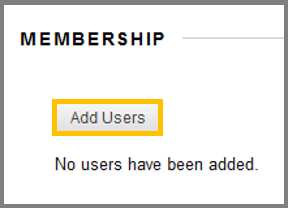
- To Add Users to the group:
- Click the Add Users button in the Membership field.
- A windows will open with the users you can add to this Group.
- You can search the Users in the Search bar located at the top of the page.
- Optionally click Show all users regardless of role.
- Check the Users you want to add.
- Click Submit.
Remove users from a group:
- Navigate to the Control Panel > Users and Groups > Groups.
- Click the contextual menu of the group you want.
- On the menu that will appear, click Edit Group.
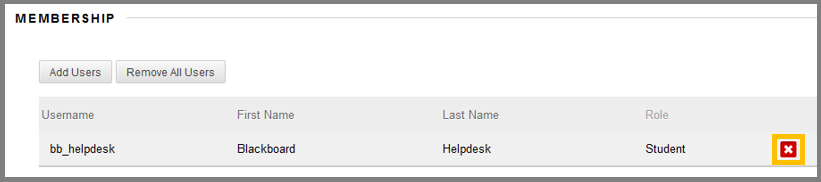
- While inside the Edit Group page, scroll down to the Membership section and remove the user you want, by clicking the X Button.
 Email users from a group:
- Navigate to the Control Panel > Users and Groups > Groups.
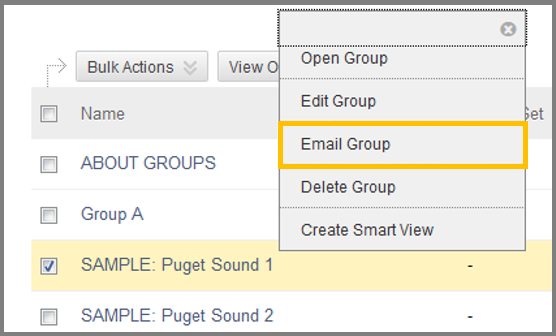
- Click the contextual menu of the group you want.
- On the menu that will appear, click Email Group.
- A page will open.
- Select the users of the group you want to send an email.
- Write an optional subject and message.
- Press Submit.
 Export groups:
- Navigate to the Control Panel > Users and Groups > Groups.
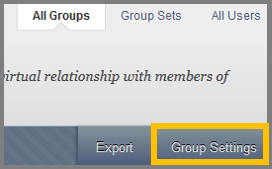
- Click the Export button at the top-right of the screen.
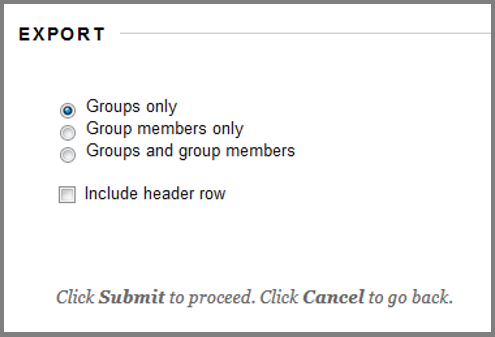
- A page will open called Export Groups and Members.
- Select which content from groups you want to export.
- Optionally select Include header row.
- Click Submit.
- An email will be sent to you when the process is complete.
Import groups:
- Navigate to the Control Panel > Users and Groups > Groups.
- Click the Import button at the top of the screen.
- A page will open called Import Groups.
- Import the Groups or Group Members respectively by uploading a .csv file from your computer.
- Select the Tools you want these groups created by this import file to have available.
- Click Submit.

 Change the Group Settings:
- Navigate to the Control Panel > Users and Groups > Groups.
- Click the Group Settings button at the top-right of the screen.
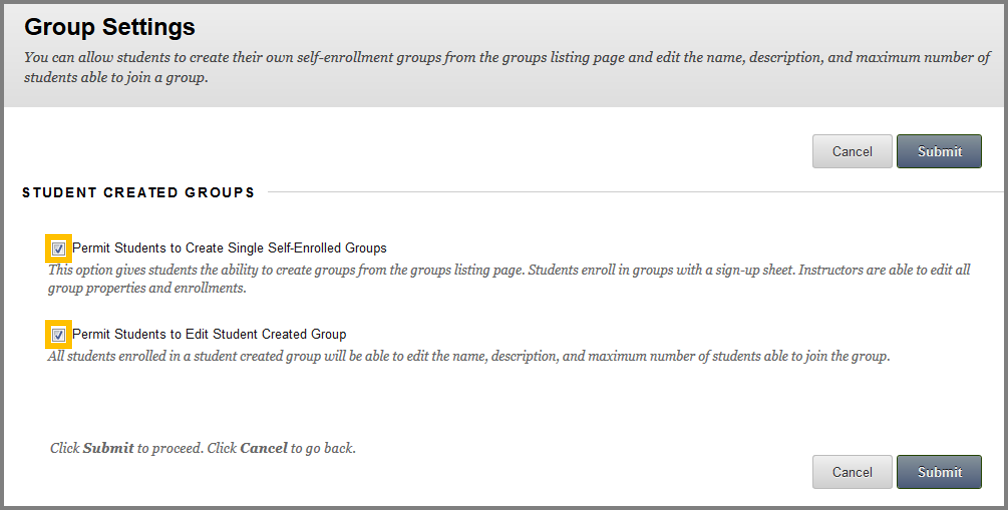
- Inside the Group Settings page, there are 2 check-boxes.
- Click the Permit Students to Create Single Self-Enrolled Groups if you want to allow your students to create their own groups.
- Click the Permit Students to Edit Student Created Group if you want to allow the students that are enrolled in a student created group to modify it.
In order to see how students see Groups, please click here.
To create a Group set, go to the Groups page and select New Group Set. You can create as many course groups as you want, with any number of students in each group. You can also create new course groups or remove course groups.
From the Group Students menu, you can divide your students among groups in these ways:
- Custom
- Self-enrollment
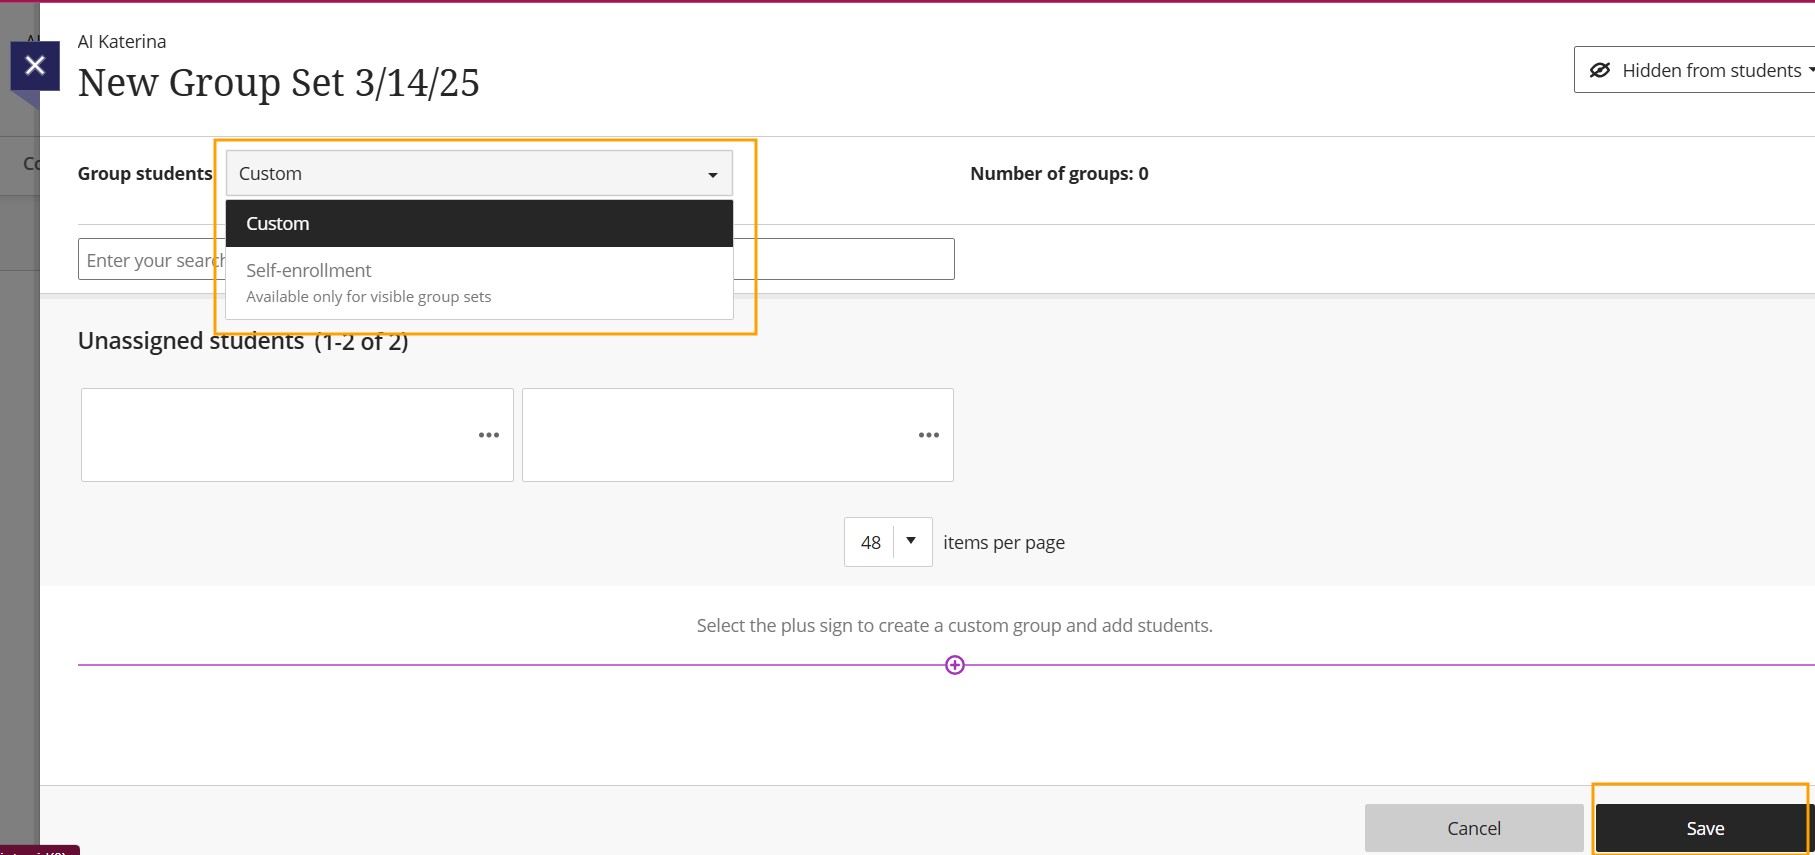
You can also select the plus sign below the graphic to create as many groups as you need and add students.
Moreover you can create Custom Groups with any number of students in each group by just selecting the students that you want to participate in your group. To do so follow the steps below:
- In the Group students menu, select Custom and enter a name at the top of the page.
- Select each student’s name one after the other to select them as a group. Select a student’s name again to remove the selection.
- After you select the students, open the menu next to one of their names and select Create a new group. You can also move multiple students to a group listed in the menu.
- Edit the group name if you want to change the default naming by selecting the pencil icon next to the group’s name.
- Provide an optional group description that will appear to that group’s members. You have no limit on the number of characters.
To create self-enrollment groups, you can allow students to sign up for course groups on their own. Only students are permitted to join these groups. They will receive a course announcement and a notification in the activity stream regarding the groups they need to join.
You can also set an enrollment period. Students will be notified as the enrollment deadline approaches. Once this period ends, students will no longer be able to join the groups. Additionally, you have the option to automatically enroll students in groups after the enrollment period has concluded by selecting or deselecting this feature.
- To enable Self-enrollment, you first need to make the groups visible to students. You can do this by selecting “Visible to students” in the top right corner of the New Group Set page.
- In the Group Students menu, select “Self-enrollment.” Students will be evenly distributed among the groups based on the number of groups you specify. You must create at least two self-enrollment groups for your course.
- To add another group, click the plus sign next to the Number of Groups. The total will automatically update. You can add or delete groups even after students have started joining. If you delete a group that students have already joined, they will be moved to the unassigned list. Make sure to notify these students so they can join one of the remaining groups or be added to a different group.
- Remember, if you set an enrollment period, any unassigned students will be automatically enrolled at the end of that period.
- You also have the option to add start and end dates for enrollment. Click the arrow next to “Advanced options” to collapse the enrollment section.
- You can modify or clear the default maximum number of members per group, which must be set to 1 or greater. Note that if you add or delete groups, the maximum number does not automatically update.