Rubrics -Ultra
Rubrics – Ultra
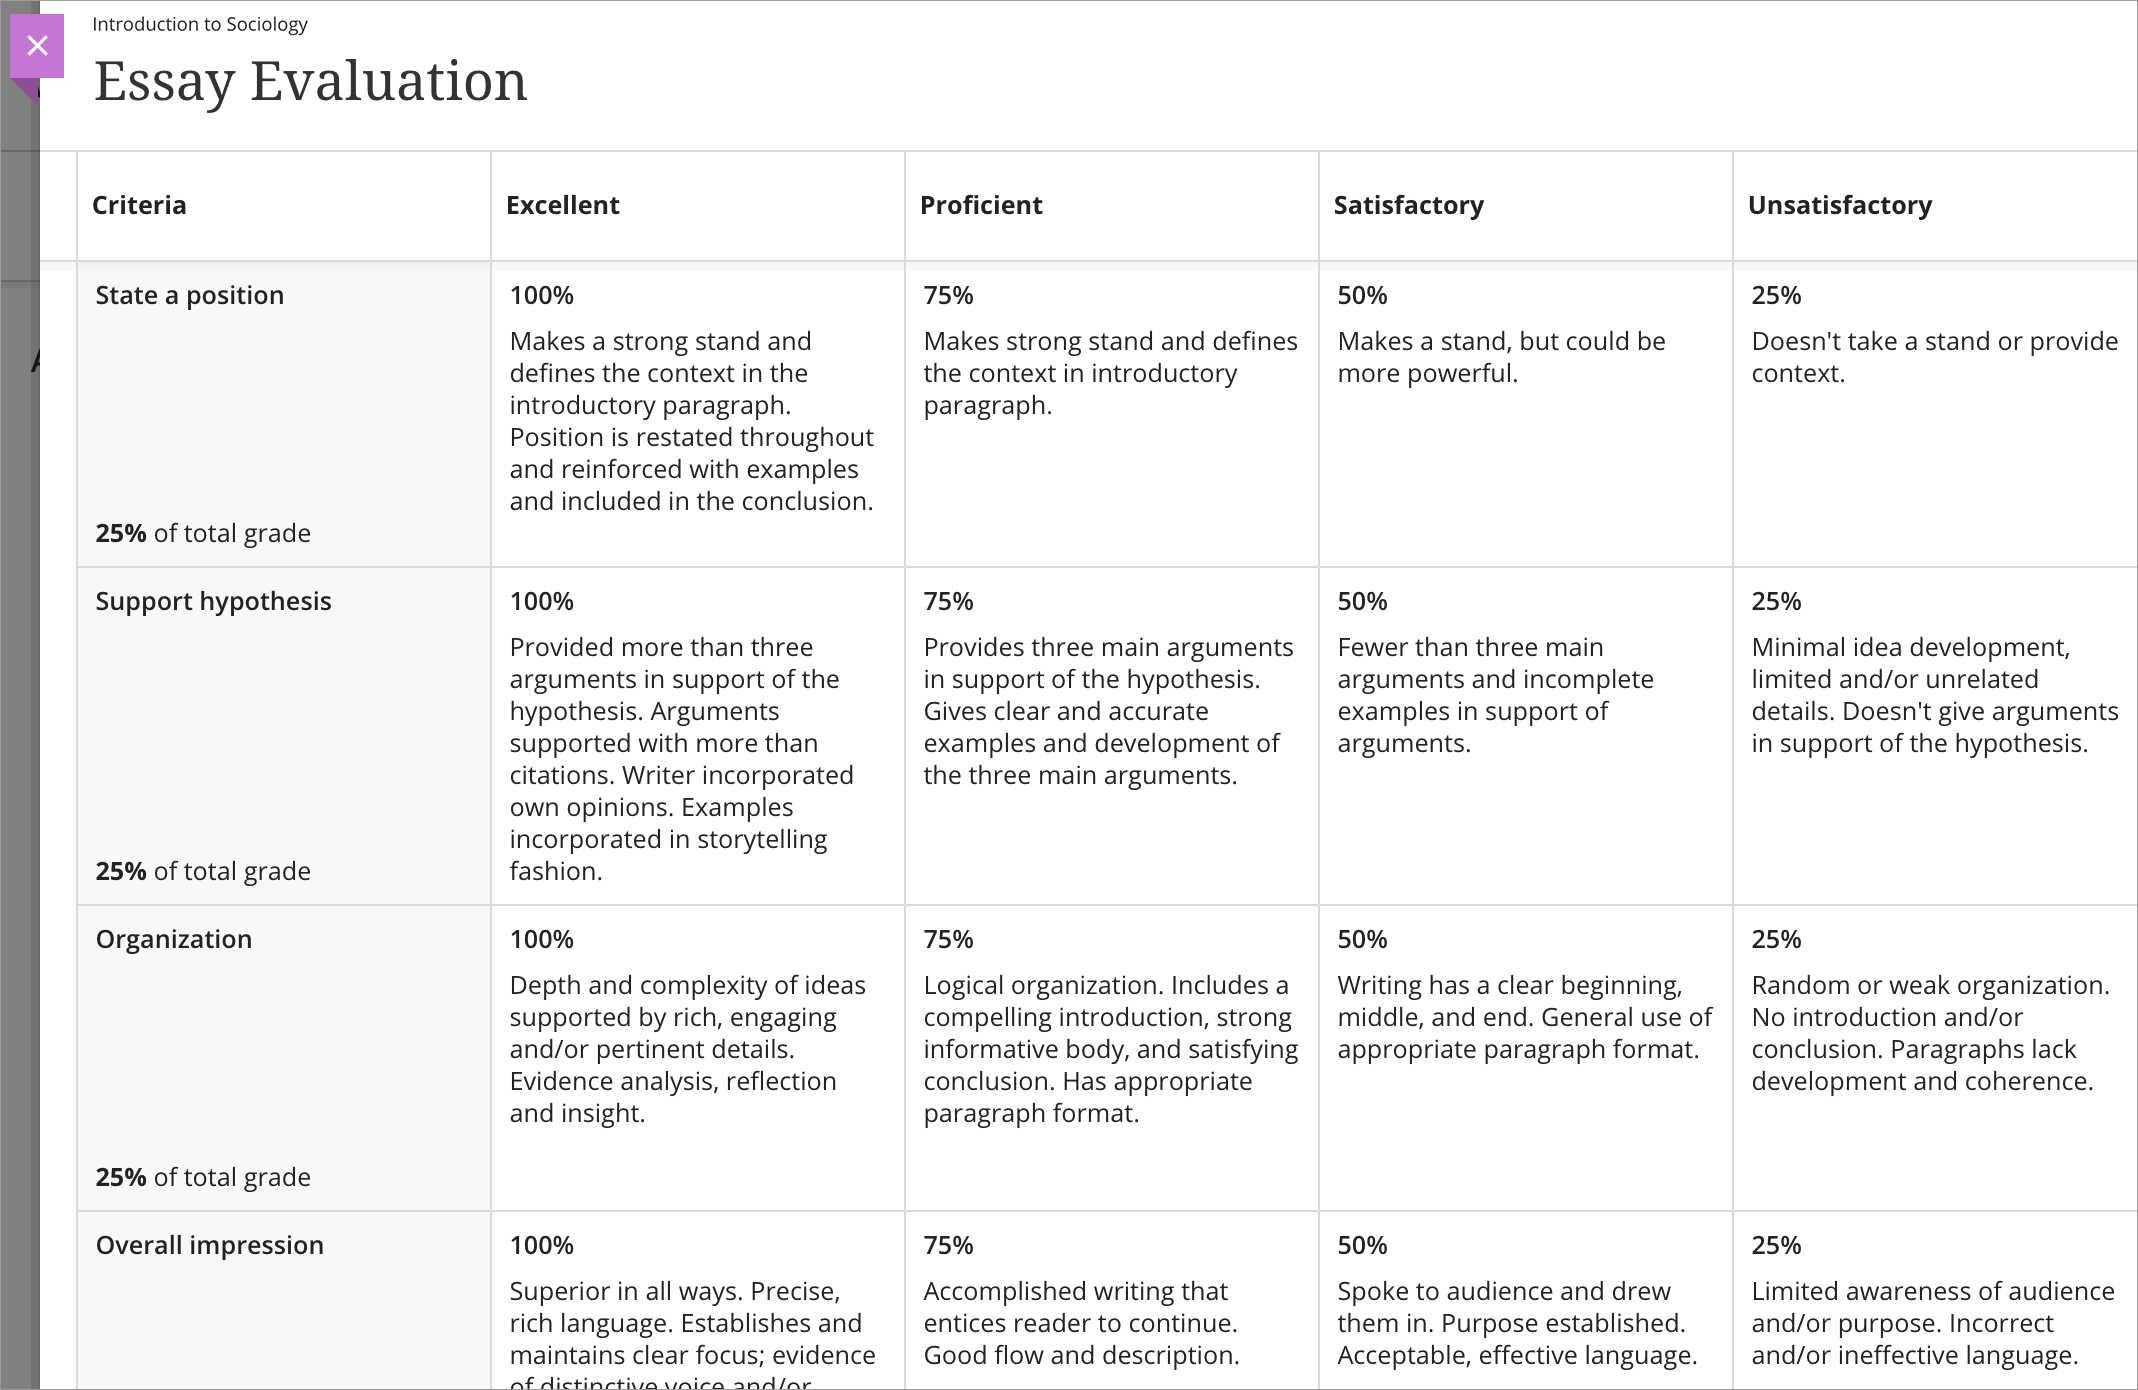
Utilizing rubrics can promote equitable and consistent grading, and help students comprehend and meet your expectations. A rubric serves as an evaluation tool that allows you to break down the assigned work into distinct parts. You can give explicit explanations of the characteristics of the work related to each part, at various levels of proficiency. By having access to a rubric, students can streamline their efforts to fulfill the requirements of the graded work. Providing students with rubrics in advance offers visibility into your grading methods and ensures transparency in the evaluation process.
In your course, it’s possible to create multiple rubrics. These rubrics are made up of rows and columns. The rows represent the criteria, while the columns describe the level of achievement for each criterion. There are four types of rubrics that you can create: percentage, percentage range, points, and points range. By default, new rubrics have four rows and four columns. However, you have the option to add up to 15 columns and rows. You can also remove all but one row and one column. Additionally, it’s possible to associate rubrics with assignments and discussions.

Create rubrics
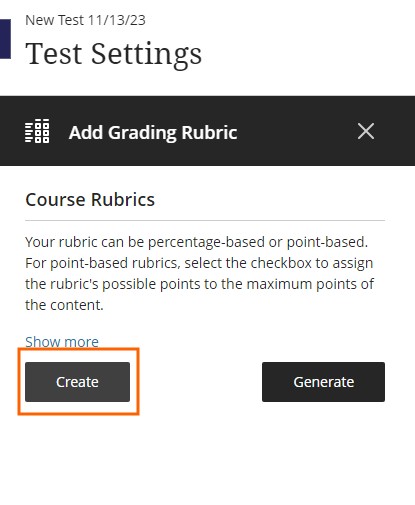
Rubrics can be created for assignments, tests, discussions, or from the gradebook. To create a rubric, go to the assignment, test, or discussion page and click on the Settings icon. Then, select Add Grading Rubric and Create New Rubric from the Additional Tools section. To view existing rubrics, access the Gradebook Settings panel by clicking on the Settings icon in your gradebook. The Grade Schemas section in the panel lists all the rubrics.
From an assignment, test, or discussion
When you create or edit an assignment, test, or discussion, you can create a new rubric. You can also associate an existing rubric unless you’ve already graded the item. You may associate only one rubric to each assignment, test, or discussion.
At this time, you can only associate rubrics with assessments with no questions.
- On the assignment, test, or discussion page, select the Settings icon to open the Settings panel.
- In the Additional Tools section, select Add grading rubric > Create New Rubric or Generate with AI.
3. On the New Rubric page, type a title with a limit of 255 characters. If you don’t add a title, “New Rubric” and the date appears as the title.
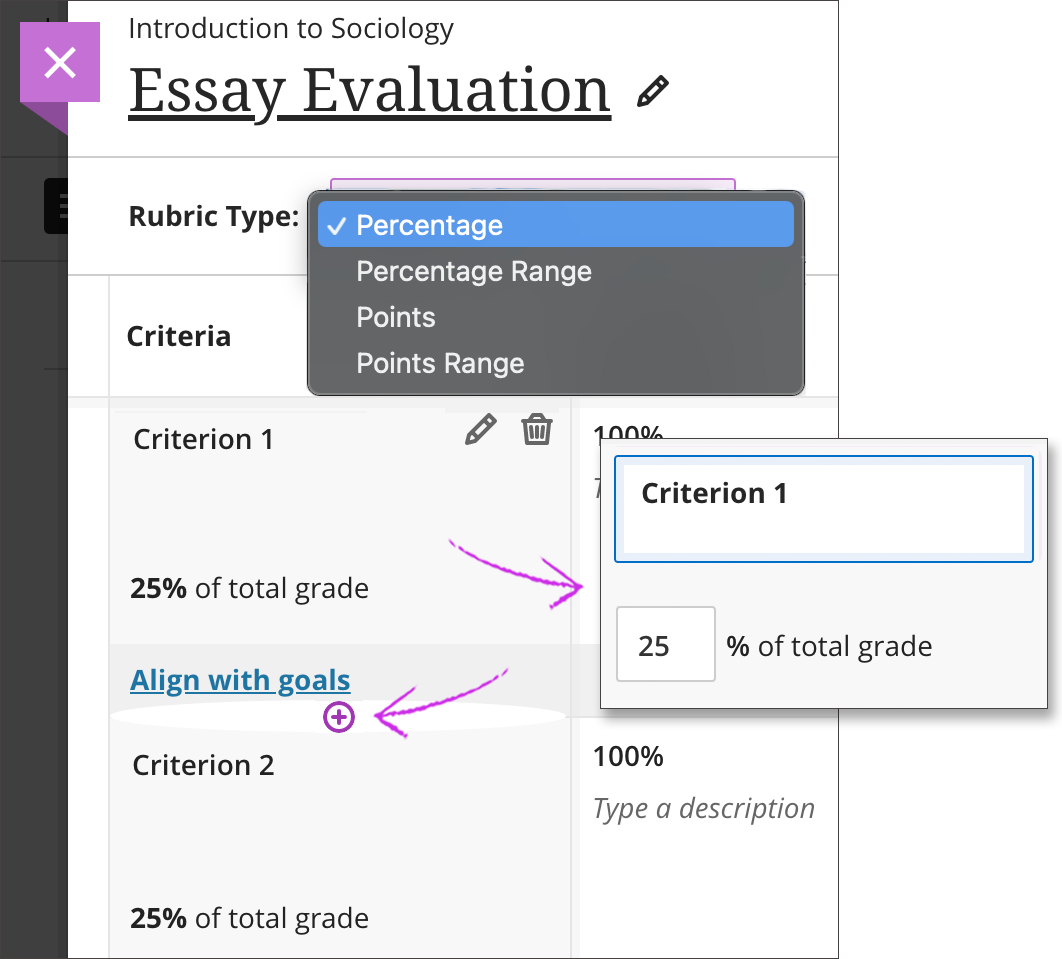
4. Select a Rubric Type: Percentage, Percentage Range, Points, or Points Range.

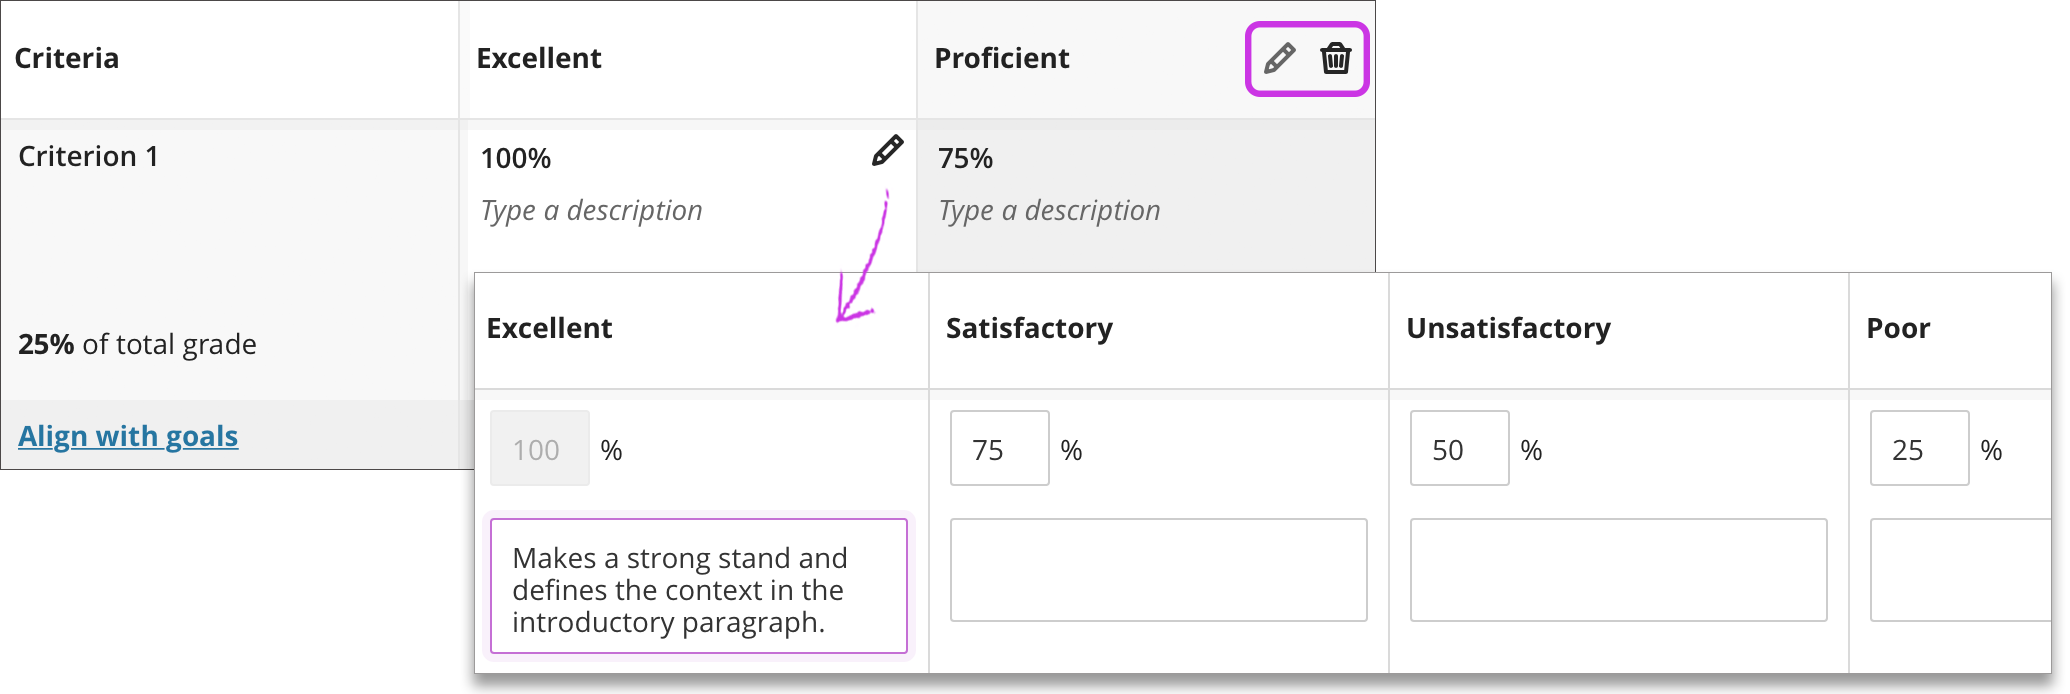
The default view displays four criteria rows and four achievement-level columns, but you have the option to add, delete, or rename them. Simply hover over a cell to access the edit and delete icons, and click the plus sign to add a new row or column. You can adjust the percentages for new achievement levels as needed, and add an optional description for each level. However, achievement titles are limited to 40 characters, and criteria and description cells have a limit of 1,000 characters. Keep in mind that you cannot add HTML code to titles and cells, and pasting text from another document may cause formatting issues. Also, note that pressing the Enter key saves your work and exits edit mode.

From the grade book
You can create, edit, copy, delete, and review existing rubrics from your gradebook. Rubrics are listed in alphabetical order.

- In your gradebook, select the Settings icon.
- In the Gradebook Settings panel, existing rubrics are listed in the Grading schemas section.

